In this lesson, we will learn real-time image transmission based on OpenCV and zmq camera.
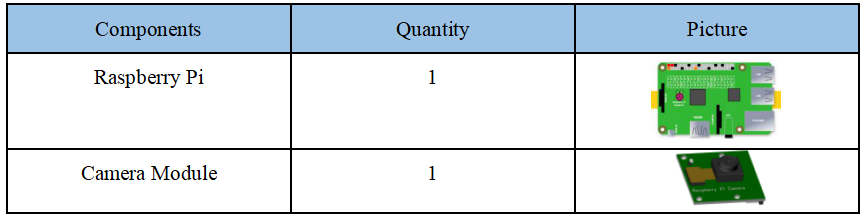
12.1 Components used in this course
12.2 Introduction of Camera Module
Camera (CAMERA or WEBCAM) is a video input device, which is widely used in video conferencing, telemedicine and real-time monitoring. The camera (webcam) generally has basic functions such as video camera/transmission and static image capture. After the image is captured by the lens, the image is processed by the photosensitive component circuit and control component in the camera and converted into a digital number that the computer can recognize.Then input to the computer via the parallel port or USB connection and then restore the image by the software. We provide a 5 million pixel camera module, which uses manual focus, and the operating voltage range is 1.7V~3.3V.
There are many ways to transmit the images captured by the Raspberry Pi camera to other devices by the network. In the Alter robot product, we use the open source project [flask-video-streaming] from the MIT open source protocol on Github.You can view the source code of the project via this web link: https://github.com/miguelgrinberg/flask-video-streaming. Why did we choose to use flask-video-streaming? It is because the flask-video-streaming solution is the most convenient, stable and most efficient among many solutions we have practiced,and the part of OpenCV it involves also has a good interface that can be rewritten into multi-threaded processing.
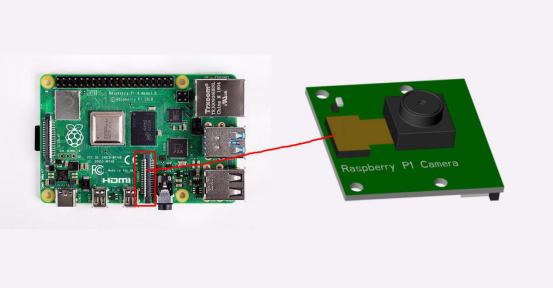
12.3 Wiring diagram (Circuit diagram)
12.4 Real-time image function based on OpenCV and zmq camera
This lesson introduces real-time video transmission, which can transmit the images collected by the camera to other places in real time for displaying images or handing it to the host computer for machine vision processing.
The software functions of this lesson are based on opencv, numpy, zmq (read Zero MQ) and base64 libraries. You need to install these libraries.
OpenCV is a cross-platform computer vision and machine learning software library based on the BSD license (open source) that can run on Linux, Windows, Android and Mac OS operating systems. It is lightweight and efficient—consisting of a series of C functions and a small number of C++ classes. It also provides interfaces to languages such as Python, Ruby, and MATLAB, and it implements many common algorithms in image processing and computer vision. OpenCV mainly tends to real-time vision applications.
ZMQ (ZeroMQ for short ZMQ) is a simple and easy-to-use transport layer. It is a socket library like a framework, which makes Socket programming simpler, more concise and higher performance. It is a message processing queue library that can be flexibly scaled between multiple threads, cores and mainframe boxes. The clear goal of ZMQ is to "become a part of the standard network protocol stack and then enter the Linux kernel." Although we have not seen their success yet, it is undoubtedly a very promising and a layer of encapsulation on top of the "traditional" BSD sockets that people need more. ZMQ makes writing high-performance network applications extremely simple and fun.
NumPy (Numerical Python) is an open source numerical computing extension of Python. This tool can be used to store and process large matrices, which is much more efficient than Python's own nested list structure (the structure can also be used to represent matrices), and it supports a large number of dimension arrays and matrices. In addition, it also provides a large number of mathematical function libraries for array operations.
Base64 is one of the most common encoding methods used to transmit 8Bit bytecode on the Internet. Base64 is a method of representing binary data based on 64 printable characters. You can view RFC2045~RFC2049, which have detailed specifications of MIME. Base64 encoding is a process from binary to character, which can be used to transfer longer identification information in the HTTP environment. Using Base64 encoding is unreadable and needs to be decoded before reading. Base64 is widely used in various fields of computer due to the above advantages. However, because the output includes more than two "symbol" characters (+, /, =), different application scenarios have developed various "variants" of Base64. In order to unify and standardize the output of Base64, Base62x is regarded as an improved version of unsigned.
12.4.1 Install OpenCV
(1) Install OpenCV on the PC
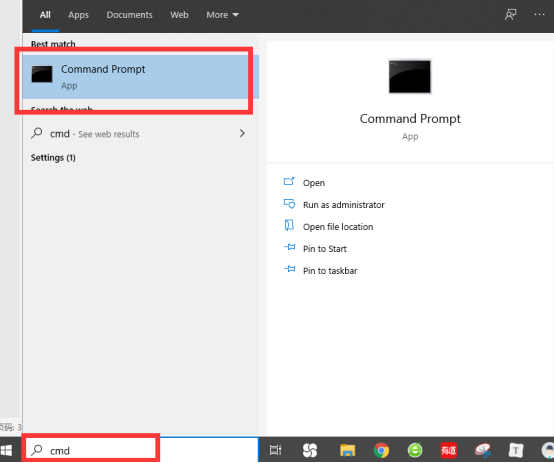
1. First open the Windows Command prompt (Command prompt), enter cmd in the search bar in the lower left corner to open the Command prompt.
You can install via this command.
pip3 install opencv-contrib-python

(2) Install OpenCV on Linux
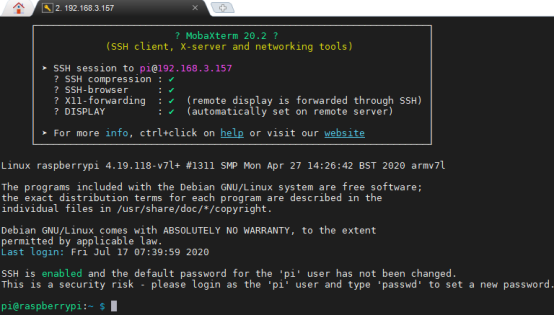
1. Open the terminal software MobaXterm:

2. Log in to your Raspberry Pi (the way to log in to Raspberry Pi has been introduced in Lesson 1):
3. Enter the Course Code folder, this folder stores the sample code program to control the robot, enter the following command:
cd adeept_alter/02CourseCode/01ComponentCode

4. Enter the command to display the contents of the current directory:
ls

5. The 11OpenCV_zmq folder stores the sample code of this course. Enter the command to enter this folder:
cd 11OpenCV_zmq

6. Enter the following command to install OpenCV:
sudo apt-get install -y libopencv-dev python3-opencv

【Attention】
If there is a prompt after entering the command: E: Unable to locate package python3-opencv:

Then you need to enter the following command first:
sudo apt-get update
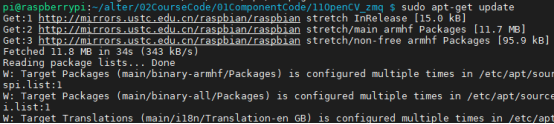
After the update is complete, you can download OpenCV by typing the following command.
sudo apt-get install -y libopencv-dev python3-opencv
12.4.2 Install zmq and Base64
(1) Install zmq and Base64 on the PC
Enter the following command in the cmd window that opens:
pip3 install zmq pybase64

(2) Install zmq and Base64 on Linux
Enter the following command in the terminal command window:
sudo pip3 install zmq pybase64

12.4.3 Install NumPy
(1) Install NumPy on the PC
Enter the command in the cmd which is opened: pip3 install numpy

(2) Install NumPy on Linux
Enter the following command in the terminal command window:
sudo pip3 install numpy

12.5 About programs of runPC.py and runPI.py
12.5.1 Run the runPI.py program in the Raspberry Pi first
1. The 11OpenCV_zmq folder stores the sample code of this lesson, enter the command to enter this folder:
cd 11OpenCV_zmq

2. Enter the command to display the contents of the current directory:
ls

3. The runPC.py program is run on the PC side, and the runPI.py program is run on the Raspberry Pi. We need to run the runPI.py program on Linux first. This python program is used to capture images from the camera. It encodes the captured images and sends them to the receiving end (PC end) of the video, so we run runPI.py on the Raspberry Pi.
4. Let's first learn about the program runPI.py, which is opened by default with Sublime software.
First import the required libraries.

Here we need to fill in the IP address of the video receiver (the IP address of your PC).

Then initialize the camera. You can change these parameters according to your needs.

Here we instantiate the zmq object used to send the frame, using the tcp communication protocol, where 5555 is the port number, the port number can be customized, as long as the port number of the sending end and the receiving end are the same.

Next loop to collect images from the camera, because we are using the Raspberry Pi camera, use_video_port is True.

Since the imencode() function needs to be passed in numpy array or scalar to encode the image, here we will convert the collected frame to numpy array

We encode the frame into stream data and save it in the memory buffer.

Here we send the stream data in the buffer to the video receiving end after base64 encoding.

5. Finally, we enter the following command to run the runPI.py program:
sudo python3 runPI.py
12.5.2 Run the runPC.py program on the PC
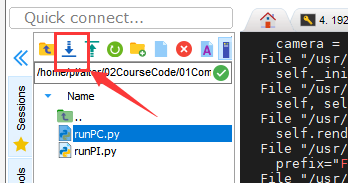
1. In the file explorer on the left side of MobaXterm, find the file runPC.py in the 11OpenCV_zmq folder of this lesson, and you need to download it to your computer.
2. Let's learn about the program runPC.py first, and use MobaXterm software to open this program by default.
First import the required libraries.

Here we instantiate the zmq object used to receive frames, and note that the port number needs to be consistent with the sender's.

Receive video frame data.

Decode it and save it to the cache.

Decode a one-dimensional array into an image.

Display the image.

Generally, waitKey() should be used after imshow() to leave time for image drawing, otherwise the window will become unresponsive and the image cannot be displayed.

3. Finally, you need to run the runPC.py program on the PC.