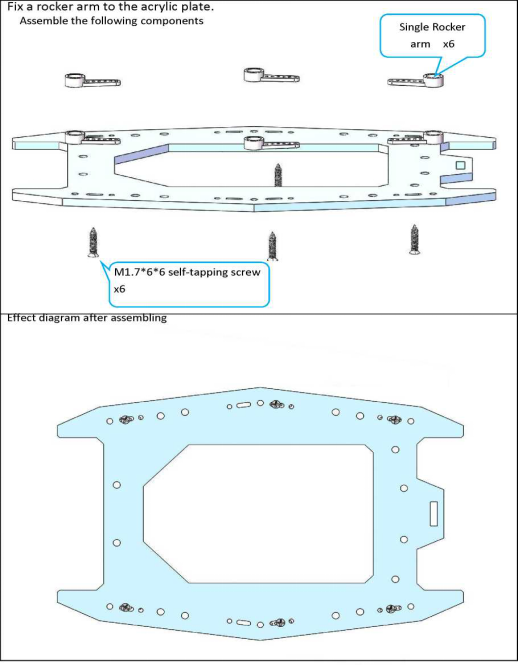
Assembly tutorial
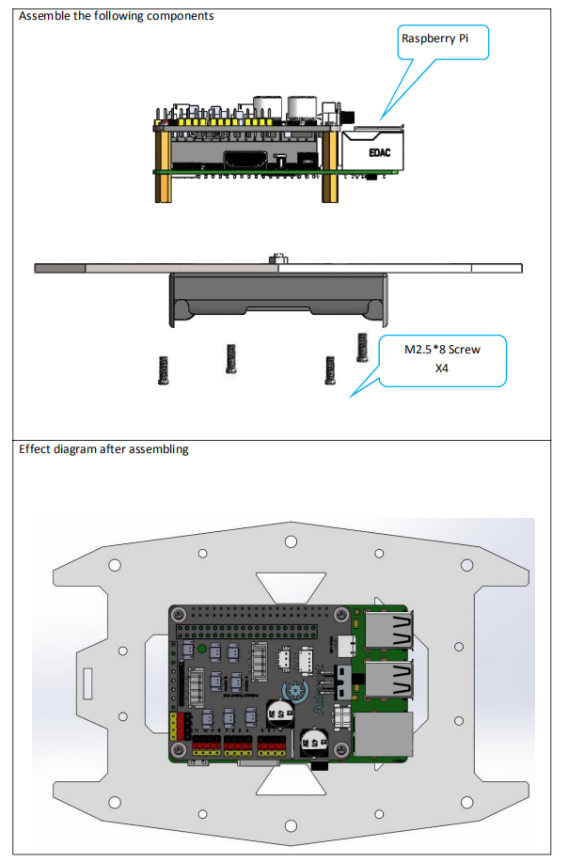
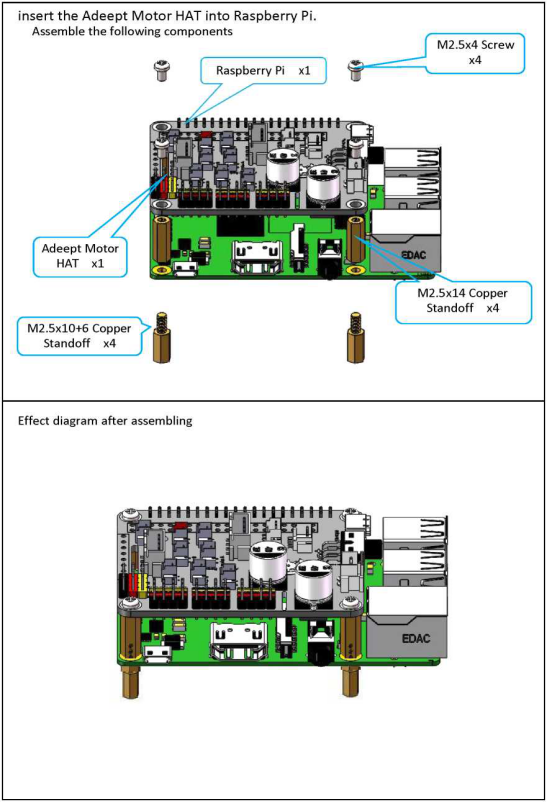
Install the Robot HAT into Raspberry Pi
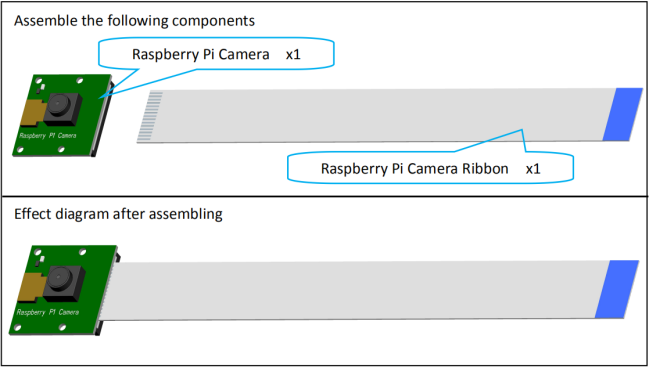
Connect the Raspberry Pi Camera and the ribbon.
|
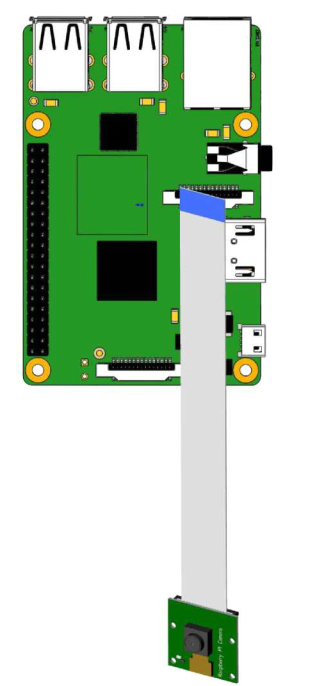
Connect the Raspberry Pi Camera and the RaspberryPi.(The Raspberry Pi is not included in the kit.)
|
|
Fix four M2.5x10+6 Copper Standoffs on Raspberry Pi.
|
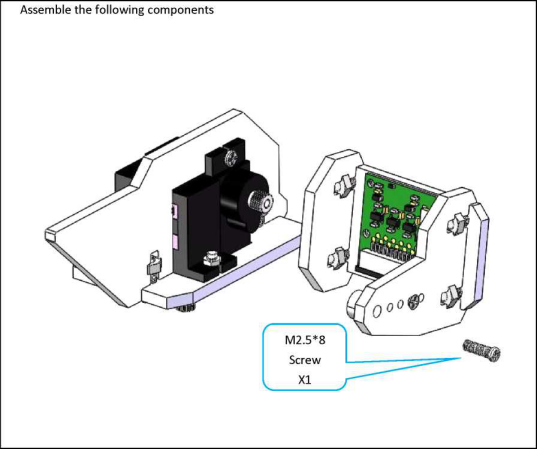
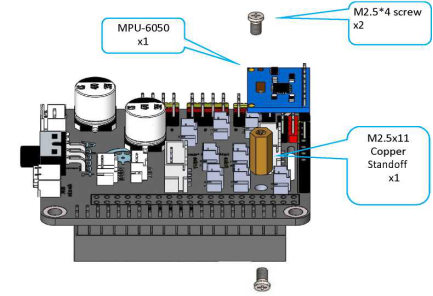
Connect the driver board to mpu-6050.
|
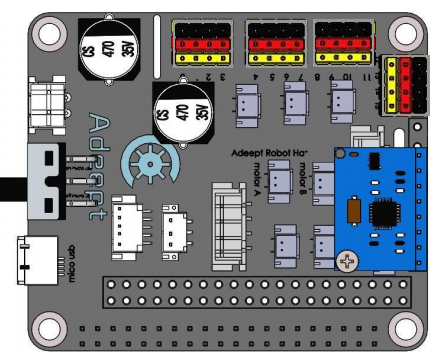
Effect diagram after assembling.
|
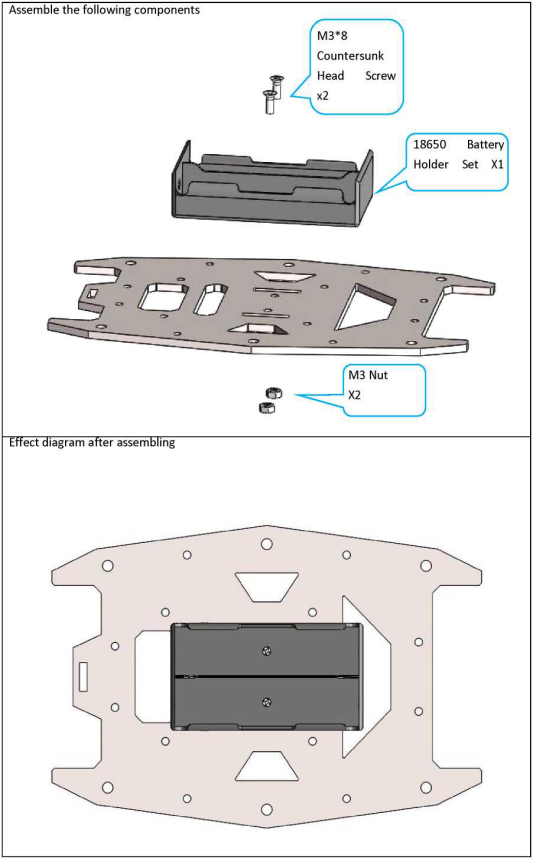
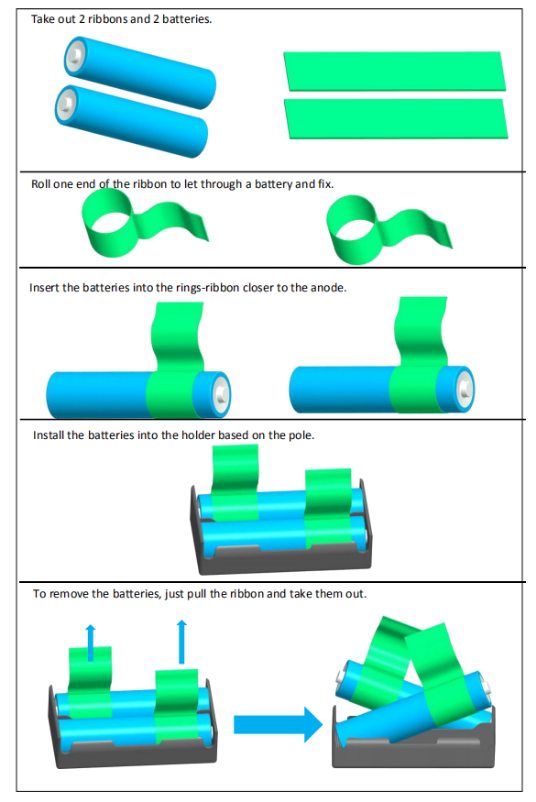
Connect the 18650 Battery Holder Set to the Adeept Motor HAT.
|
Install and Remove Batteries. |
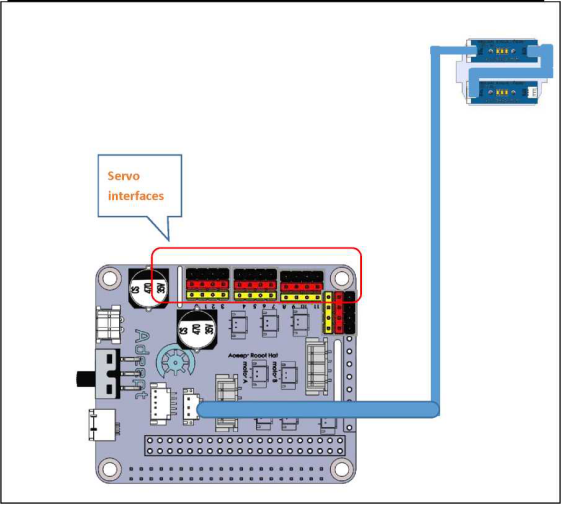
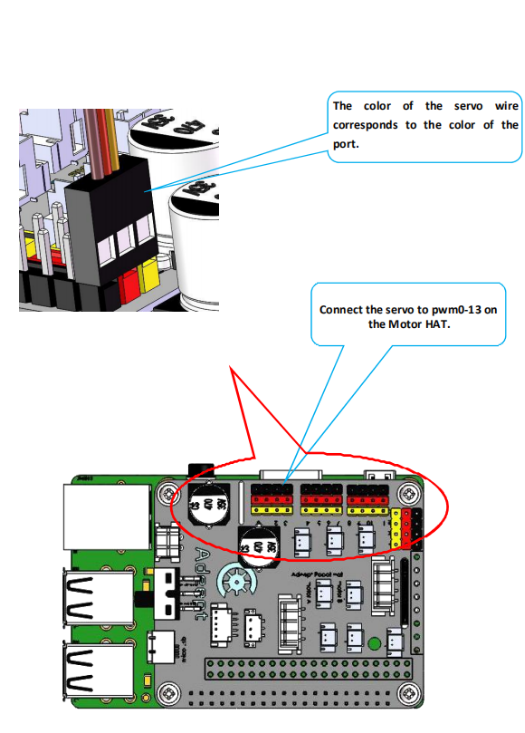
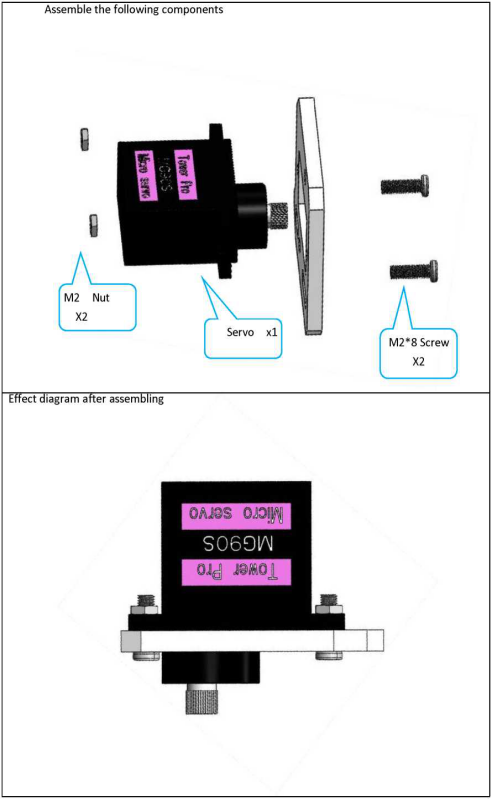
Connect servos to Adeept Motor HAT.
|
Before switching on, you need to insert the configured SD card into the Raspberry Pi. For details, please refer to the third chapter of the document. Otherwise, the servo will not rotate to the middle position after booting. In the next installation, the servos need to be connected to the robot HAT. And the Raspberry Pi will automatically adjust the servo to the correct angle.
|


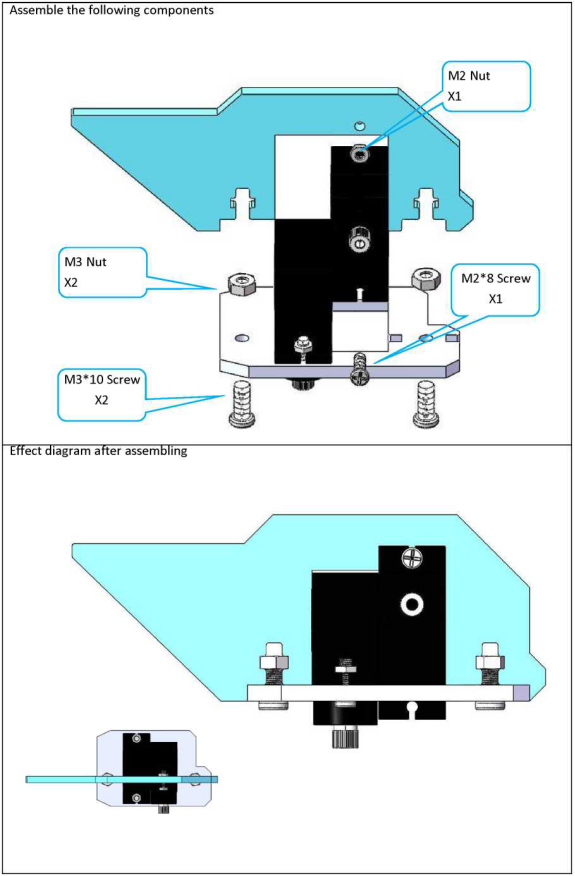
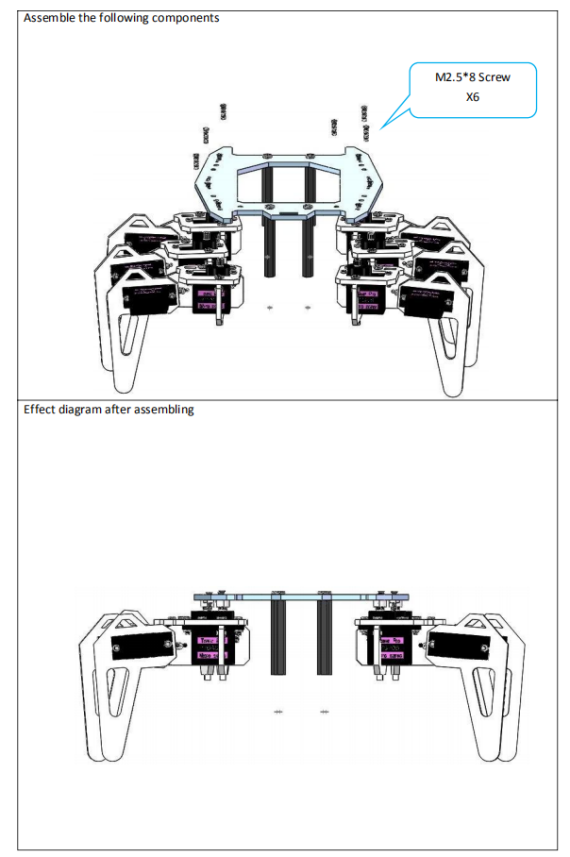
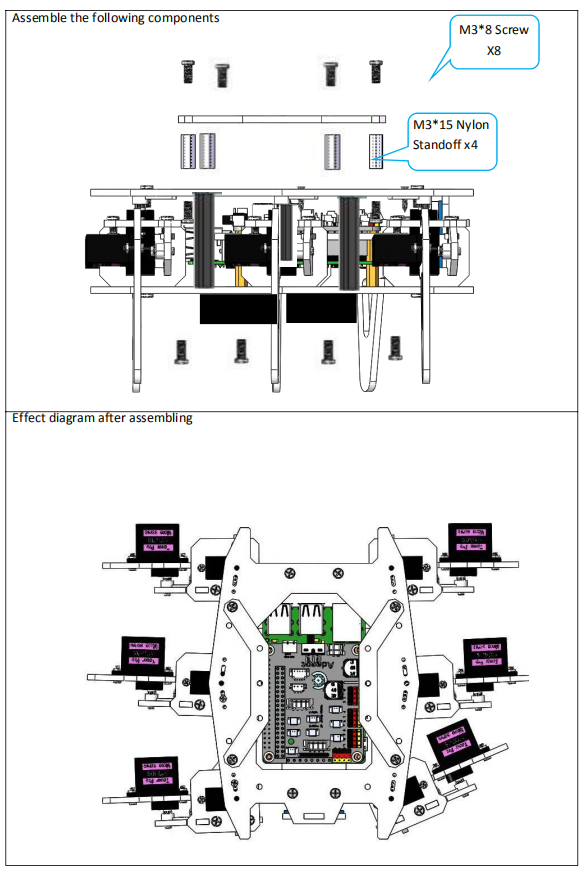
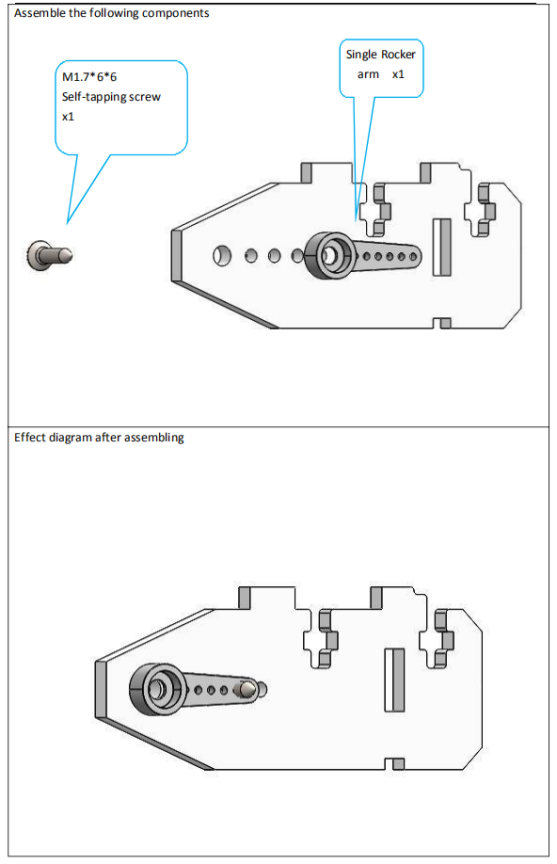
Assemble the arms
|
|
|
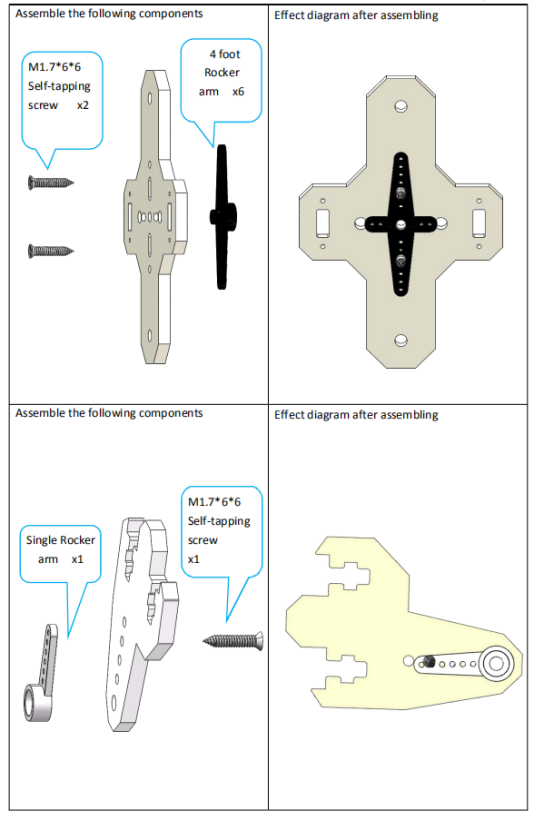
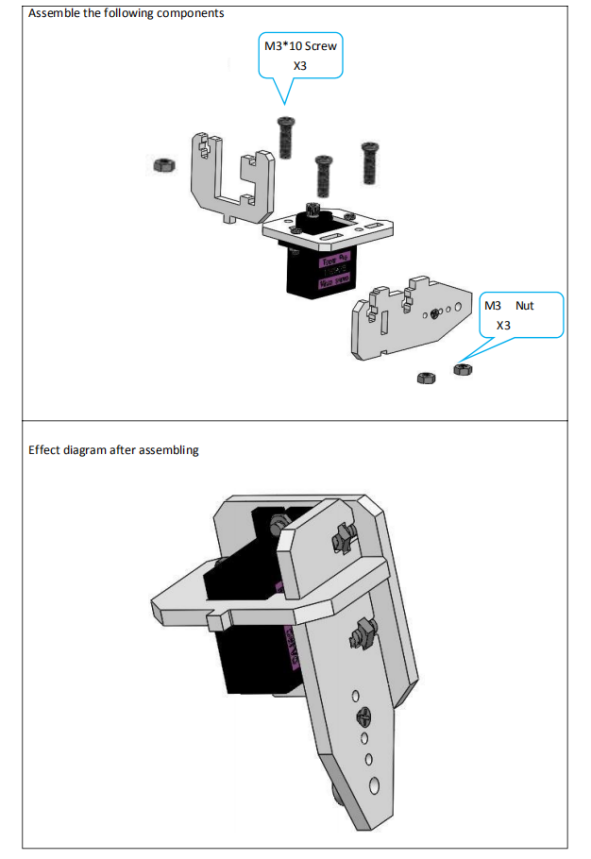
Assemble the feets
|
|
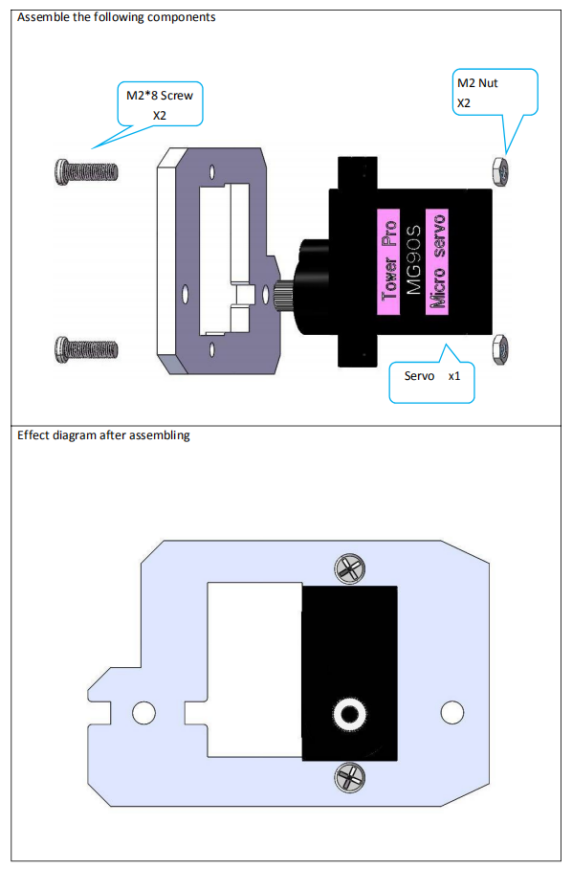
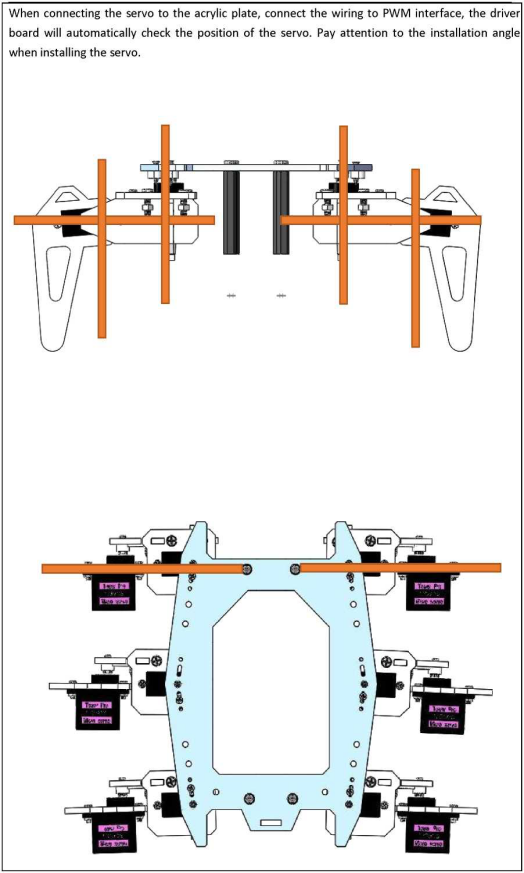
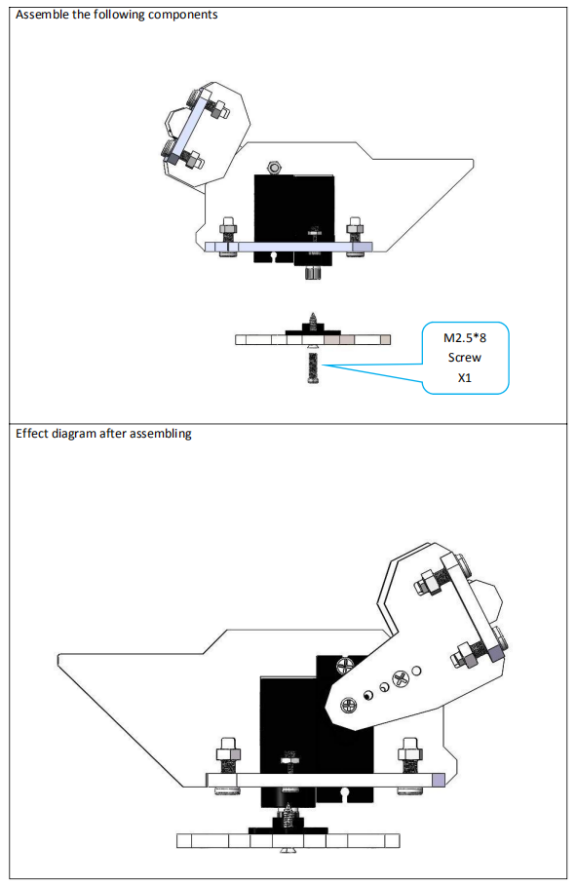
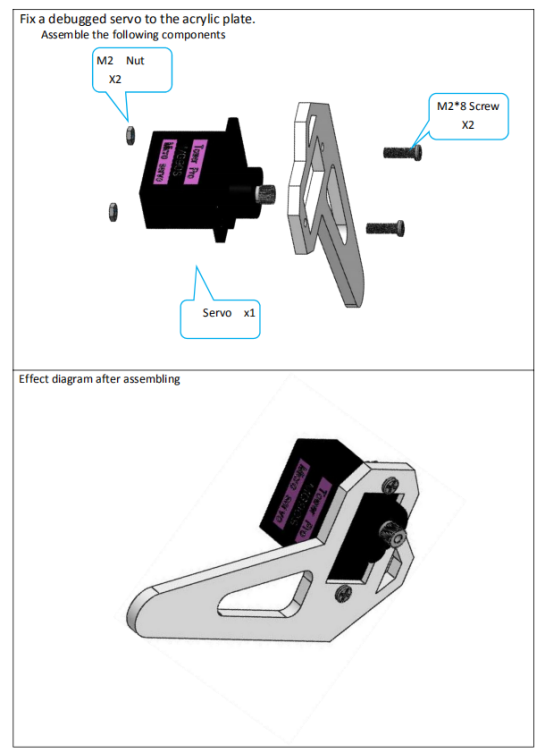
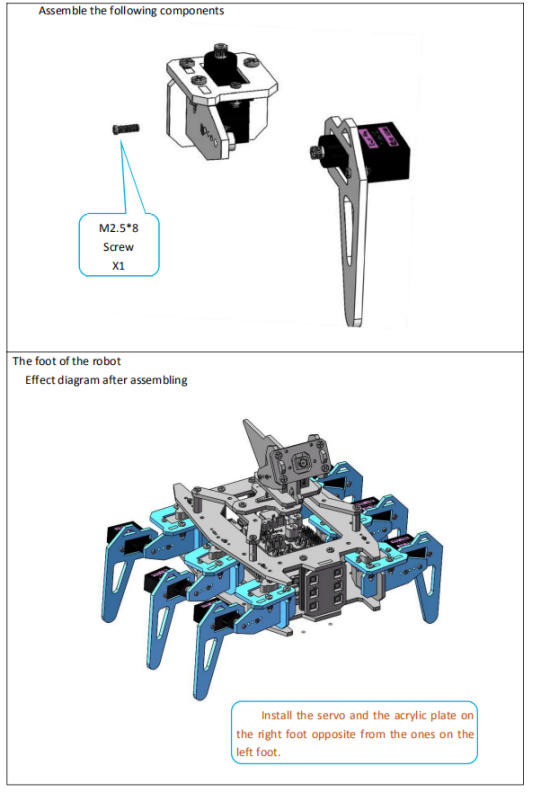
Fix a debugged servo to the acrylic plate.
|
|
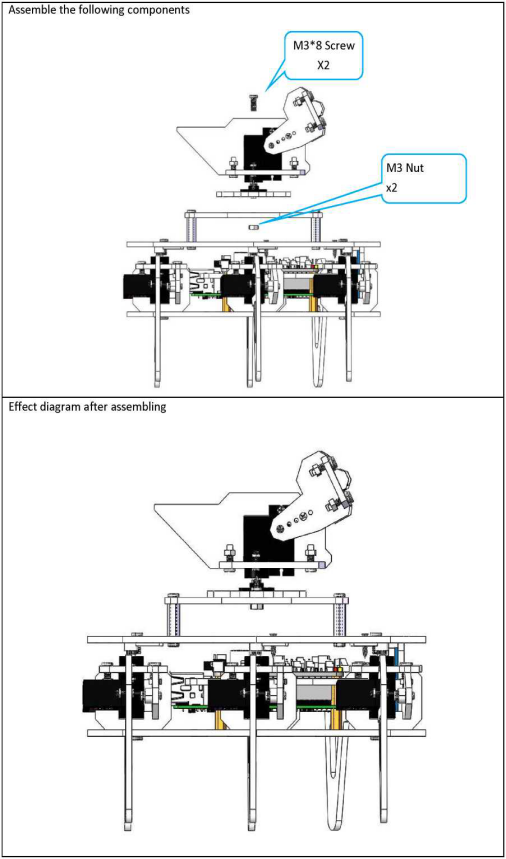
Fix Robot feet.
This picture shows the distribution of each foot after assembly. Note: There are two different assembly methods for the left and right sides of the foot. The assembly method of the foot on the same side is the same. Please distinguish according to the figure above (the top acrylic of the foot structure is flipped once). |
Assemble the Camera
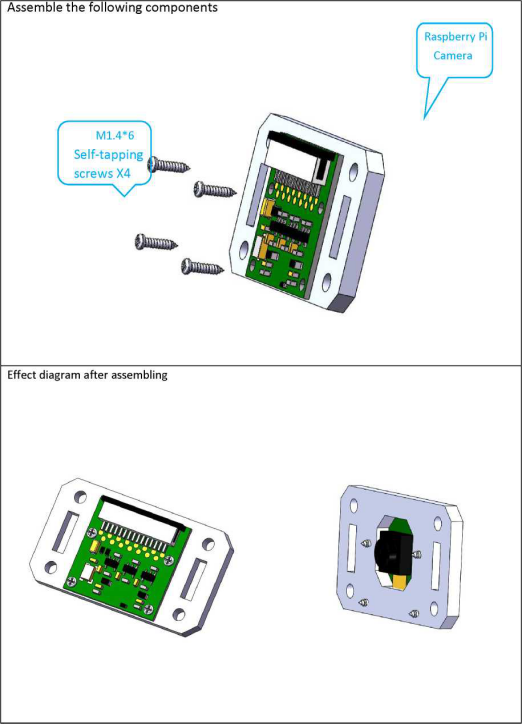
Fix Raspberry Pi Camera on Acrylic Plates.
|
|
|
|
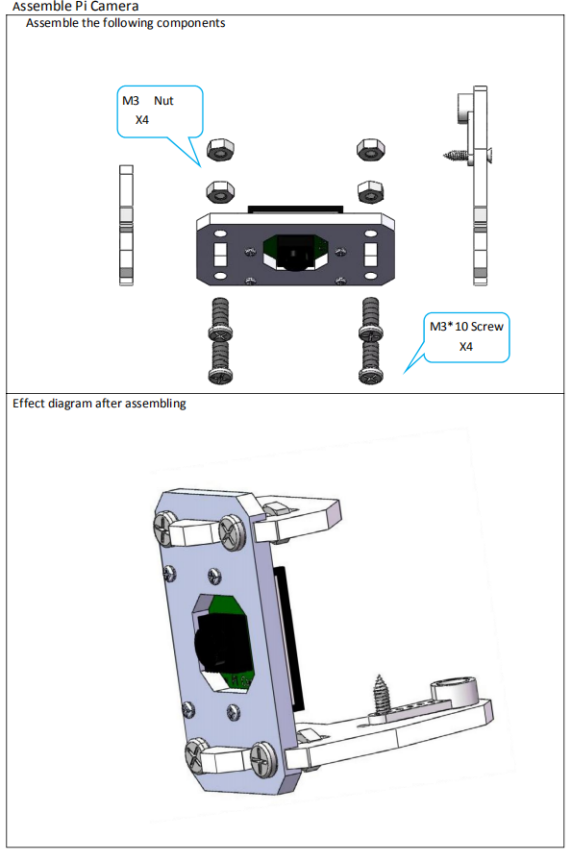
Connect Assemble Pi Camera
|
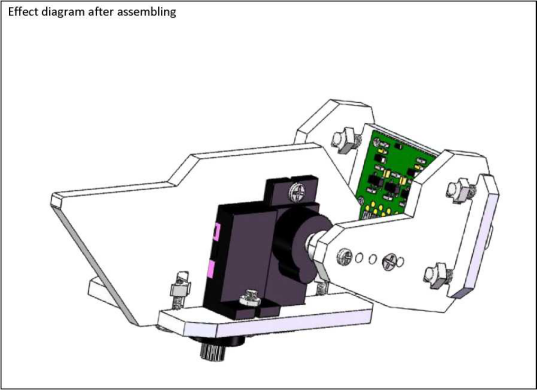
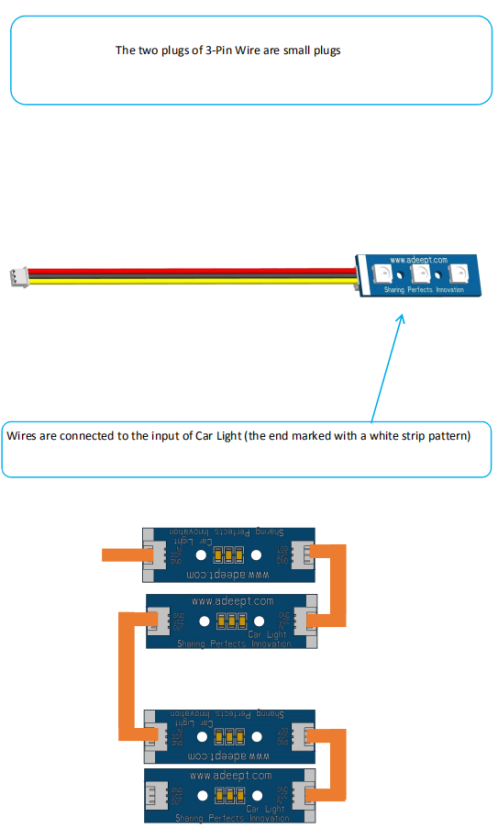
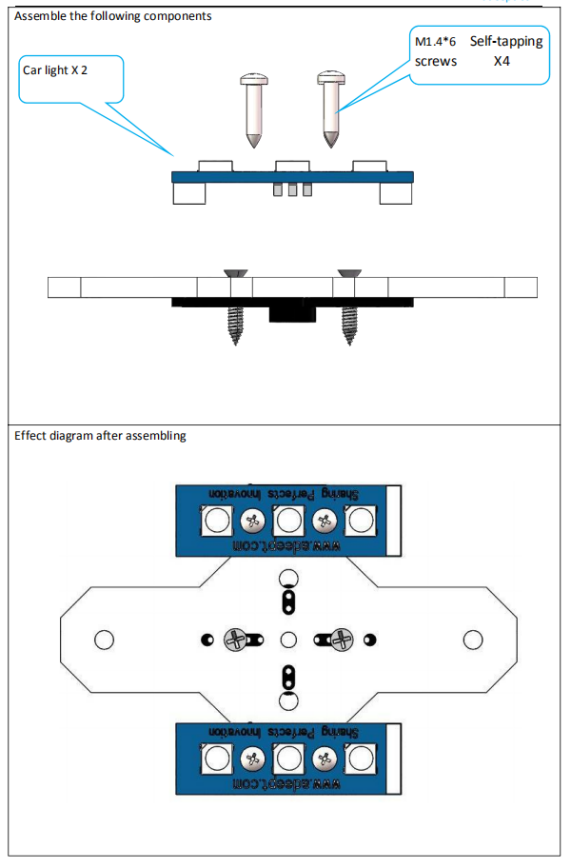
Fix car light on Acrylic Plates.
|
|
|
|
|
|
|
|
|
|
|
|
RaspClaws installation is complete. After the product circuit wiring is completed, start the Raspberry Pi, and the WS2812 LED will light up later. |