Lesson 9 How to Take a Photo with Raspberry Pi
In this tutorial we will learn the photography function of the Raspberry Pi.
For more details, refer to the Raspberry Pi official website:
https://www.raspberrypi.org/documentation/usage/camera/README.md
9.1 Components & Parts
Components | Quantity | Picture |
Raspberry Pi | 1 |
|
Robot HAT | 1 |
|
Camera Module | 1 |
|
Camera Flex Cable | 1 |
|


9.2 Introducing the Camera Module
The Raspberry Pi camera module is capable of taking full HD 1080p photos and videos and can be controlled programmatically.
9.3 Schematic Diagram
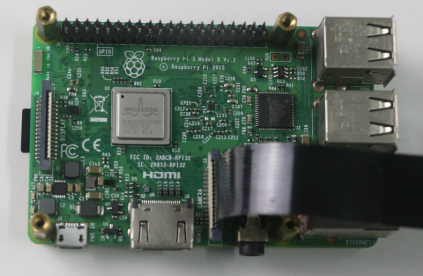
The flex cable inserts into the connector situated between the Ethernet and HDMI ports, with the silver connectors facing the HDMI port. The flex cable connector should be opened by pulling the tabs on the top of the connector upwards then towards the Ethernet port. The flex cable should be inserted firmly into the connector, with care taken not to bend the flex at too acute an angle. The top part of the connector should then be pushed towards the HDMI connector and down, while the flex cable is held in place. (Pay attention that the metal of the connector should be in contact with that of the cable)
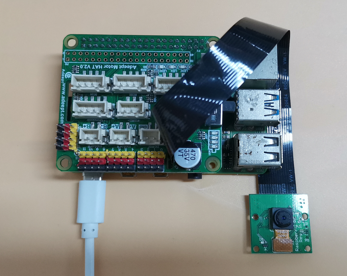
Install the Motor HAT. Insert the cable through the hole of the Motor HAT.
Connect the flex cable and camera module (metals of both should be in contact with each other).
9.4 Programming the Raspberry Pi to Take Photos
Run the code
1. Log into the Raspberry Pi remotely.

2. When the Raspberry Pi is configured with the robot software, the Raspberry Pi will automatically run the webServer.py program. If you need to use the camera in other programs, you need to terminate this program. Termination command:
sudo killall python3
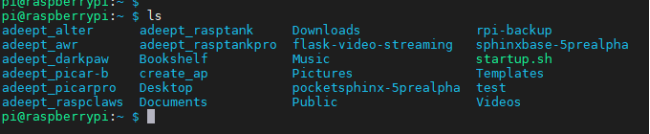
3. View the files of the current directory:
ls
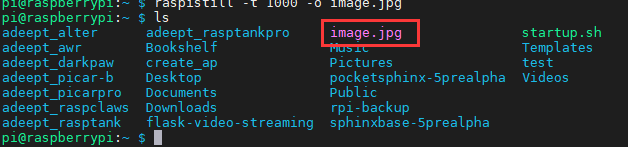
4. Type in commands, press Enter to run the program:
raspistill -t 1000 -o image.jpg

5. 1s after the successful run, the camera will take a photo image.jpg.
l 1000: delay time of photo shooting
l image.jpg: name of the photo
6. Type in "ls" to view the file.
ls
9.5 Q&A
l Error occurs when the command "raspistill -t 1000 -o image.jpg" is typed in the command line.
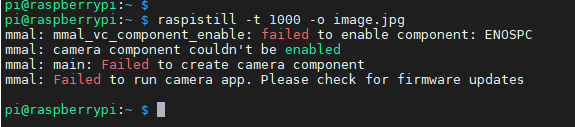
1. Run “ sudo killall python3”.
2. Check whether the camera connector of the Raspberry Pi, flex cable, and camera module are well connected.
l Metals of the flex cable and camera module should be in contact with each other
l Metals of the camera module's flex cable and camera connector of the Raspberry Pi should be in contact with each other
Check whether the flex cable and camera are good or damaged.