Overview
In this lesson, we will learn how to control a stepper motor.
Components
- 1 * Arduino UNO
- 1 * USB Cable
- 1 * Stepper Motor
- 1 * ULN2003 Driver Board
- Several jumper wires
Principle
1. stepper motors
Stepper motors, due to their unique design, can be controlled to a high degree of accuracy without any feedback mechanisms. The shaft of a stepper, mounted with a series of magnets, is controlled by a series of electromagnetic coils that are charged positively and negatively in a specific sequence, precisely moving it forward or backward in small "steps".
There are two types of steppers, Unipolars and Bipolars, and it is very important to know which type you are working with. In this experiment, we will use a unipolar stepper.
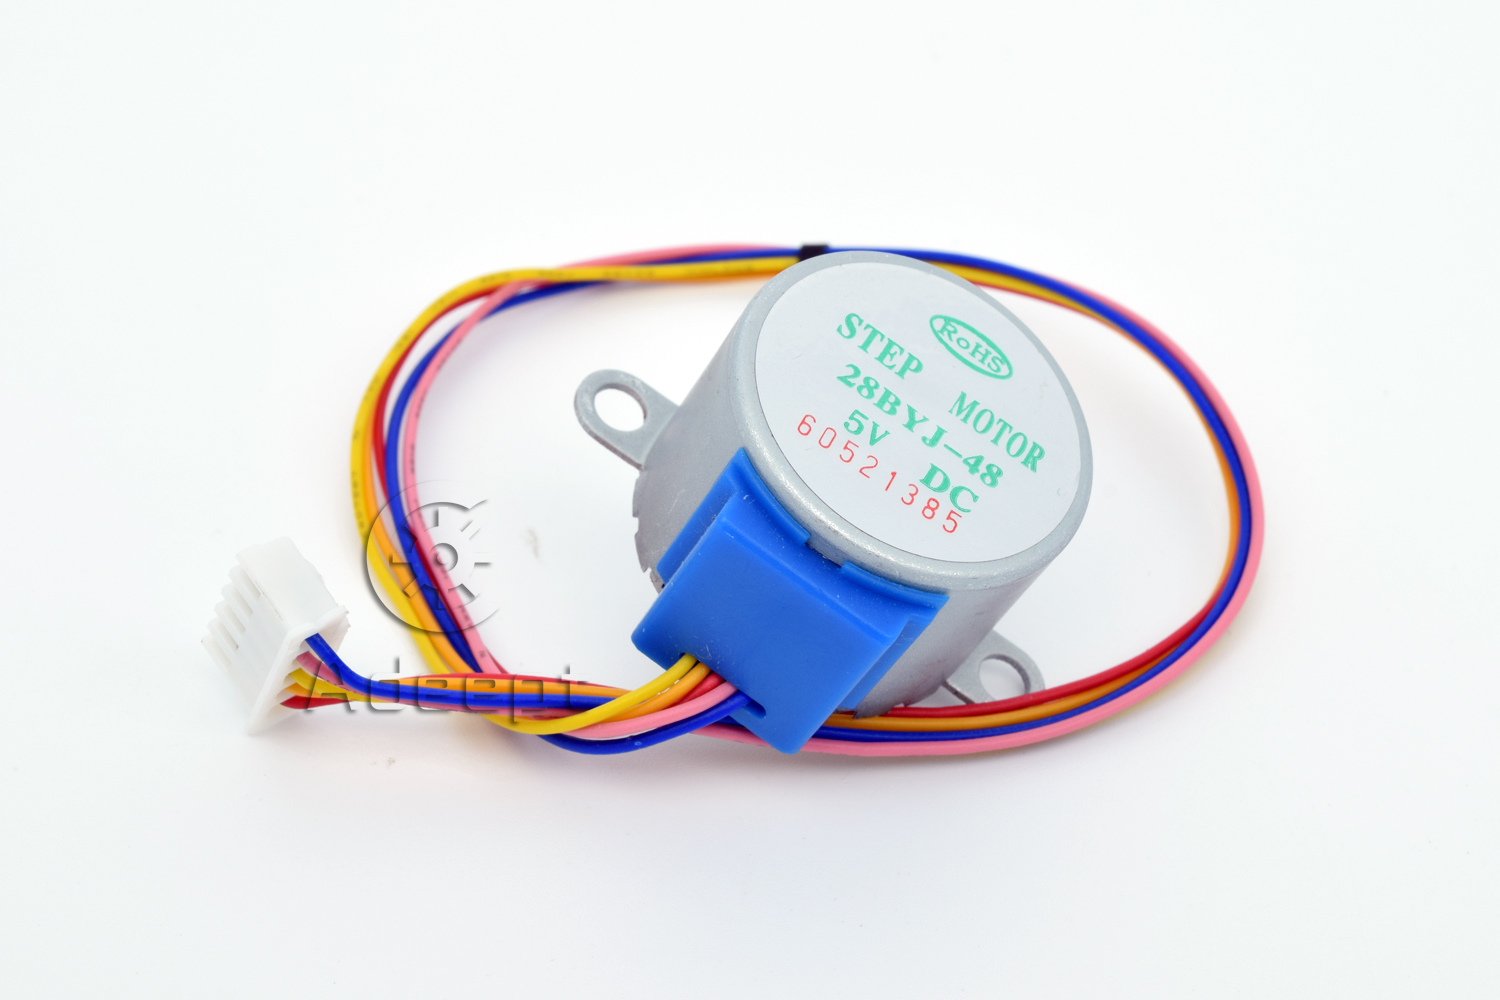
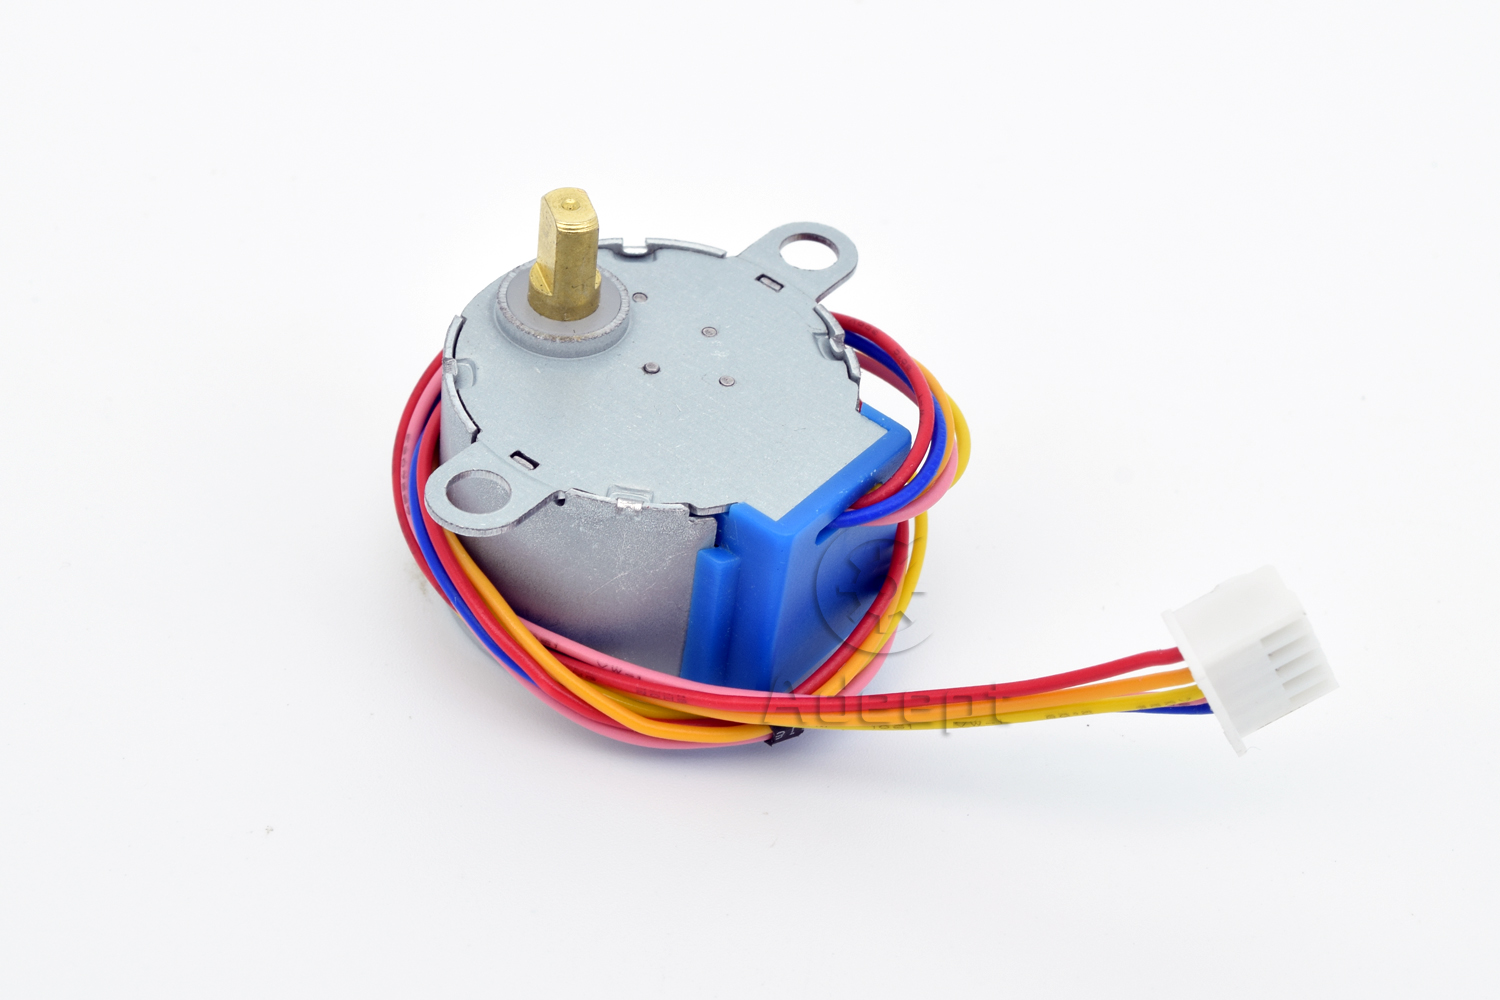
The stepping motor model that we provide is 28BYJ-48. Operating voltage is 5VDC. Phase is 4. The current is 92mA. The reduction ratio is 1/64. Using the eight-beat control the stepper motor.
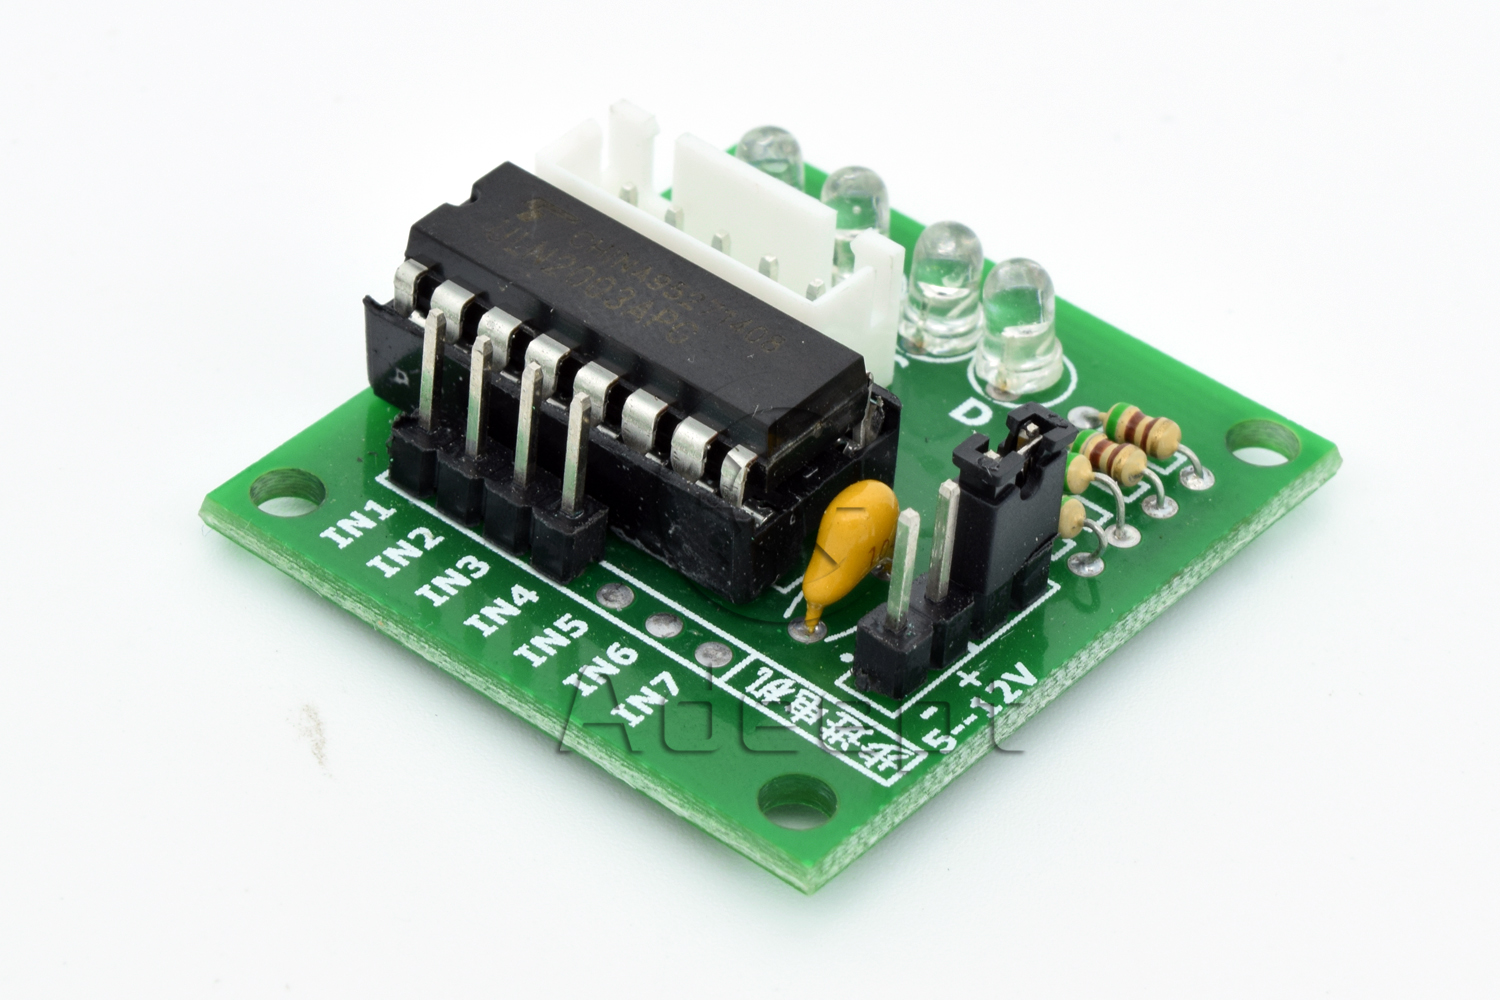
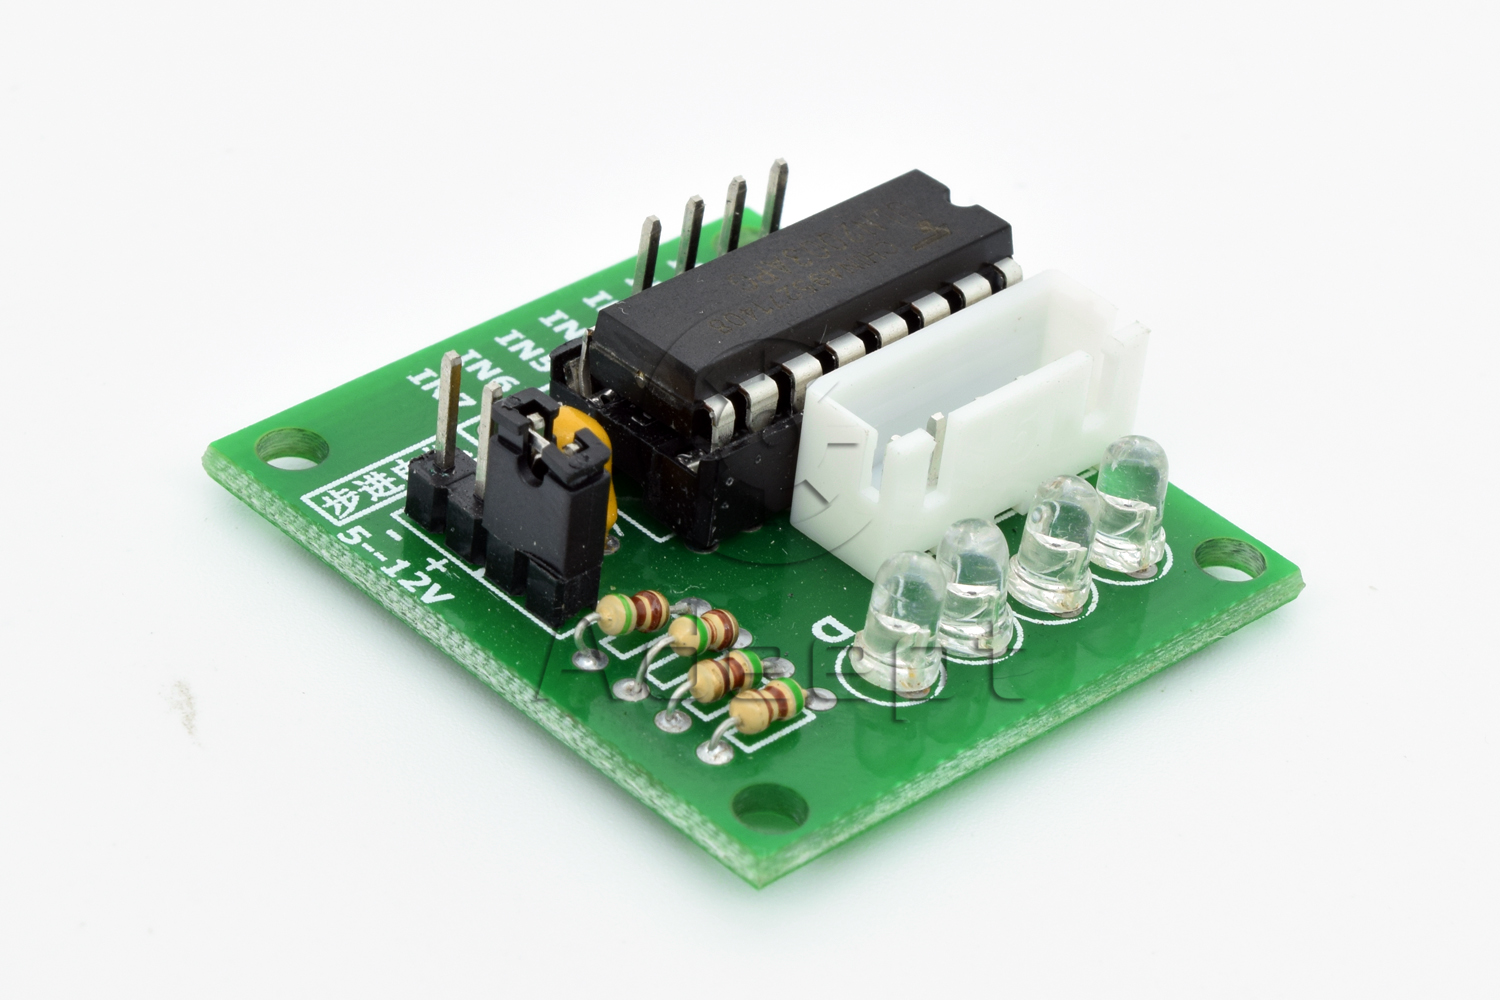
2. ULN2003 driver board
Arduino UNO R3 board cannot directly drive stepper motors. A driver circuit is necessary, so we choose an ULN2003 driver board here as shown below. There are four LEDs on the top. The white booth in the middle is connected to the stepper motor. The bottom is four pins used to connect with Arduino digital pins. When a pin is high, the corresponding LED will light up. The black jump hat on the right is power source input end. The driving method for stepper motor can be categorized as four-beat and eight-beat. In this experiment, we take eight-beat for example, for it is simple. You can drive the motor as long as you input HIGH to the four ports A, B, C and D in turn.
How many beats needed for the shaft to take a turn?
It is 360 degrees for the shaft to take a turn. In this experiment, we set that it takes 512 steps to take a turn. So each step will be 360/512 = 0.7 degrees.
Procedures
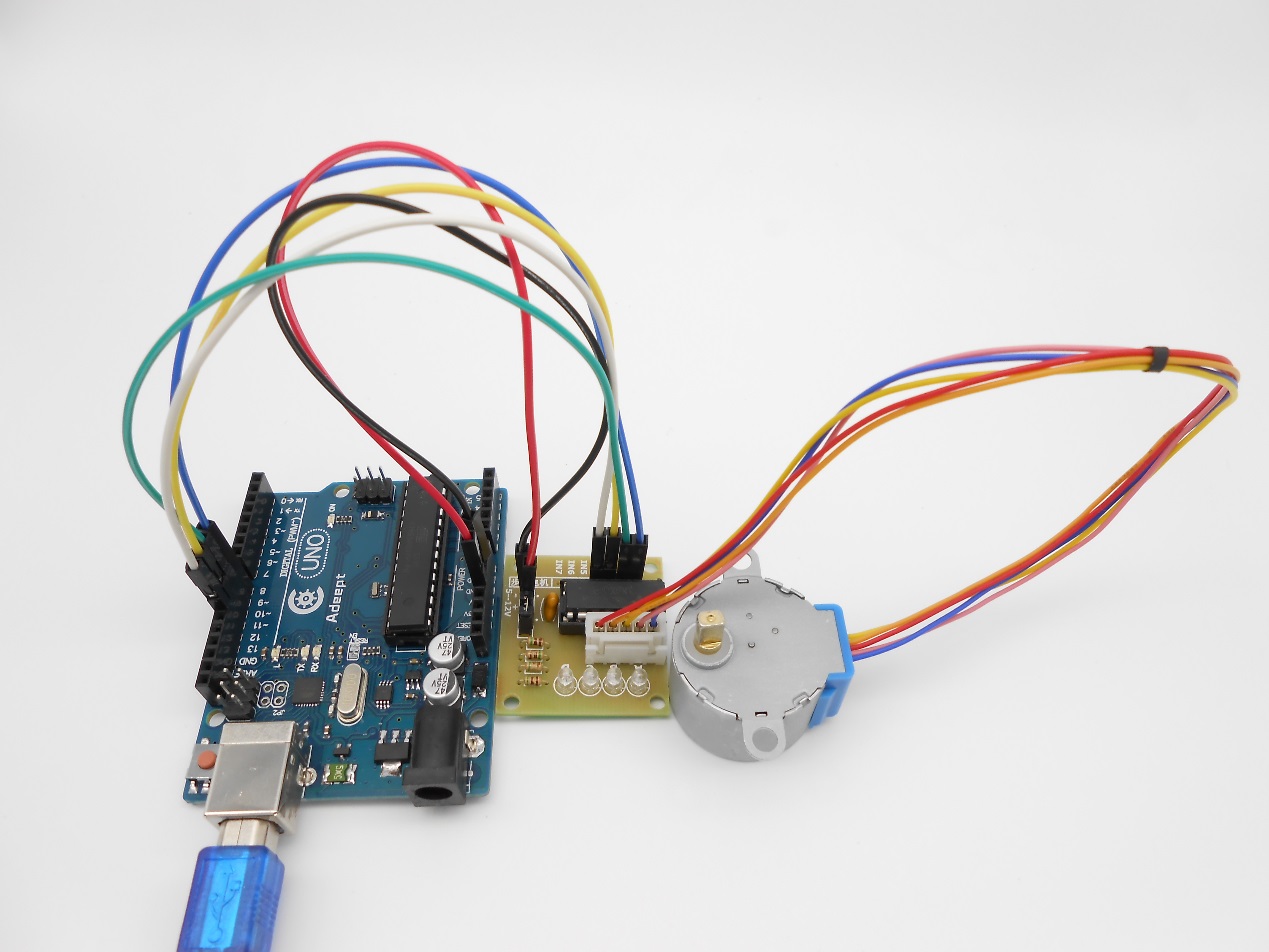
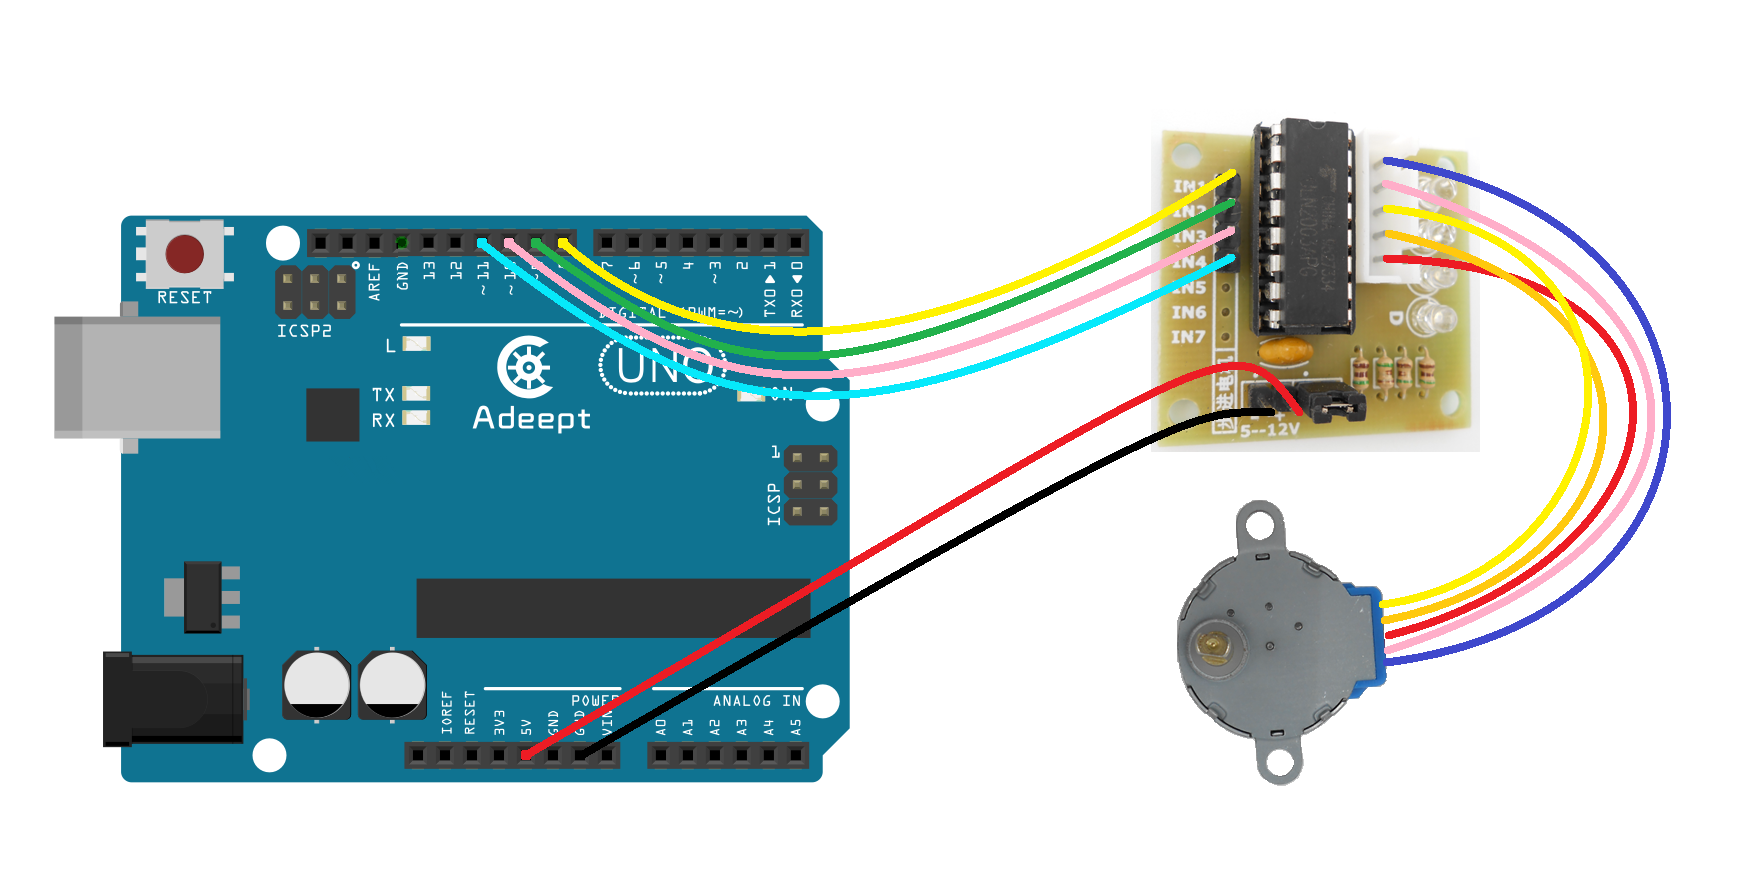
Step 1: Build the circuit
ULN2003 driver board IN1----------------------- Arduino UNO R3 Digital pin 8
ULN2003 driver board IN2----------------------- Arduino UNO R3 Digital pin 9
ULN2003 driver board IN3----------------------- Arduino UNO R3 Digital pin 10
ULN2003 driver board IN4----------------------- Arduino UNO R3 Digital pin 11
ULN2003 driver board “+” ----------------------- Arduino UNO R3 Power pin 5V
ULN2003 driver board “-“----------------------- Arduino UNO R3 Power pin GND
Step 2: Program
/***********************************************************
File name: 26_steppermotor.ino
Description: You can observe the stepper motor is fast and
             forward in a circle, next the stepper motor is
             slow and reverse in a circle.
Website: www.adeept.com
E-mail: support@adeept.com
Author: Tom
Date: 2015/05/02
***********************************************************/
int Pin0 = 8;//definition digital 8 pins as pin to control the IN1 (ULN24L01)
int Pin1 = 9;//definition digital 9 pins as pin to control the IN2 (ULN24L01)
int Pin2 = 10;//definition digital 10 pins as pin to control the IN3 (ULN24L01)
int Pin3 = 11;//definition digital 11 pins as pin to control the IN4 (ULN24L01)

int _step = 512;
int _speed = 1;
void setup()
{
 pinMode(Pin0, OUTPUT);//Set digital 8 port mode, the OUTPUT for the output
 pinMode(Pin1, OUTPUT);//Set digital 9 port mode, the OUTPUT for the output
 pinMode(Pin2, OUTPUT);//Set digital 10 port mode, the OUTPUT for the output
 pinMode(Pin3, OUTPUT);//Set digital 11 port mode, the OUTPUT for the output
}

void loop()
{
   Speed(15);//Stepper motor speed = 15 fast (note:speed from 1 to 15)
  Step(512);//Stepper motor forward 512 steps ---- 360 angle
  delay(2000);// delay 2S
   Speed(1); //Stepper motor speed = 1 slow  (note:speed from 1 to 15)
  Step(-512);//Stepper motor backward 512 steps ---- 360 angle
  delay(2000);//delay 2S
}
void Speed(int stepperspeed)//set Stepper speed
{
    _speed = 15 - stepperspeed;
    if( _speed<1){
     _speed = 1;
    }
    if( _speed>15){
     _speed = 15;
    }
}
void Step(int _step)//Stepper motor rotation
{
  if(_step>=0){  // Stepper motor forward
    for(int i=0;i<_step;i++){
      setStep(1, 0, 0, 1);
      delay(_speed);
      setStep(1, 0, 0, 0);
      delay(_speed);
      setStep(1, 1, 0, 0);
      delay(_speed);
      setStep(0, 1, 0, 0);
      delay(_speed);
      setStep(0, 1, 1, 0);
      delay(_speed);
      setStep(0, 0, 1, 0);
      delay(_speed);
      setStep(0, 0, 1, 1);
      delay(_speed);
      setStep(0, 0, 0, 1);
      delay(_speed);
    }
  }else{ // Stepper motor backward
     for(int i=_step;i<0;i++){
      setStep(0, 0, 0, 1);
      delay(_speed);
      setStep(0, 0, 1, 1);
      delay(_speed);
      setStep(0, 0, 1, 0);
      delay(_speed);
      setStep(0, 1, 1, 0);
      delay(_speed);
      setStep(0, 1, 0, 0);
      delay(_speed);
      setStep(1, 1, 0, 0);
      delay(_speed);
      setStep(1, 0, 0, 0);
      delay(_speed);
      setStep(1, 0, 0, 1);
      delay(_speed);
    }
   }
}
void setStep(int a, int b, int c, int d)
{
    digitalWrite(Pin0, a);
    digitalWrite(Pin1, b);
    digitalWrite(Pin2, c);
    digitalWrite(Pin3, d);
}
Step 3: Compile the program and upload to Arduino UNO board
Now, the stepper motor can run fast in a clockwise circle, next the stepper motor can run slow in a counterclockwise circle.