Lesson 3 Introduction to the Servo Fine-tuning Function
3.1 Function introduction
Available to fine-tuning the default angle of the servo and correct the angle error caused by the servo installation. For the crawling robots, fine-tuning the default angle of the servo will improve their walking smoothness. For robot products with manipulators, it helps to adjust the initial angle of the manipulator chuck for correcting the error caused by the servo installation.
3.2 The fine-tuning function of the servo
Run the servo fine-tuning program
1. Start up Raspberry Pi robot for about 30s-60s.
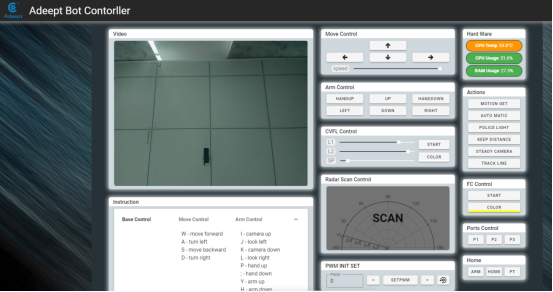
2. When PiCarPro is started up, enter the IP address of your Raspberry Pi on the Google browser of the mobile phone or computer, and access Port 5000, for example: 192.168.3.44:5000. Then the web controller will be displayed on the browser.
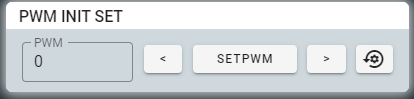
3. The module "PWM INIT SET" is the operating area of the fine-tuning function of the servo. (It is recommended to restart PiCarPro before fine-tuning the servo)
4. Introduction to the servo fine-tuning module
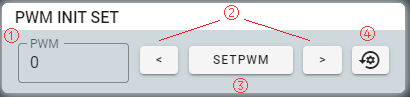
l "PWM": for selecting the servo number and the No. 0 servo is selected in the figure. Click the box to enter the number or click the buttons of up and down in the box to select the servo number that needs adjusting.
l "<": Adjust the selected servo to rotate counterclockwise slightly.
l “>”: Adjust the selected servo to rotate clockwise slightly.
l "SETPWM": After adjusting the servo, save the current servo angle as the default value.
l "@": Initialize the default angles of all servos to factory setting.
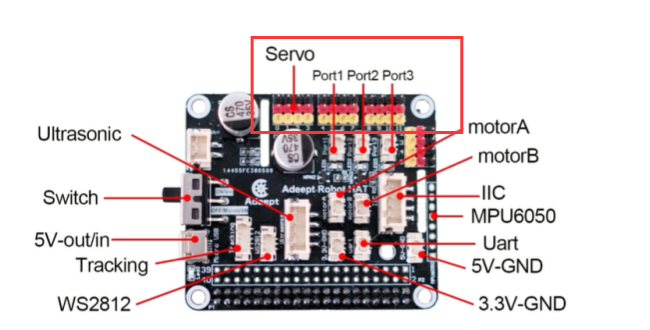
5. Select the servo number to be adjusted. The servo number is the interface number of the servo connected to Robot HAT. For example, when the servo cable is connected to the Servo 1 interface, the servo number is 1.
6. After selecting the servo to be adjusted, clicking "<" and ">" to adjust the servo to a right position, and then click "SETPWM" to save.
3.3 The main code program
Please see the complete code in findline.py.
Import dependency and initialize
1. from __future__ import division 2. import time 3. import RPi.GPIO as GPIO 4. import sys 5. import Adafruit_PCA9685 6. import threading 7. 8. import random 9. ''''' 10. change this form 1 to -1 to reverse servos 11. ''' 12. pwm = Adafruit_PCA9685.PCA9685() 13. pwm.set_pwm_freq(50) 14. 15. init_pwm0 = 300 16. init_pwm1 = 300 17. init_pwm2 = 300 18. init_pwm3 = 300 19. 20. init_pwm4 = 300 21. init_pwm5 = 300 22. init_pwm6 = 300 23. init_pwm7 = 300 24. 25. init_pwm8 = 300 26. init_pwm9 = 300 27. init_pwm10 = 300 28. init_pwm11 = 300 29. 30. init_pwm12 = 300 31. init_pwm13 = 300 32. init_pwm14 = 300 33. init_pwm15 = 300 |
Servo fine-tuning function
1. class ServoCtrl(threading.Thread): 2. 3. def __init__(self, *args, **kwargs): 4. self.sc_direction = [1,1,1,1, 1,1,1,1, 1,1,1,1, 1,1,1,1] 5. self.initPos = [init_pwm0,init_pwm1,init_pwm2,init_pwm3, 6. init_pwm4,init_pwm5,init_pwm6,init_pwm7, 7. init_pwm8,init_pwm9,init_pwm10,init_pwm11, 8. init_pwm12,init_pwm13,init_pwm14,init_pwm15] 9. self.goalPos = [300,300,300,300, 300,300,300,300 ,300,300,300,300 ,300,300,300,300] 10. self.nowPos = [300,300,300,300, 300,300,300,300 ,300,300,300,300 ,300,300,300,300] 11. self.bufferPos = [300.0,300.0,300.0,300.0, 300.0,300.0,300.0,300.0 ,300.0,300.0,300.0,300.0 ,300.0,300.0,300.0,300.0] 12. self.lastPos = [300,300,300,300, 300,300,300,300 ,300,300,300,300 ,300,300,300,300] 13. self.ingGoal = [300,300,300,300, 300,300,300,300 ,300,300,300,300 ,300,300,300,300] 14. self.maxPos = [560,560,560,560, 560,560,560,560 ,560,560,560,560 ,560,560,560,560] 15. self.minPos = [100,100,100,100, 100,100,100,100 ,100,100,100,100 ,100,100,100,100] 16. self.scSpeed = [0,0,0,0, 0,0,0,0 ,0,0,0,0 ,0,0,0,0] 17. 18. self.ctrlRangeMax = 560 19. self.ctrlRangeMin = 100 20. self.angleRange = 180 21. 22. ''''' 23. scMode: 'init' 'auto' 'certain' 'quick' 'wiggle' 24. ''' 25. self.scMode = 'auto' 26. self.scTime = 2.0 27. self.scSteps = 30 28. 29. self.scDelay = 0.037 30. self.scMoveTime = 0.037 31. 32. self.goalUpdate = 0 33. self.wiggleID = 0 34. self.wiggleDirection = 1 35. 36. super(ServoCtrl, self).__init__(*args, **kwargs) 37. self.__flag = threading.Event() 38. self.__flag.clear() 39. 40. def initConfig(self, ID, initInput, moveTo): 41. if initInput > self.minPos[ID] and initInput < self.maxPos[ID]: 42. self.initPos[ID] = initInput 43. if moveTo: 44. pwm.set_pwm(ID,0,self.initPos[ID]) 45. else: 46. print('initPos Value Error.') |