Lesson 1 Introducing GUI Control UI
For previous robot program of Adeept, we've introduced the method of controlling robot via desktop GUI program written with Python. However, it's not recommended for beginners as it requires some further knowledge and experience.
The GUI program now is only compatible with Windows operating system. Generally, it's named GUI.py and stored under the client directory of the robot software package.
1.1 Installing GUI Dependent Libraries on Windows
Installing Python3
l You need to install Python on your computer to run the program for PC. Since the code of this robot was developed and debugged by Python3, please download the Python3.7 version or higher in case of any error caused by incompatibility.
l Download Python3 at this link: https://www.python.org/downloads/windows/
l Double click the installation package to install Python.
l Pay attention to select Add Python to PATH when installing.
Installing NumPy
l NumPy is a basic software package for scientific calculation through Python. OpenCV needs to use some of its functions.
l Press Win + R key, type in "cmd", and click OK to start cmd.
l Type in the command below to install NumPy:
pip3 install numpy
l Press Enter to start downloading and installing NumPy.
Installing OpenCV
l Same method with installing NumPy
l Start cmd, type in the command as shown below:
pip3 install opencv-contrib-python
l Press Enter to start downloading and installing OpenCV
Installing zmq and pybase64
l zmq and pybase64 are the libraries for real time video
l Start cmd, type in the following command:
pip3 install zmq pybase64
l Start cmd, type in the following command:
l Press Enter to start downloading and installing zmq and pybase64.
Downloading GUI Program
Since the GUI.py is included in the code file of the robot, here we download the code file on Windows:
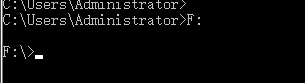
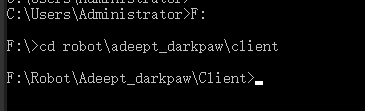
Choose the path to save the code file: F:\Robot
Type in the command as shown below:
F:
Type in the command below:
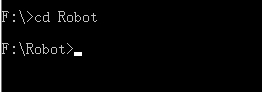
cd Robot
Type in the command below to download the code program:
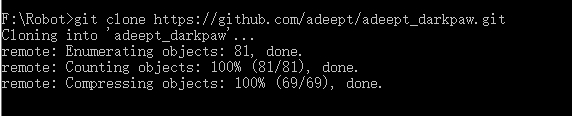
git clone https://github.com/adeept/adeept_darkpaw.git
1.2 Introducing GUI Control Program
l The web terminal and GUI are not connected. Therefore, to control the robot via GUI, you need to manually run server.py on Raspberry Pi. (similar to manually running webserver.py, the only difference is the server.py program)
Terminate the auto-run program of webServer.py on Raspberry Pi:
sudo killall python3

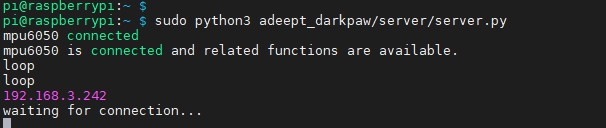
Run the server.py program:
sudo python3 adeept_darkpaw/server/server.py
l After server.py run successfully on Raspberry, run GUI.py on Windows.
Run GUI.py in cmd. If you right click on the GUI.py file in the folder, there may be an error message.
Access the folder of the robot program:
Run the GUI.py program (run it after accessing the client folder, or there may be an error).
Python GUI.py
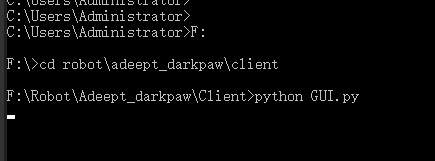
The GUI interface will appear after run successfully.
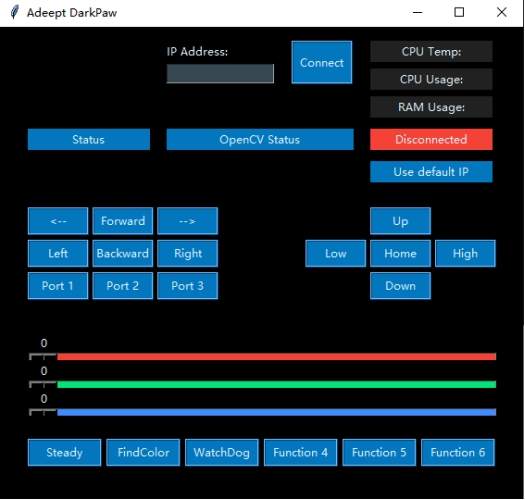
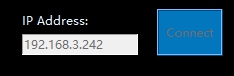
l Enter the IP address of the Raspberry Pi in the GUI on PC, click Connect, and you can control the robot now. For instance, enter 192.168.3.242


Now you can see 3 windows: cmd, Adeept DarkPaw, and stream window.
l cmd execution window: Shows up every time a GUI is started. Any abnormalities of execution will be shown in this window. GUI will be closed if you close the window.
l Camera stream window: Shows the images captured by the camera. The rendering may vary from different product types; some product may even communicate with this window.
l Adeept DarkPaw window: To connect and control the robot.
IP Address textbox: Enter the IP address of the Raspberry Pi, click Connect to connect it and GUI.
Movement control:
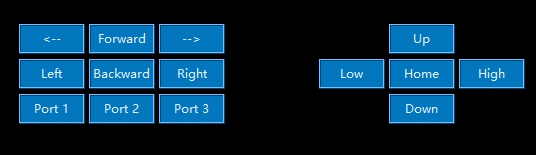
Forward: Control the robot to move forward, with a shortcut W.
Backward: Control the robot to move backwards, with a shortcut S.
Left: Control the robot to turn left, with a shortcut A.
Right: Control the robot to turn right, with a shortcut D.
Up: Control the robot to raise its head, with a shortcut I.
Down: Control the robot to lower its head, with a shortcut K.
Low: Control the robot to lower its body, with a shortcut U.
High: Control the robot to lift its body, with a shortcut O.
Home: Control servo to restore to its initial position, with a shortcut H.
<--: Same with turning left, you can change to self-defined code
-->: Same with turning right, you can change to self-defined code
Port1: Control the Port 1 on the Robot HAT to turn on/off.
Port2: Control the Port 2 on the Robot HAT to turn on/off.
Port3: Control the Port 3 on the Robot HAT to turn on/off.
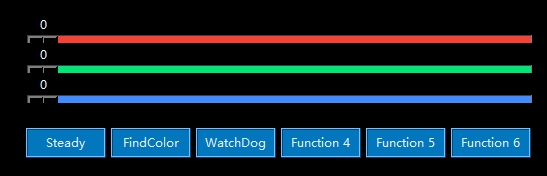
WatchDog: Based on the motion detection function of OpencCV. When there's motion detected in the camera's view, the program will mark the mobile object in real time and the LED light on the robot will also light up accordingly.
Steady: Self-balancing function realized based on MPU6050. After the function is enabled, you can place the robot on an even surface like a plate. Slowly tilt the plate and you can see the robot adjust the height of its legs to keep balanced. When the function's working, the robot can't take any other actions. Click again to disenable the function.
FindColor: Start color detection function. Click again to disable the function. By default, it will look for objects of yellow color.