USD
USD EUR
EUR GBP
GBP CAD
CAD AUD
AUD HKD
HKD JPY
JPY KRW
KRW


Your position: Home > All Products
- Arduino Robotic Kits
-
 $ 69.99Quantity: 1
 -
 $ 99.99Quantity: 1
 -
, Line Tracking, Obstacle Avoidance, OLED Display, Ultrasonic Sensor, Wireless Remote Control") $ 49.99Quantity: 1
$ 49.99Quantity: 1
The select 0 products
$79.99
- Description
Important Tips:
This kit is loose pieces, you need to assemble it yourself!
This is a STEM kit suitable for everyone, and it is easy to assemble and suitable for cultivating children's hands-on and programming skills. Professional robotic hobbyists can also enjoy it by customizing and adding more functions onto this kit.
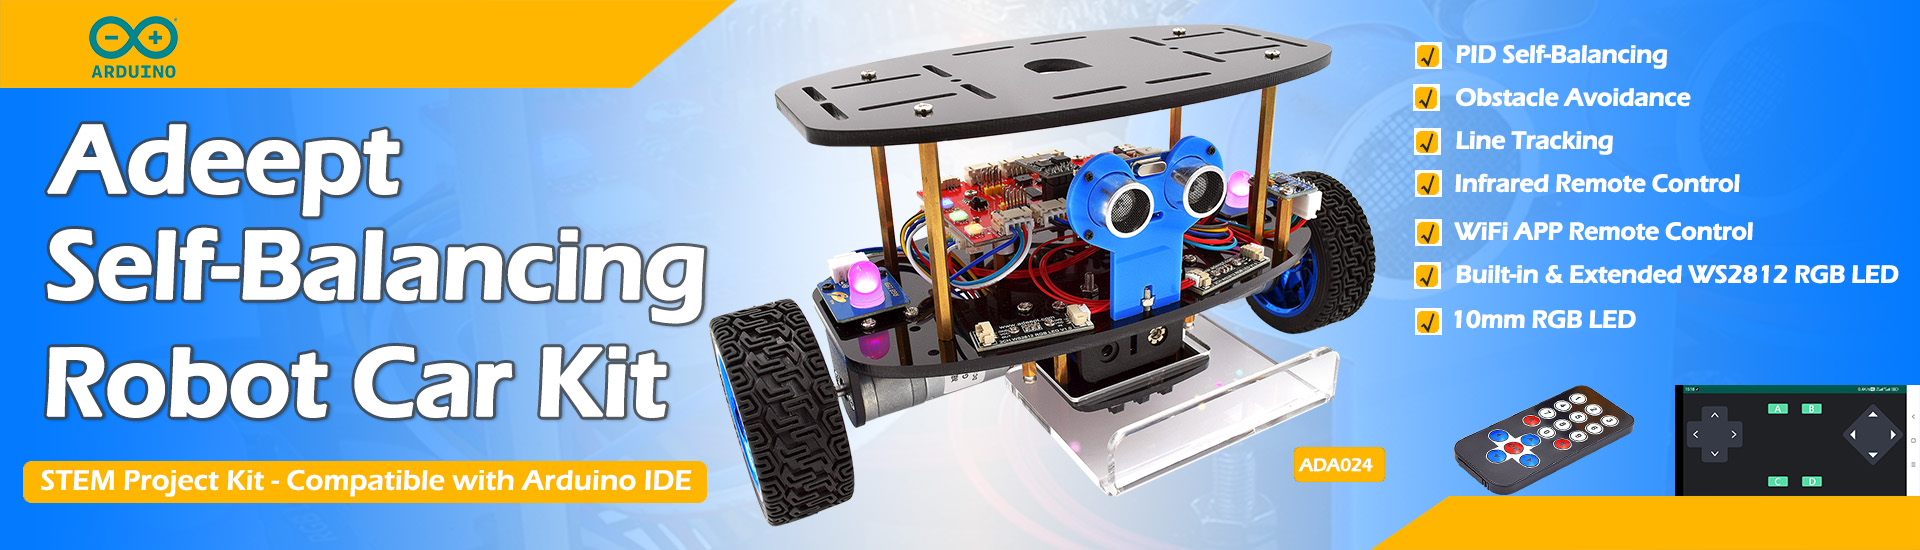
Features:
- This Self-Balancing Robot Car Kit is designed for teens to learn to coding, building and robotics. It is developed based on MEGA328P, and it is fully compatible with Arduino IDE. It is the best choice for learning programming and robotics.
- It has various fascinating features, such as auto-follow, obstacle avoidance, Dual 10mm RGB LED turn signal; Extended WS2812 RGB LED light strip.
- Multiple Control Methods - Wireless remote control by IR remote control; Remote controlled by Android APP.
- It comes with a well-designed and illustrated tutorial that guides you step by step to assemble this robot and program all its interesting features. The download link can be found on the card in the box(Paper tutorials are NOT available as the tutorials are updated frequently).
- Control Board with Charging - Adeept Self-Balancing Car Control Board integrates an 8.4V battery charger, allowing you to directly charge the battery through the Type-C interface without an additional charger.
Download Tutorials:
https://www.adeept.com/learn/detail-90.html
Lessons:
000 Assemble
001 Packing List
002 Introduction of Adeept Self-balancing Car Control Board
003 Building the Arduino Development Environment
01 Onboard LED
02 How to Control a DC Motor
03 Buzzer
04 Control the RGB LED
05 WS2812 RGB LED
06 Measure Distance
07 Line Tracking
08 Get battery level infomation
09 MPU6050 Gyro Sensor
10 IR Remote Control
11 Keep Balance
12 IR Remote Control Car
13 WiFi Remote Control Car
14 Line Tracking Car
15 Obstacle Avoidance Car
16 Automatic Following Car
Package List:
1 Set Structure Parts(Acrylic)
1x Adeept Self-Balancing Car Control Board(Based on MEGA328P, fully compatible with Arduino IDE)
1x ESP8266 WiFi Module
1x Ultrasonic Range Sensor
1x 3-CH Line Tracking Module
1x MPU6050 Gyro Sensor
1x IR Remote Control
2x WS2812 RGB LED Module
2x Adeept RGB LED Module
2x Reduction Motor(with Encoder)
2x Motor Bracket
2x Wheel
1x Battery Holder
1x Type-C USB Cable
2x Coupling
Other Necessary Accessories(Cables, Nuts, Screws, Copper Standoffs, Tools, etc.)
You May Like
, Color Tracking, OLED Display, Video Transmission")
-
$99.99
, Smart Car with 4-DOF Robotic Arm for Pi 5/4/3, 1080P HD Camera, OpenCV, OLED")
-
$164.99

-
$114.99

-
$89.99

-
$89.99

-
$94.99
, STEM Projects Kit, Robotics & Engineering Kit, Programming Set")
-
$79.99

-
$169.99

-
$44.99
Product reviews can be carried out after the member login, please click here to login
See all 12 Customer Reviews