USD
USD EUR
EUR GBP
GBP CAD
CAD AUD
AUD HKD
HKD JPY
JPY KRW
KRW


Your position: Home > All Products
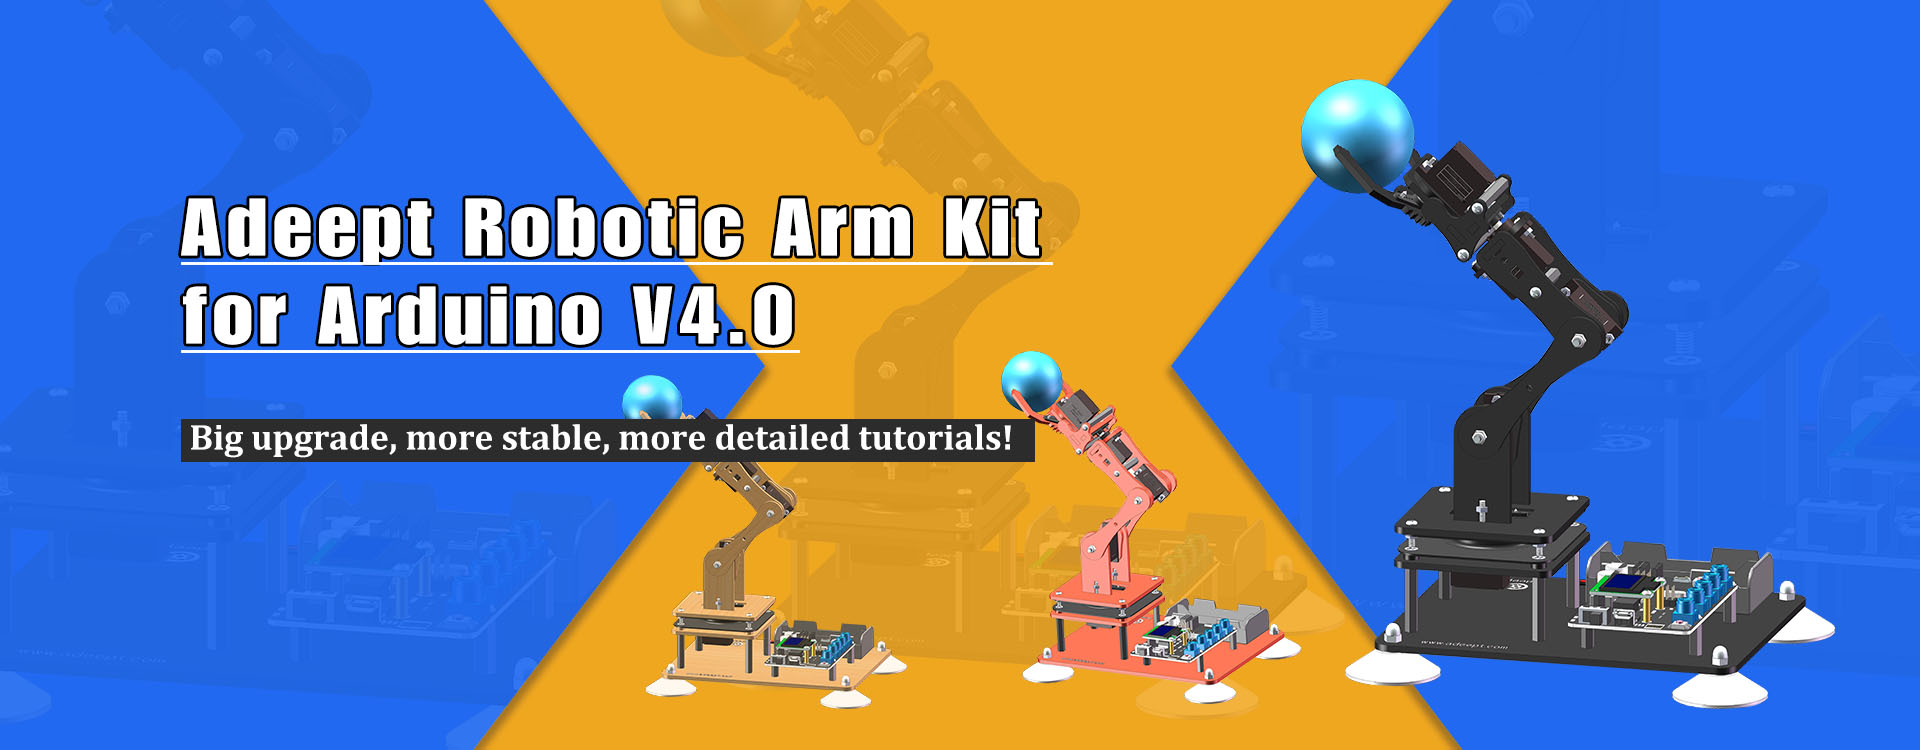
- 3 Colors Robotic Arm Learning Kit for Arduino
- Robotic Arm
- Robotic Arm Drive Board
- Arduino Robotic Kits
- Sale!!! on 3 Colors Robotic Arm Kit

-
 $ 64.99Quantity: 1
 -
 $ 69.99Quantity: 1
 -
 $ 14.79Quantity: 1
 -
 $ 12.49Quantity: 1
 -
 $ 7.99Quantity: 1
The select 0 products
$69.99


, Line Tracking, Obstacle Avoidance, OLED Display, Ultrasonic Sensor, Wireless Remote Control")
- Description
About this item
- This robotic arm kit is designed for teens to learn to coding, building and programming. It is fully compatible with Arduino IDE, easy to learn and easy to program.
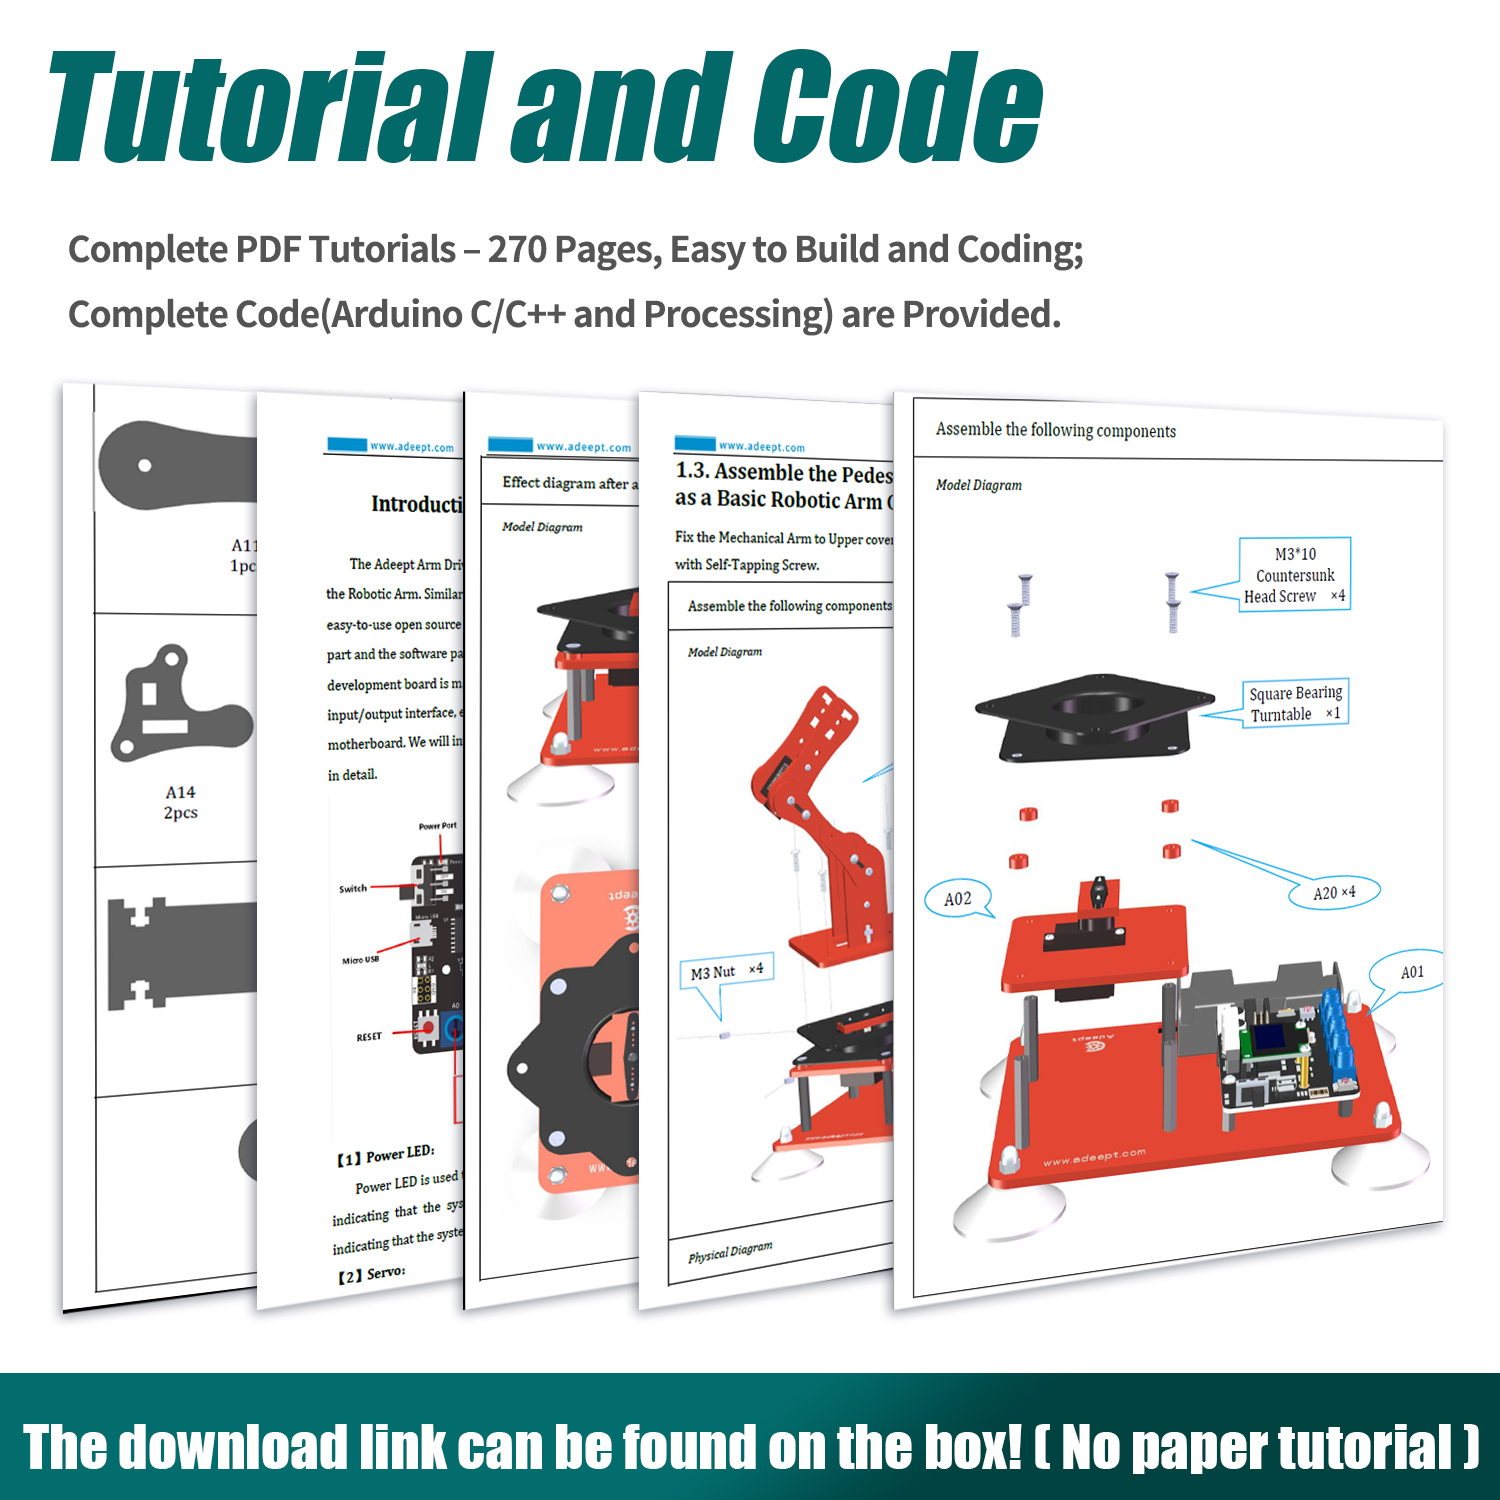
- Easy to Assemble and Build - Detailed tutorials and complete code(Arduino C/C++ and Processing) are provided. The download link can be found on the card in the box (Paper tutorials are NOT available as the tutorials are updated frequently).
- Various Control Methods - Manual Control(Controlled by rotating the potentiometer knobs on the driver board); Remote Control(Controlled by graphical processing-based PC software).
- Multiple Ways of Working - Self-learning/Action memory, drawing, imitating, etc.
- Batteries NOT included, you need to buy 2x18650 battery by yourself. You can also supply power directly through the Micro USB interface without using batteries.
Important Tips:
1. This robotic arm kit is loose pieces, you need to assemble it yourself;
2. Batteries NOT included, you need to buy 2x18650 battery by yourself. You can also supply power directly through the Micro USB
interface without using batteries.
Compatibility:
The Main Controller - Adeept Robotic Arm Driver Board is developed based on ATMEGA328P and it is fully compatible with
Arduino IDE. You should select the board model as (Arduino UNO R3) in the Arduino IDE.
Tutorials and Codes:
Detailed tutorials and complete code(Arduino C/C++ and Processing) are provided(Paper tutorials are NOT available as the tutorials are updated frequently). The download link can be found on the card in the box.
Download Tutorials:
https://www.adeept.com/learn/detail-64.html
Package List:
1 Set Structure Parts(Acrylic)
1x Adeept Robotic Arm Driver Board(Compatible with Arduino)
1x 0.96'' OLED Display
6x AD002 Servo
1x Extension Cable for Servo
1x Square Bearing Turntable
1x Battery Holder
1x Cross Socket Wrench
1x Cross Screwdriver(3mm)
1x Cross Screwdriver(2mm)
1x Winding Pipe
4x Suction Cup
1x Micro USB Cable
Other Necessary Accessories(Wires, Nuts, Screws, Copper Standoffs, Nylon Standoffs, etc.)

You May Like
, Color Tracking, OLED Display, Video Transmission")
-
$99.99
, Smart Car with 4-DOF Robotic Arm for Pi 5/4/3, 1080P HD Camera, OpenCV, OLED")
-
$164.99

-
$114.99

-
$89.99

-
$89.99

-
$94.99
, STEM Projects Kit, Robotics & Engineering Kit, Programming Set")
-
$79.99

-
$169.99

-
$44.99
Product reviews can be carried out after the member login, please click here to login
See all 15 Customer Reviews