Lesson 1 Introducing Web Controller UI
1.1 Running webServer.py Program
l Raspberry Pi will automatically run the program of the robot every time it reboots. Specifically, it will run adeept_darkpaw/server/webServer.py, but if the Raspberry Pi camera or the driver board Robot HAT is not connected, webServer.py will not run. It's normal because the program of the robot needs to use the camera and PCA9685 chip. The Adeept Robot HAT controls servo via PCA9685, while the Raspberry Pi communicates with PCA9685 through I2C. If Robot HAT is not installed on the Raspberry Pi, when instantiating the dependent library of PCA9685, a communication failure will occur with a program error.
l You can power off the Raspberry, install the camera module and Robot HAT, and reboot. Then webServer.py can run successfully.
l Under normal circumstances, you don't need to manually run webServer.py since the Raspberry Pi will automatically run the program when booting.
l If you failed to open the page, you can remotely log into the Raspberry Pi via SSH and type in the command as shown below to disable all auto-run programs to release resource. Otherwise, there may be issues like camera initialization failure or occupied port.
sudo killall python3

l Type in the following code to run webServer.py:
sudo python3 adeept_darkpaw/server/webServer.py

l You can access the Raspberry Pi by IP address through a web browser only when it can successfully run webServer.py.
1.2 Getting Access to Web Controller
l A web controller is a web interface to control the robot product to perform various actions and it can be applied on any device that is able to run a browser, including PC, mobile phones, tablets, etc.
l If you've completed all installations based on the instructional document, it will be quite easy to open a web controller.
1. Check that your device is under the same LAN with the Raspberry Pi.
2. Obtain the Raspberry Pi's IP address (refer to the Software Installation section).
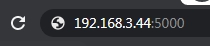
3. Open a web browser (recommended to use Chrome in case of any possible incompatibility with other browsers), enter the Raspberry Pi's IP address with the port :5000, for instance: 192.168.3.44:5000
Then the web controller will be loaded into the browser.
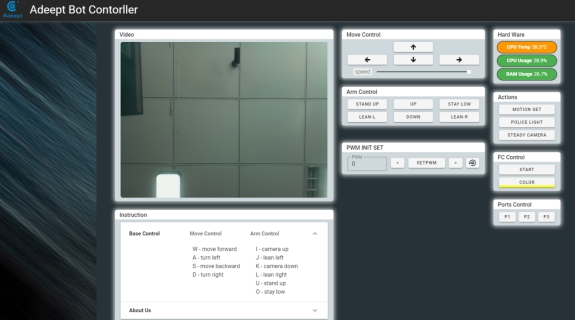
Modules on the web controller may vary from products. Most of them are explained below with the method for application. You can check modules on your web controller accordingly to better understand their functions and how to use them.
1.3 Function Overview of Web Controller
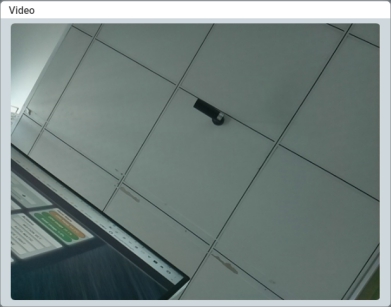
1. Video Module
Display the image captured by the camera.
2. Hard Ware Module
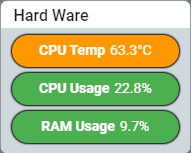
l CPU Temp: Shows the temperature of the Raspberry Pi CPU.
l CPU Usage: Shows the usage of the Raspberry Pi CPU
l RAM Usage: Shows the usage of the Raspberry Pi memory
3. Move Control Module
Control the movement of the robot towards the front, back, left, and right.
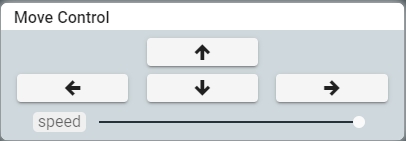
Speed: Slide to adjust the speed of the robot's movement, for robot with wheels. It's not supported for the Adeept DarkPaw Robot.
4. Arm Control Module
Control the robot's movements. The movement control for Adeept DarkPaw Robot is as follows:
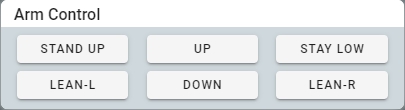
l UP: Camera view moves upwards, by lifting the forelegs and lowering the hind legs.
l DOWN: Camera view moves downwards, by lifting the hind legs and lowering the forelegs.
l STAND UP: Stand up – whole robot body rises.
l STAY LOW: Lie down – whole robot body gets low.
l LEAN-L: Robot tilts towards the left.
l LEAN-R: Robot tilts towards the right.
5. Actions Module

l MOTION GET: Click to start the watch dog mode. In this mode, the robot stays still and moves when motion is detected. The mobile object will be marked in a frame in the Video Module. Click again to disable the function.
l POLICE LIGHT: Turn on or off the police light. Under the mode, the LED light on the robot will flash like the police light. Click again to disable the function.
l STEADY CAMERA: Self-balancing mode. In this mode, the robot will try to keep itself as level as possible.
6. FC Control Module
Control the color detection function on/off and color setup.
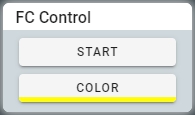
l COLROR: Select the color to be detected.
l START: Turn on/off the color detection function.
7. PWM INIT SET Module
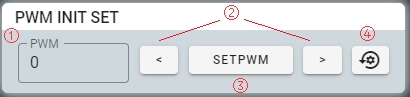
Adjust the initial angle of servo to fix angle error during assembly. Servo will rotate to the initial position when initialized.
① Enter the number of the PWM port connected with the desired servo in the textbox under PWM. Click the PWM textbox and the buttons for increase and decrease will appear. Click to choose a PWM port number.
② Click the two buttons to control the servo to slightly rotate clockwise/counterclockwise.
③ Click to save the current angle of the servo as the initial.
④ Click to initialize the angle of all servos to the factory default settings.
4. Ports Control Module
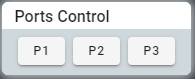
Control the Port 1, Port 2, and Port 3 on the board to turn on/off.
1.4 Q&A
l After the Raspberry Pi boots, I can't access the web controller page via "Raspberry Pi's IP address + :5000 (port number)" (e.g., 192.168.3.230:5000)
Take the following steps:
1. Type in the command "sudo killall python3", run the webServer.py program by "sudo python3 <your path of the webserver.py file>" (e.g., sudo python3 adeept_rasptank/server/webServer.py)
2. If error happens when running webServer.py, please check whether the camera is connected appropriately (metals of the camera flex cable and camera module should be in contact with each other)
l After the Raspberry Pi boots, I got access the web controller page via "Raspberry Pi's IP address + :5000 (port number)", but I saw a non-real-time, static video and couldn't control the robot to move.
Take the following steps:
1. Check whether the Raspberry Pi has rebooted or not. If it has, the "Connect Failed" message would be prompted within 1 minute on the web controller page, and the terminal logged into Raspberry Pi via SSH would not respond.
2. Possible reason for this issue: Low power of the battery. It's suggested to change high power batteries for controlling the robot via web controller.
3. Use 18650 battery with "high rate discharge" mark or that can support large current output of up to 4A.