Overview
In the first class, we have learned how to make an LED blink by programming the Arduino. Today, we will use the Arduino to control 8 LEDs, so that 8 LEDs showing the result of flowing.
Requirement
- 1* Arduino MEGA 2560
- 1* USB Cable
- 8* LED
- 8* 220Ω Resistor
- 1* Breadboard
- Several Jumper Wires
Principle
The principle of this experiment is very simple. It is very similar with the first class.
Key function:
●for statements
The for statement is used to repeat a block of statements enclosed in curly braces. An increment counter is usually used to increment and terminate the loop. The for statement is useful for any repetitive operation, and is often used in combination with arrays to operate on collections of data/pins.
There are three parts to the for loop header:
for (initialization; condition; increment) {
//statement(s);
}
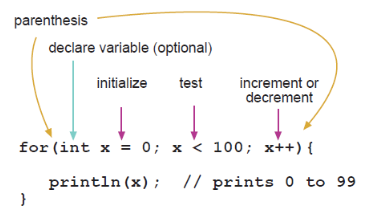
The initialization happens first and exactly once. Each time through the loop, the condition is tested; if it's true, the statement block, and the increment is executed, then the condition is tested again. When the condition becomes false, the loop ends.
Procedures
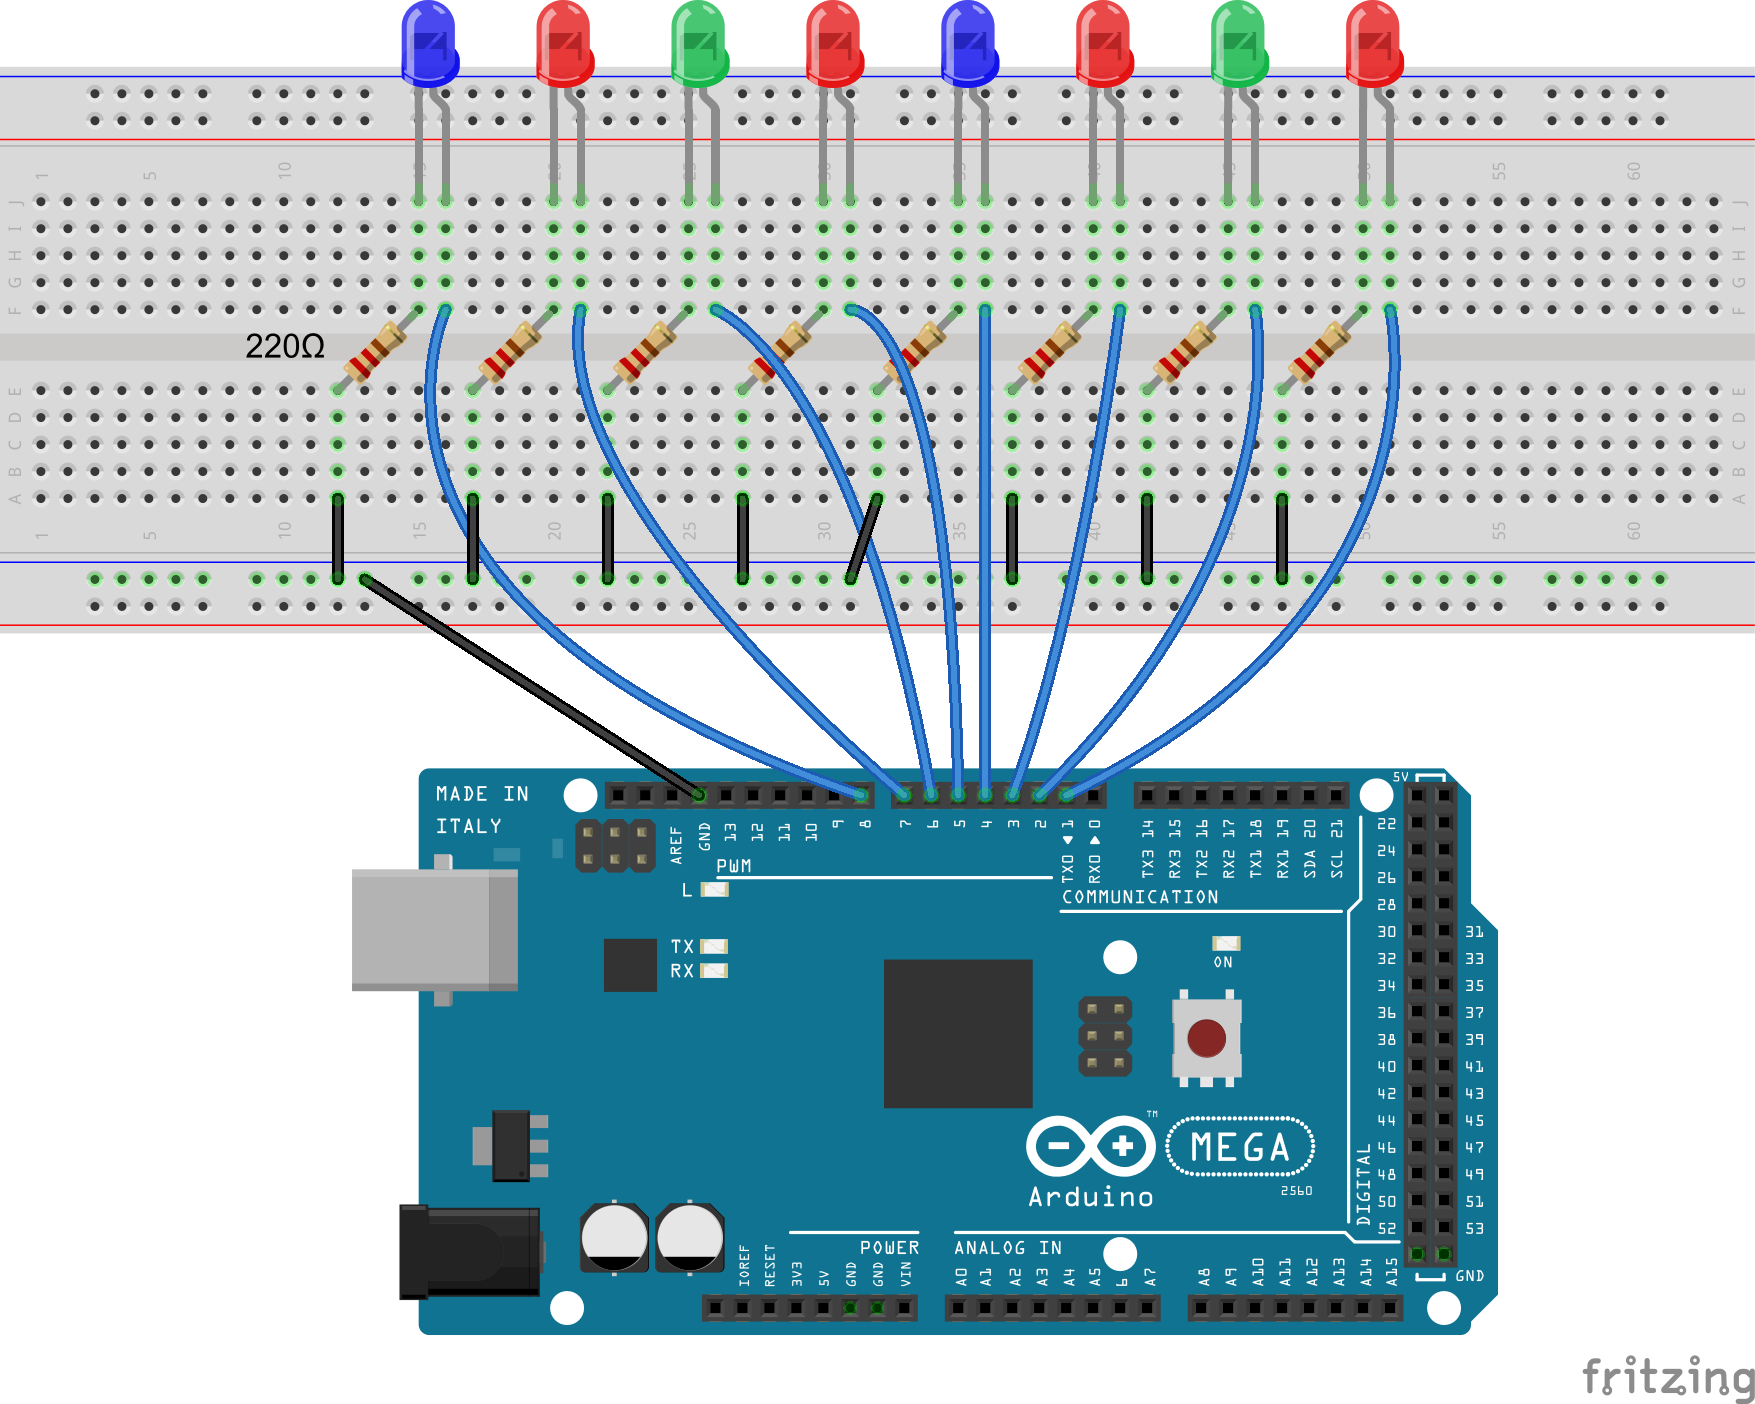
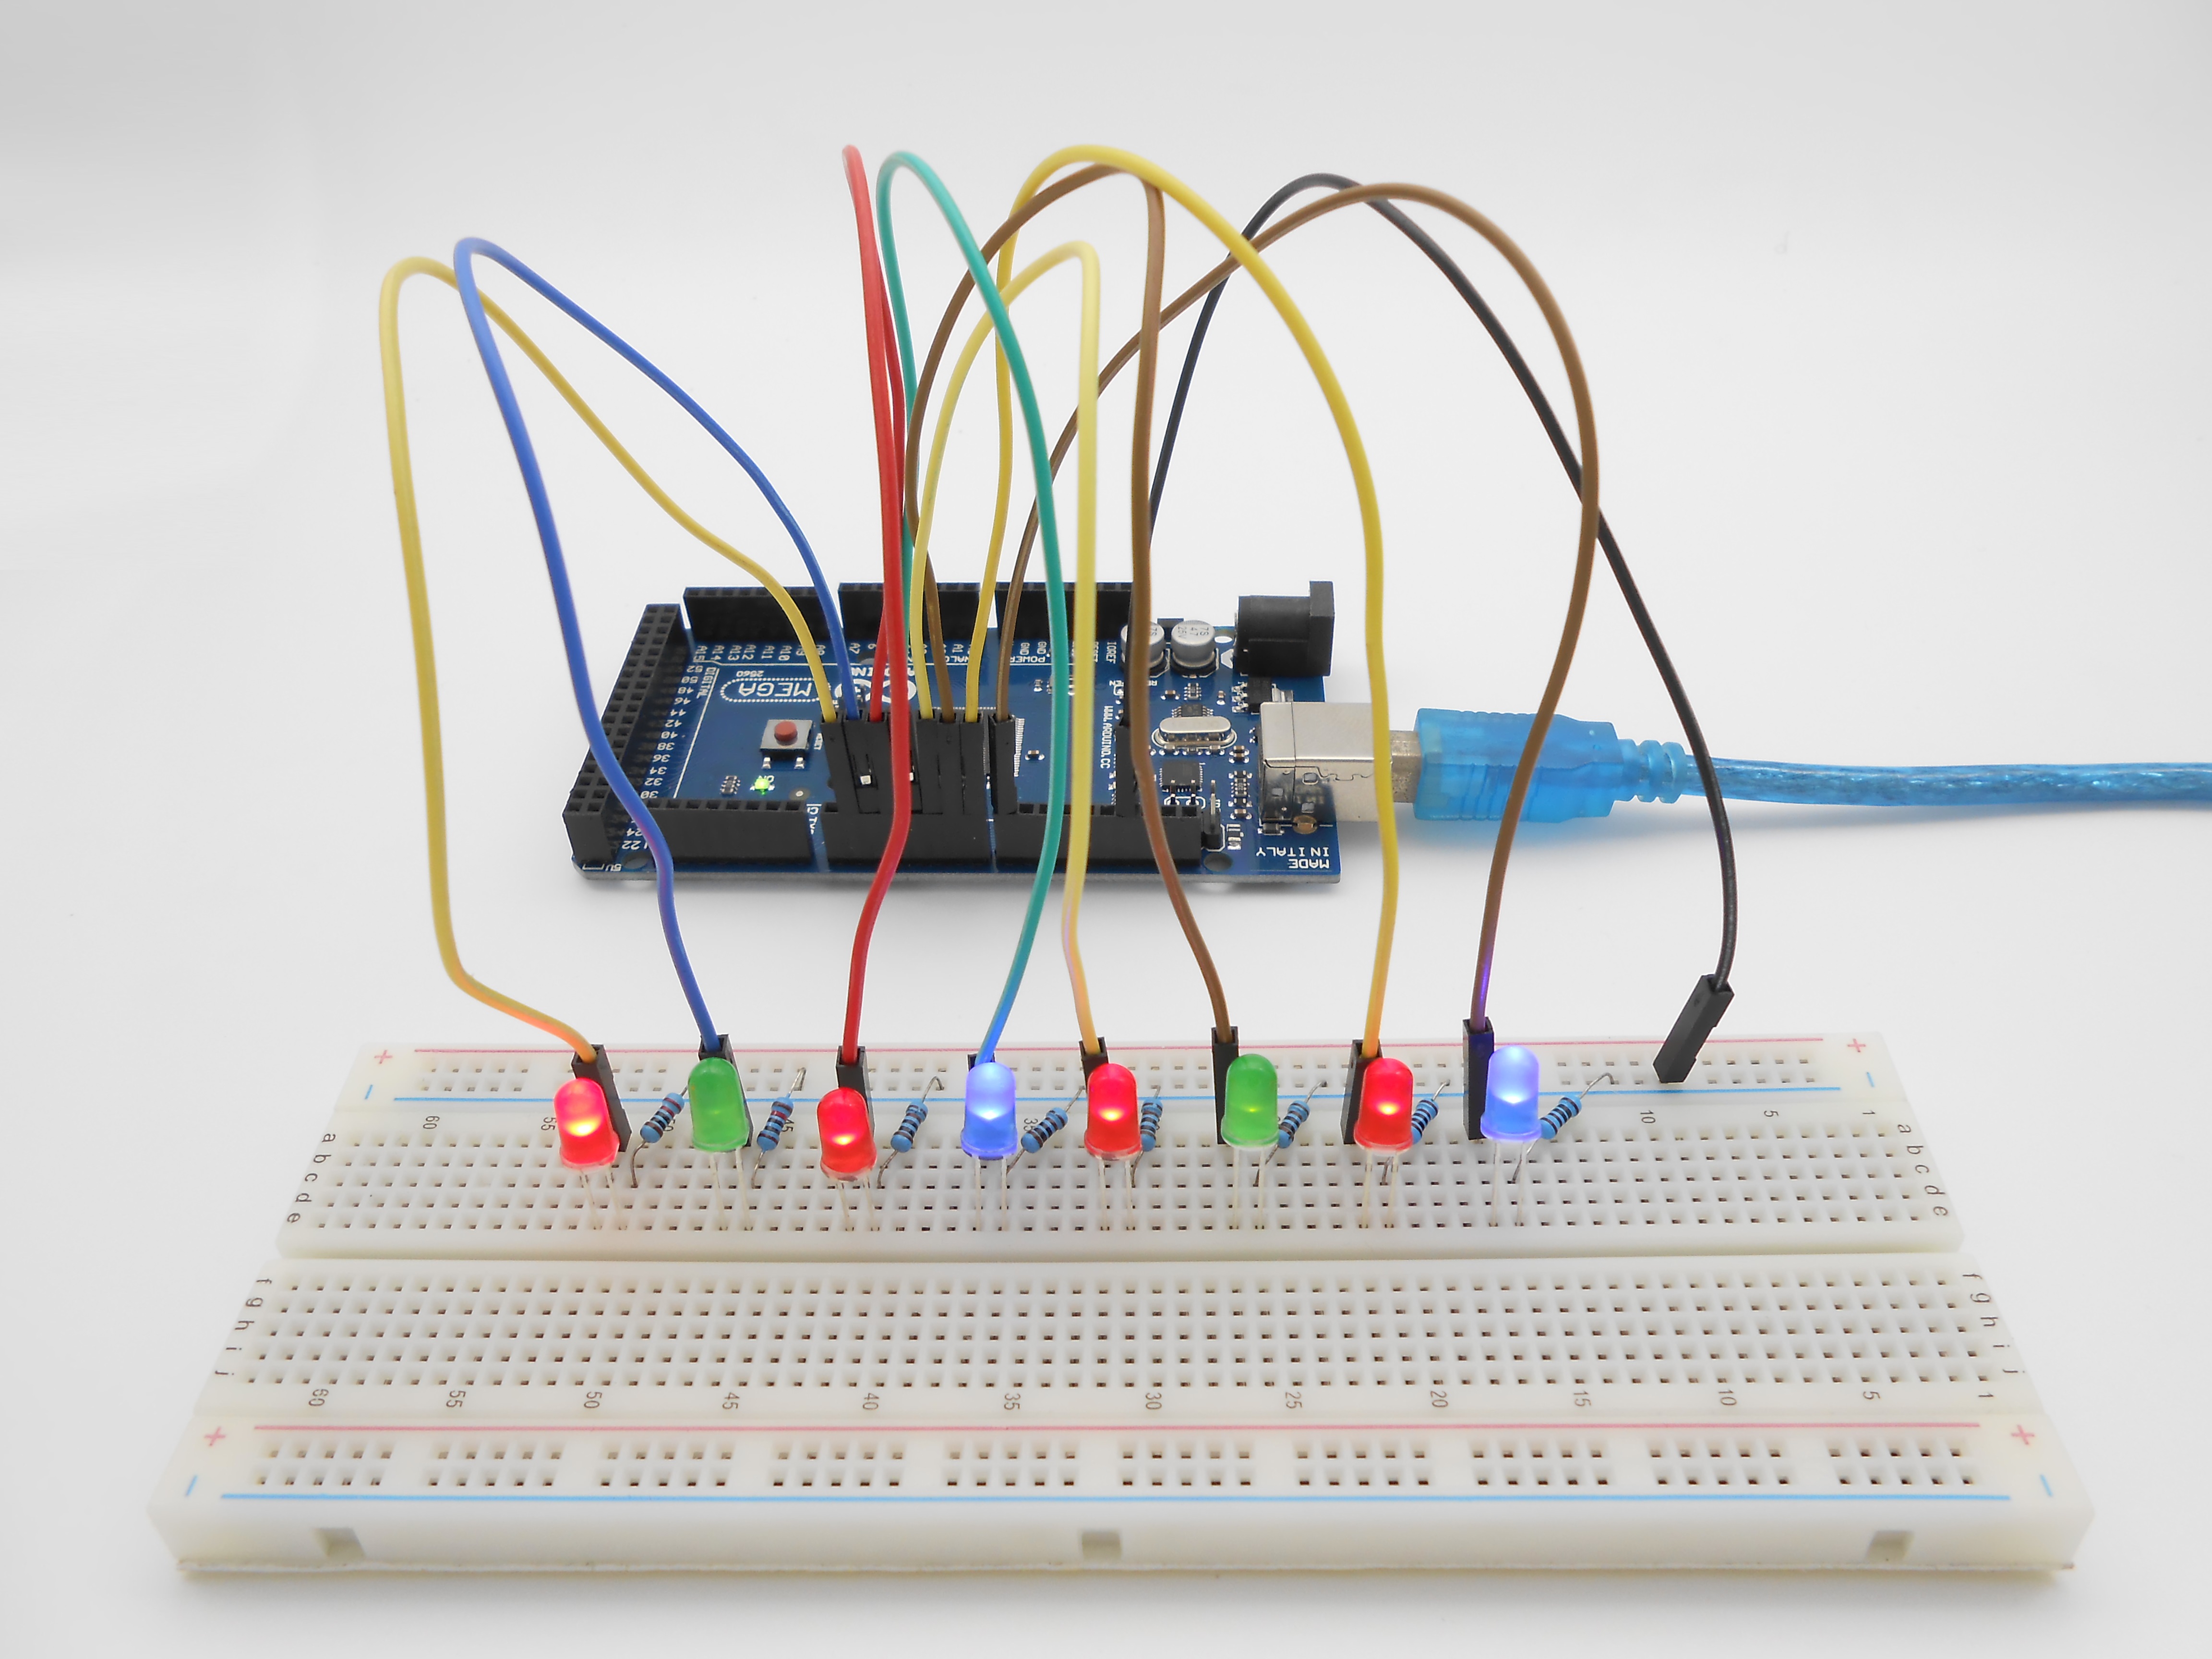
1. Build the circuit
2. Program
/***********************************************************
File name: 06_flowingLed.ino
Description: LED turn lighting control
Website: www.adeept.com
E-mail: support@adeept.com
Author: Tom
Date: 2015/12/27
***********************************************************/

void setup()
{
  unsigned char ledPin;           //ledPin will be set to 1,2,3,4,5,6, 7 and 8.
  for(ledPin=1;ledPin<=8;ledPin++)//In turn set 1 ~ 8 digital pins to output mode
  pinMode(ledPin,OUTPUT);         //Set the  ledPin pin to output mode
}

void loop()
{
  unsigned char ledPin;           //ledPin will be set to 1,2,3,4,5,6, 7 and 8.
  for(ledPin=1;ledPin<=8;ledPin++)//Every 200ms on in order LED1 ~ 8
  {
    digitalWrite(ledPin,HIGH);    //led on
    delay(200);                   //Delay 200 ms
  }
  for(ledPin=1;ledPin<=8;ledPin++)//Every 200ms off in order LED1 ~ 8
  {
    digitalWrite(ledPin,LOW);     //led off
    delay(200);                   //Delay 200 ms
  }
}
3. Compile the program and upload to Arduino MEGA 2560 board
Now, you should see 8 LEDs are lit in sequence from the right green one to the left, next from the left to the right one. And then repeat the above phenomenon.
Summary
Through this simple and fun experiment, we have learned more skilled programming about the Arduino. In addition, you can also modify the circuit and code we provided to achieve even more dazzling effect.