Overview
In this lesson, we will learn how to use a character display device—LCD1602 on the Arduino platform. First, we make the LCD1602 display a string "Hello Geeks!" scrolling,then display “Adeept” and “www.adeept.com” static.
Requirement
- 1* Arduino MEGA 2560
- 1* USB Cable
- 1* LCD1602
- 1* 10KΩ Potentiometer
- 1* Breadboard
- Several Jumper Wires
Principle
LCD1602 is a kind of character LCD display. The LCD has a parallel interface, meaning that the microcontroller has to manipulate several interface pins at once to control the display. The interface consists of the following pins:
● A register select (RS) pin that controls where in the LCD's memory you're writing data to. You can select either the data register, which holds what goes on the screen, or an instruction register, which is where the LCD's controller looks for instructions on what to do next.
● A Read/Write (R/W) pin that selects reading mode or writing mode
● An Enable pin that enables writing to the registers
● 8 data pins (D0-D7). The state of these pins (high or low) are the bits that you're writing to a register when you write, or the values when you read.
● There's also a display contrast pin (Vo), power supply pins (+5V and Gnd) and LED Backlight (Bklt+ and BKlt-) pins that you can use to power the LCD, control the display contrast, and turn on or off the LED backlight respectively.
The process of controlling the display involves putting the data that form the image of what you want to display into the data registers, then putting instructions in the instruction register. The LiquidCrystal Library simplifies this for you so you don't need to know the low-level instructions.
The Hitachi-compatible LCDs can be controlled in two modes: 4-bit or 8-bit. The 4-bit mode requires seven I/O pins from the Arduino, while the 8-bit mode requires 11 pins. For displaying text on the screen, you can do most everything in 4-bit mode, so example shows how to control a 2x16 LCD in 4-bit mode.
A potentiometer , informally a pot, is a three-terminal resistor with a sliding or rotating contact that forms an adjustable voltage divider. If only two terminals are used, one end and the wiper, it acts as a variable resistor or rheostat.
Key function:
●begin()
Specifies the dimensions (width and height) of the display.
Syntax
lcd.begin(cols, rows)
Parameters
lcd: a variable of type LiquidCrystal
cols: the number of columns that the display has
rows: the number of rows that the display has
●setCursor()
Position the LCD cursor; that is, set the location at which subsequent text written to the LCD will be displayed.
Syntax
lcd.setCursor(col, row)
Parameters
lcd: a variable of type LiquidCrystal
col: the column at which to position the cursor (with 0 being the first column)
row: the row at which to position the cursor (with 0 being the first row)
●scrollDisplayLeft()
Scrolls the contents of the display (text and cursor) one space to the left.
Syntax
lcd.scrollDisplayLeft()
Parameters
lcd: a variable of type LiquidCrystal
Example
scrollDisplayLeft() and scrollDisplayRight()
See also
scrollDisplayRight()
●print()
Prints text to the LCD.
Syntax
lcd.print(data)
lcd.print(data, BASE)
Parameters
lcd: a variable of type LiquidCrystal
data: the data to print (char, byte, int, long, or string)
BASE (optional): the base in which to print numbers: BIN for binary (base 2), DEC for decimal (base 10), OCT for octal (base 8), HEX for hexadecimal (base 16).
Returns
byte
print() will return the number of bytes written, though reading that number is optional
●clear()
Clears the LCD screen and positions the cursor in the upper-left corner.
Syntax
lcd.clear()
Parameters
lcd: a variable of type LiquidCrystal
Procedures
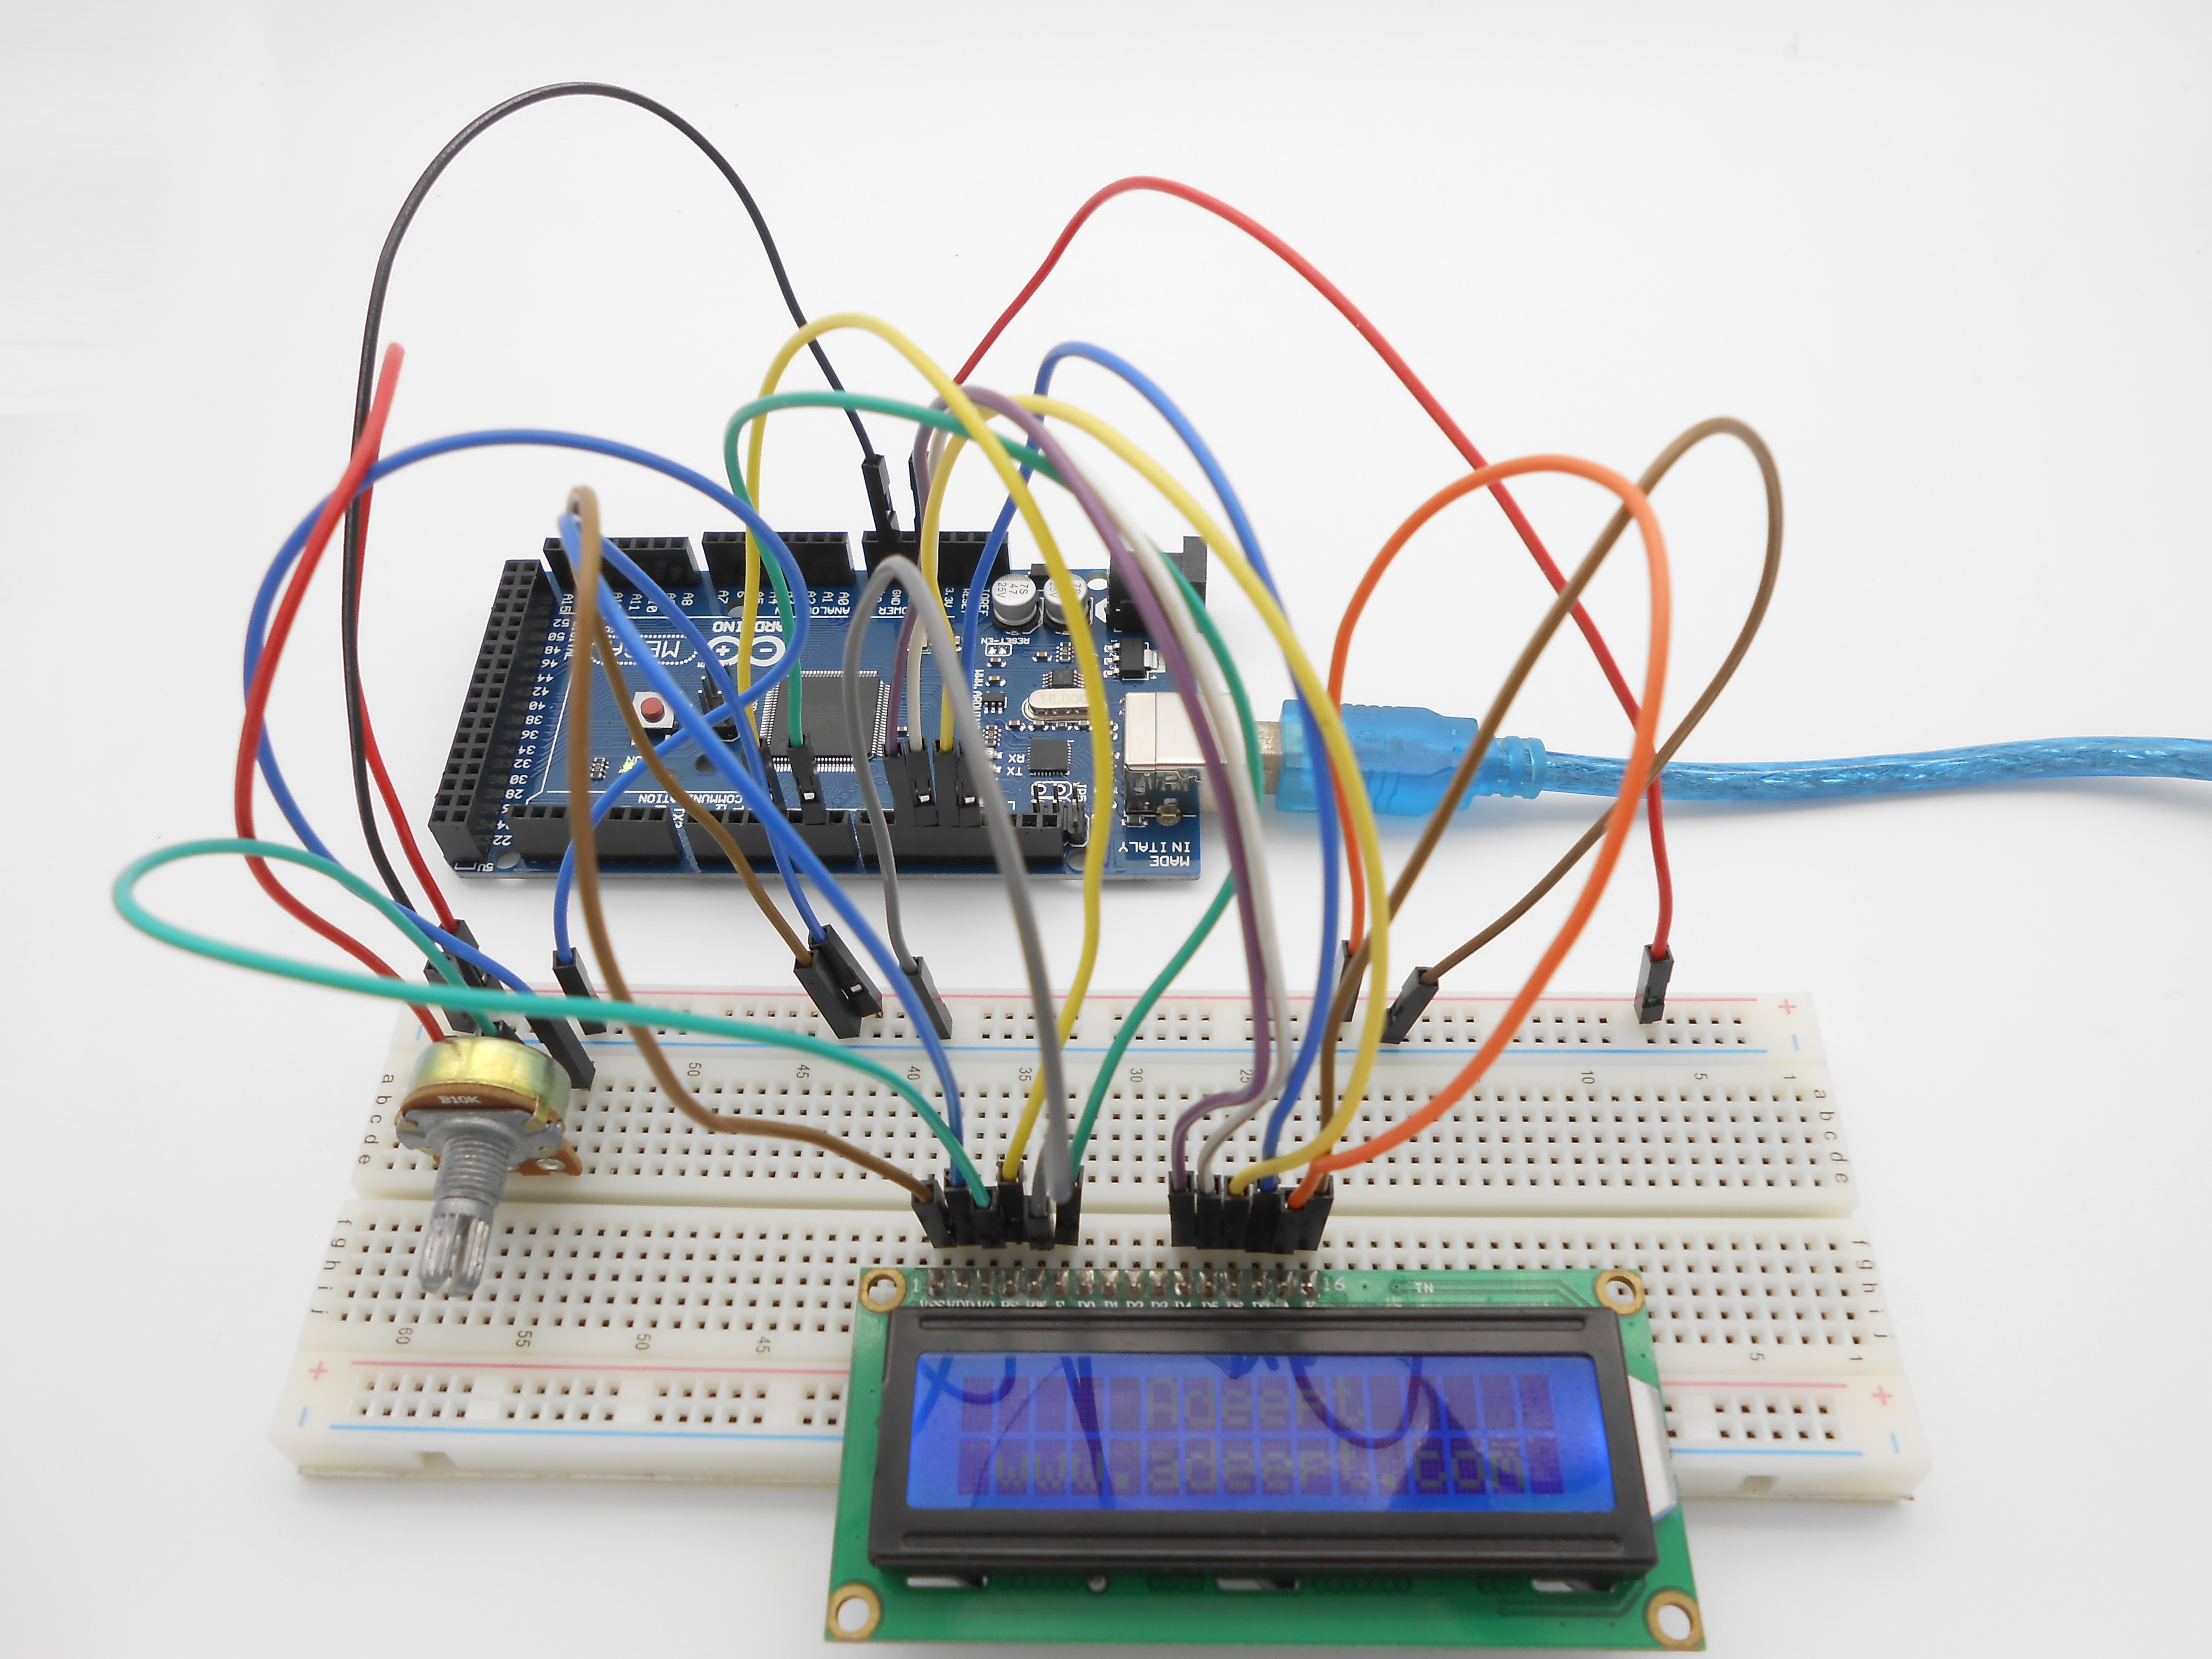
1. Build the circuit

2. Program
/***********************************************************
File name: 11_LCD1602.ino
Description: LCD1602 display a string "Hello Geeks!" scrolling,
             then display “Adeept” and “www.adeept.com” static.
Website: www.adeept.com
E-mail: support@adeept.com
Author: Tom
Date: 2015/12/27
***********************************************************/

#include <LiquidCrystal.h>

char array1[]="     Adeept     ";                //the string to print on the LCD
char array2[]="  hello geeks!                ";  //the string to print on the LCD
char array3[]=" www.adeept.com ";                //the string to print on the LCD

int tim = 250;  //the value of delay time

// initialize the library with the numbers of the interface pins
LiquidCrystal lcd(4, 6, 10, 11, 12, 13);

void setup()
{
  lcd.begin(16, 2);  // set up the LCD's number of columns and rows:
}

void loop()
{
    lcd.clear();  //Clears the LCD screen and positions the cursor in the upper-left corner
    lcd.setCursor(15,0);                   // set the cursor to column 15, line 1
    for (int positionCounter2 = 0; positionCounter2 < 30; positionCounter2++)
    {
      lcd.scrollDisplayLeft();             //Scrolls the contents of the display one space to the left.
      lcd.print(array2[positionCounter2]); // Print a message to the LCD.
      delay(tim);                          //wait for 250 microseconds
    }

    lcd.clear();  //Clears the LCD screen and positions the cursor in the upper-left corner.

    lcd.setCursor(0,0);                    // set the cursor to column 15, line 0
    for (int positionCounter1 = 0; positionCounter1 < 16; positionCounter1++)
    {
      lcd.print(array1[positionCounter1]); // Print a message to the LCD.
      delay(tim);                          //wait for 250 microseconds
    }

    lcd.setCursor(0,1);                    // set the cursor to column 15, line 1
    for (int positionCounter3 = 0; positionCounter3 < 16; positionCounter3++)
    {
      lcd.print(array3[positionCounter3]); // Print a message to the LCD.
      delay(tim);                          //wait for 250 microseconds
    }
}
3. Compile the program and upload to Arduino MEGA 2560 board
Now, you can see the string "Hello Geeks!" is shown on the LCD1602 scrolling, and then the string "Adeept" and "www.adeept.com" is displayed on the LCD1602 static.
Summary
I believe that you have already mastered the driver of LCD1602 through this lesson. I hope you can make something more interesting base on this lesson and the previous lesson learned.