All the code programs of our robot products have been open sourced on GitHub. You need to download them to the Raspberry Pi and install the relevant dependencies before they can run normally.
2.1 Downloading the code program to control the robot
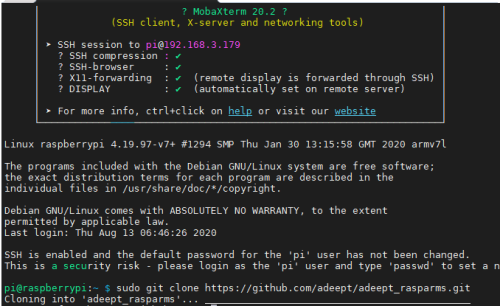
After successfully logging in to the Raspberry Pi, we need to download the code program to control the robot, and enter the following command in the console:
sudo git clone https://github.com/adeept/adeept_rasparms.git
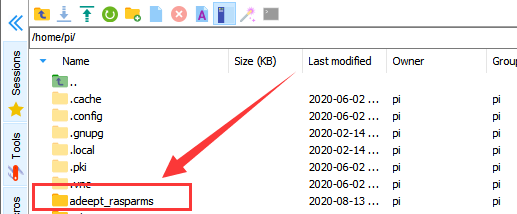
After successfully downloading, you will see a new folder adeept_rasparms in the file resource list on the left. This folder stores some very important program codes. We will teach you how to use it in detail in the following courses.
2.2 Installing the relevant dependency libraries of the robot
1. We have prepared a script program (setup.py) to install the dependent libraries needed by the robot and set up operations such as turning on the camera and automatically running at startup. This script program is in the directory of the adeept_rasparms folder you downloaded. You need to enter the following command in the command window of the Raspberry Pi to run it:
sudo python3 adeept_rasparms/setup.py

Press the "Enter" button and wait for the download and installation to complete.
2. After the download is complete, the following prompt will appear:

3. After the installation is complete, the Raspberry Pi will automatically disconnect the SSH connection and restart. At this time, if you are using the Raspberry Pi to connect with Putty, MobaXterm and other software, there will be an error message such as Network error: Software caused connection abort.Just close the prompt.
2.3 Running the program of the Raspberry Pi robot
Raspberry Pi will automatically run the program of the robot product every time it restarts. Specifically, every time it restarts, it will run [RobotName]/server/webServer.py. Replace [RobotName] with the name of your robot product program folder, but if without connecting the Raspberry Pi camera and the driver board RobotHAT, webServer.py will not run successfully. This is a normal phenomenon, because the program of the robot product needs to use the camera and the PCA9685 chip. Our RobotHAT uses PCA9685 to control the servo.Raspberry Pi communicates with PCA9685 with I2C. If RobotHAT is not installed on Raspberry Pi, communication failure will occur when instantiating PCA9685's dependent library, which will cause program error.
We can turn off the Raspberry Pi, install the camera module and RobotHAT, and turn it on again, so that webServer.py can run successfully.
Under normal circumstances, there is no need for people to manually run webServer.py, because every time the Raspberry Pi is turned on, webServer.py will be run automatically.
You can open Google Chrome, enter the IP address of the Raspberry Pi and add: 5000 after it, press enter to jump to the Raspberry Pi web page, an example is shown below:
If the page fails to open, you can log in to the Raspberry Pi by using SSH, and use the following command to end the robot program that automatically runs on startup to release resources. Otherwise, problems such as camera initialization failure or port occupation will occur. Enter the following command in the command window:
sudo killall python3
Use the following command to manually run webServer.py:
sudo python3 adeept_rasparms/server/webServer.py
2.4 Editing the code program in Raspberry Pi
To view and edit the code program in the Raspberry Pi on the MobaXterm terminal software, we provide two methods for reference.
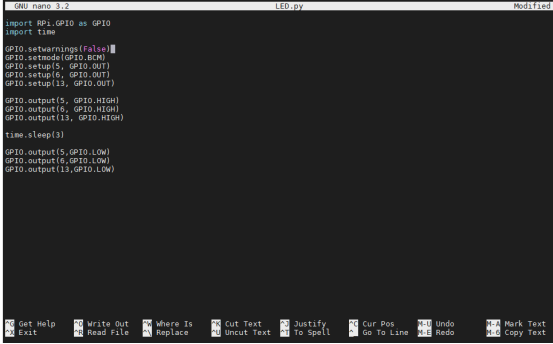
The first is to use Linux commands. For example, if you need to view the code program LED.py in this section of the course, then you can enter the following commands in the console of the MobaXterm terminal:
sudo nano LED.py

1. In this way, you can view our code program. You can modify and edit the code with the direction keys on the keyboard to realize the control function you want. But you need to learn and search about the command operation method of Linux nano. Here we provide several common operation commands about nano:
1. To save the modified program, you need to press the shortcut key Ctrl+O on the keyboard
2. To exit the code editing interface, you need to press the shortcut key Ctrl+X on the keyboard
3. To cut a line of code, you can use Ctrl+K
4. Paste the code, you can use Ctrl+U
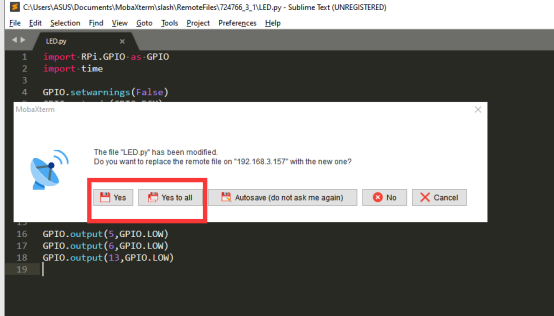
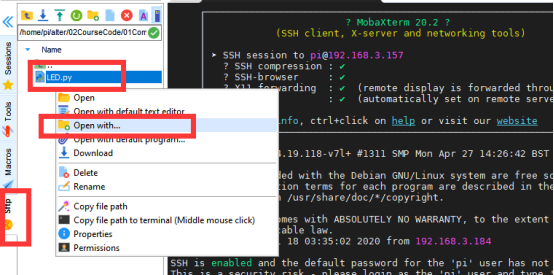
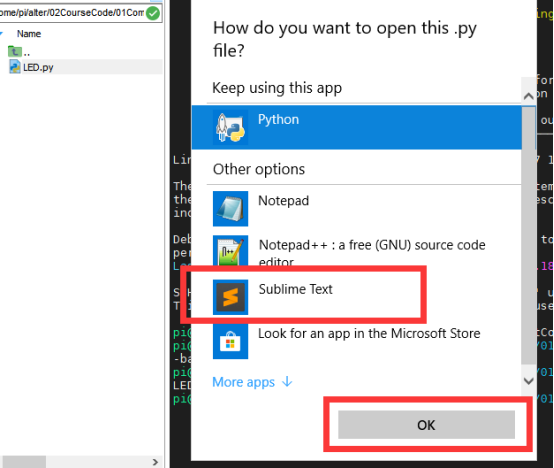
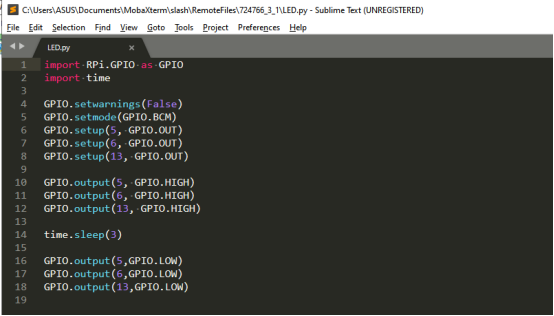
The second method is to use a third-party IDE tool to view and edit the code program of this lesson. You can find the file you want to edit in the file resource management system on the left side of MobaXterm, right-click the file, and click Open with , Choose your IDE, we recommend you to use Sublime Text IDE, you need to download it to edit files in the Raspberry Pi After editing: http://www.sublimetext.com/3. In this way, you can use your favorite IDE to edit the files in the Raspberry Pi. After editing, CTRL+S can save the files.
When you need to save the modified file, you can press the shortcut key CTRL+S, and then select Yes or Yes to all.