In this lesson, we will learn how to remotely control the robotic arm with the GUI.
11.1 How to open the GUI control interface
1. Open the terminal software MobaXterm:

2. Log in to your Raspberry Pi (the way to log in to Raspberry Pi has been introduced in Lesson 1):

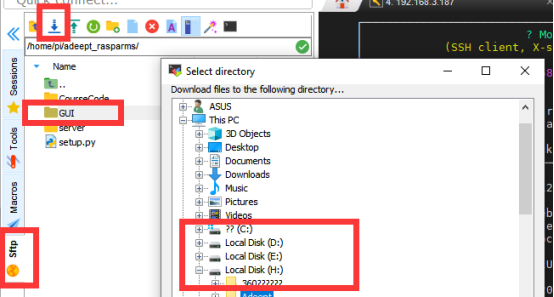
3. The relevant code programs of the RaspArm-S robot are stored in the folder of adeept_rasparms, which has been explained in "2.1 Downloading the Code Program for Controlling the Robot" in Lesson 2, you need to download the GUI folder to your computer under the directory of adeept_rasparms, click the GUI with the mouse, and then click the button to download the code program to the PC, and save it in the path of English letters, as shown in the figure below:
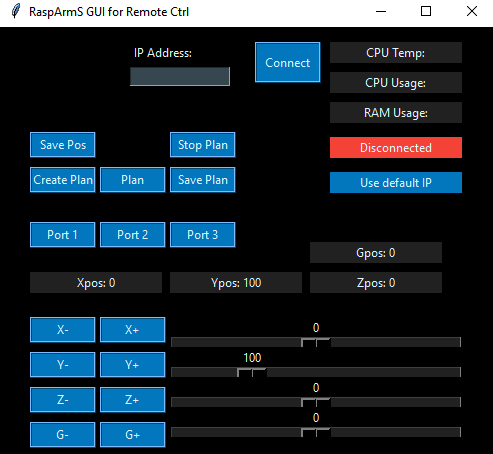
4. Then double-click on the PC to open the Python program GUI for Remote.py, you must make sure that the python environment has been installed on your PC. The GUI interface after opening is as follows:
【Pay attention】:
If you cannot connect, I suggest you turn off the Raspberry Pi again, and then turn on the Raspberry Pi again.
11.2 GUI function introduction
When studying this section, you only need to read and understand, you don’t need to do any click operations. We will provide an operation case in section 11.3.
(1) :
:
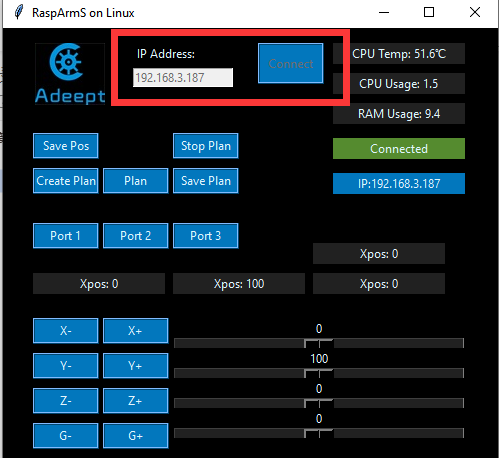
After opening the GUI control interface, you need to enter the IP address of the Raspberry Pi in the IP Address input field. Then click the Connect button to connect to the Raspberry Pi, after successful connection, as shown below:
(2) :
:
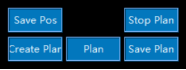
1. :
:
Click the button , and the robot arm will record the coordinate position of the X, Y, Z, G axis of the current end point of the robot arm.
2. :
:
Click the button and the end point of the robotic arm will repeatedly move between the positions of the different coordinate points recorded in the last save.
When the end point of the robotic arm is at different coordinate points (more than 2 coordinate points), click the button , and the robotic arm will record the position information of the different coordinate points in the form of an array [X, Y, Z, G]. If you click the button
 , the end point of the robotic arm will repeatedly move between the recorded positions of different coordinate points.
3. :
:
When you click the button , the previously saved coordinate point position information will be deleted, and you will enter the setting mode of re-recording the position of the end point of the robotic arm. You only need to click once. At this time, you can slide the X, Y, Z, and G sliders. To adjust the position of the end point of the robotic arm, each adjustment, combined with the button
  can save the coordinates of the end point of the robotic arm.
4. :
:
Click the button , the system will record the coordinate point position information of the end point of the robotic arm in the form of an array [X, Y, Z, G], and save it as a ".json" file, which will be saved in the course routine as a "plan.json" file.
5. :
:
Click the button and the robot arm will stop moving.
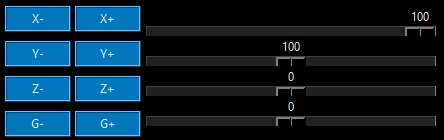
(3)
1. [X+ and X-]: Controlling the end point of the robotic arm to move left and right
(1) X+:
If the x value becomes larger, the end point of the robotic arm will shift to the right. It can be adjusted by the slider on the right.
(2) X-:
If the x value becomes smaller, the end point of the robotic arm is shifted to the left.
2. [Y+ and Y-]: Controlling the end point of the robotic arm to move back and forth
(1) Y+:
If the Y value becomes larger, the end point of the robotic arm moves forward. It can be adjusted by the slider on the right.
(2) Y-:
If the Y value becomes smaller, the end point of the robotic arm moves backward.
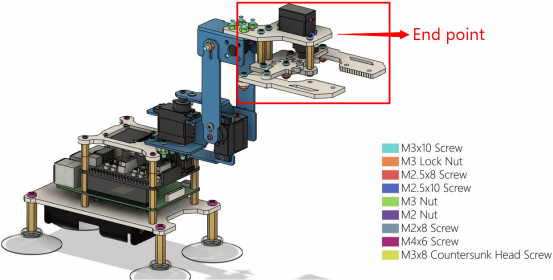
The area about the end point of the robotic arm is as follows:
3. [Z+ and Z-]: controlling the end point of the robotic arm to move up and down
(1) Z+:
If the Z value becomes larger, the end point of the robotic arm moves upward. It can be adjusted by the slider on the right.
(2) Z-:
If the Z value becomes smaller, the end point of the robotic arm moves downward.
4. [G+ and G-]: controlling the opening and closing of the mechanical arm clip
(1) G+:
If the G value becomes larger, the mechanical arm clamp is closed. It can be adjusted by the slider on the right.
(2) G-:
If the G value becomes smaller, the mechanical arm clip opens.
11.3 Controlling the end point of the robotic arm to move between the new position points
When you open the GUI control application for the first time, click the button , and the robot arm will repeat the movement between the last recorded and saved position points (must be 2 different positions), then how to change the end point of the robotic arm to move at different points? Let's learn together.
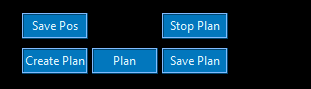
First click the button to stop the moving robot arm, and then click the button
 to start recording a new position point. At this time, you need to combine the X, Y, Z, and G sliding buttons in the figure below to locate the end point of the robot arm to make adjustments, such as sliding the X slide bar to the far right, and turning the end point of the robotic arm to the right. At this time, we need to save the position of this coordinate point. By clicking the button
 , we can save the current position; then we also need to record the new position again, continue to slide the X slide bar to the middle position, click the button
  at this time to save the current position; continue to slide the X slide bar to the leftmost position, click the button
 at this time, save the current position; now we have recorded three different position points, now click the button
 , the end point of the robotic arm will repeat the movement between the three different position points just recorded. If you want to continue running the location you just recorded and saved when you turn on the Raspberry Pi next time, then you can record the location information by clicking the button
 , and that's it.