In this lesson, we will learn how to use multi-threading to control RaspArms servo.
17.1 Introduction to Multithreading
This lesson introduces the use of multi-threading to realize the control of 180° servo. Multi-threading is a very common operation that we use in robot projects, because robots have high requirements for real-time response. When performing a certain task, it is necessary to try not to block the main thread communication.
Multithreading is similar to executing multiple different programs or tasks at the same time. Multithreading has the following advantages:
1. Using threads to put time-consuming tasks in the background for processing.
2. Improving the operating efficiency of the program.
3. The encapsulated multi-threaded task is more convenient to call, similar to the non-blocking control method, that is, the control method of the servo is encapsulated by multi-threading
We use Python's threading library to implement multi-threaded control of the robot. The thread is the smallest unit of work in the application. The current Python version does not yet provide multi-thread priority, thread group, thread can not be stopped, suspended, resumed, and interrupted.
17.2 Preparation
You need to prepare the assembled RaspArm-S robotic arm. Make sure that the robotic arm has been connected to the circuit according to the assembled circuit diagram. Refer to "10.2 Robotic Arm Assembly Tutorial" for details.

17.3 Controlling the servo with multiple threads
17.3.1 Learning the code program of multi-thread control servo
We use the following code to implement multi-threaded control of the servo. Here, we use Subline IDE to view and edit the code program of this lesson. Please see section 2.4 in Lesson 2 for specific methods. The specific code and comments are as follows:
In the file manager of the MobaXterm terminal, find the adeept_rasparms/server directory and open the code of this lesson: mutiTest.py.
Import the library socket for TCP communication, import the library threading for enabling multi-threading and the library raspArms for controlling the servo.

Instantiate the servo control object and start the thread that controls the servo.

This method is used to receive information from the TCP client and perform corresponding actions.

This method is used to establish a TCP server. After the server is established, it starts to monitor the client connection. After the connection is successful, runTcp() is called to receive instructions from the client.

Define the information related to TCP communication, the port number needs to be consistent with the client.

Set up a TCP server.

Start listening for client connections.

The client connects successfully.

Start receiving instructions from the client.

Instantiate the thread object.

Start the thread guard so that when the main thread ends, this thread will also end.

Start the thread.

This loop is used to keep the main thread from exiting.

17.3.2 Running the code program of multi-thread control servo
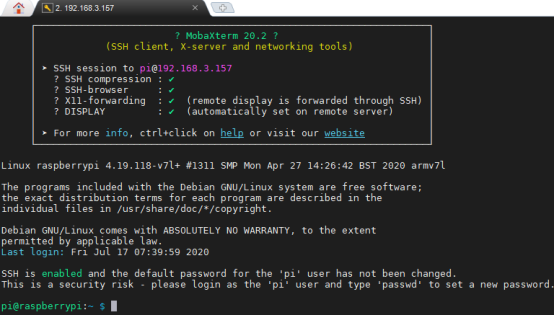
1. Open the terminal software MobaXterm:

2. Log in to your Raspberry Pi (the way to log in to Raspberry Pi has been introduced in Lesson 1):
3. Enter the Course Code folder, this folder stores the sample code program to control the robot, enter the following command:
cd adeept_rasparms/server

4. Enter the command to display the contents of the current directory:
ls

5. When using the Servo module, we need to install the Python dependency library to control Servo: Adafruit_PCA9685, enter the following command in the console of the command window:
sudo pip3 install adafruit-pca9685

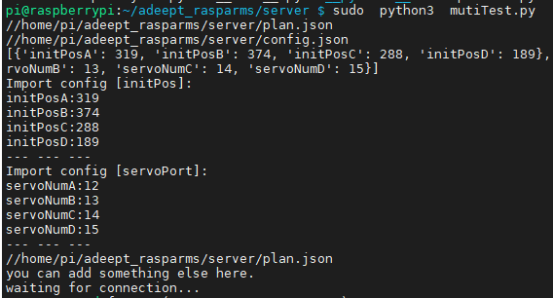
6. mutiTest.py is the sample code for this lesson, enter the command to run this program:
sudo python3 mutiTest.py
After successful operation, you will see the following interface, prompting you to establish a connection with the Raspberry Pi. We follow the next 7th step to open the GUI application control program on the PC.
7. Open the GUI application on your computer: GUI for Remote.py (there are related operation methods in Lesson 11, find GUI in the directory of adeept_rasparms, click the button to download the GUI folder to the PC), in the PC double-click to open the GUI for Remote.py in the GUI folder (you must have Python installed on your computer), and the opened interface is as follows:
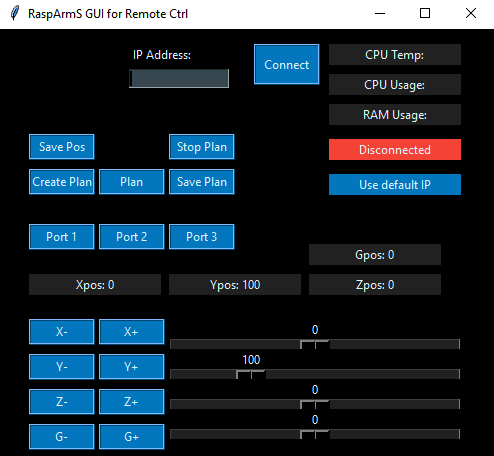
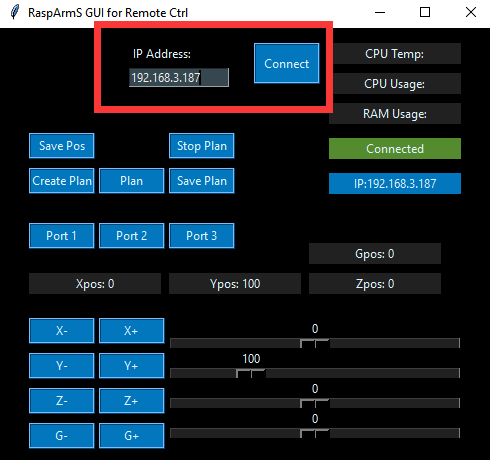
8. You need to enter your Raspberry Pi IP address in  , and then click the Connect button. After the connection is successful, the button
  on the right will turn green: with the GUI control interface, you can operate the robotic arm.
17.4 Controlling the end point of the robotic arm to move between the new position points
When you open the GUI control application for the first time, click the button , and the robot arm will repeat the movement between the last recorded and saved position points (must be 2 different positions), then how to change the end point of the robotic arm to move at different points? Let's learn together.

First click the button to stop the moving robot arm, and then click the button
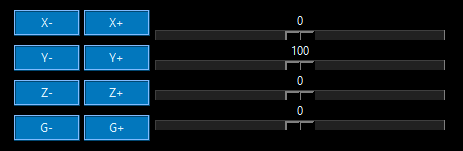
 to start recording a new position point. At this time, you need to combine the X, Y, Z, and G sliding buttons in the figure below to locate the end point of the robot arm to make adjustments, such as sliding the X slide bar to the far right, and turning the end point of the robotic arm to the right. At this time, we need to save the position of this coordinate point. By clicking the button
 , we can save the current position; then we also need to record the new position again, continue to slide the X slide bar to the middle position, click the button
 at this time to save the current position; continue to slide the X slide bar to the leftmost position, click the button
 at this time, Save the current position; now we have recorded three different position points, now click the button
 , the end point of the robotic arm will repeat the movement between the three different position points just recorded. If you want to continue running the location you just recorded and saved when you turn on the Raspberry Pi next time, then you can record the location information by clicking the button
 , and that's it.
When you click the X, Y, Z, G buttons to adjust, the coordinate position of the end point of the robotic arm will be printed in the command window of the Raspberry Pi.
