In this section of the course, we will learn the use of Micro:bit's development environment and programming tools.
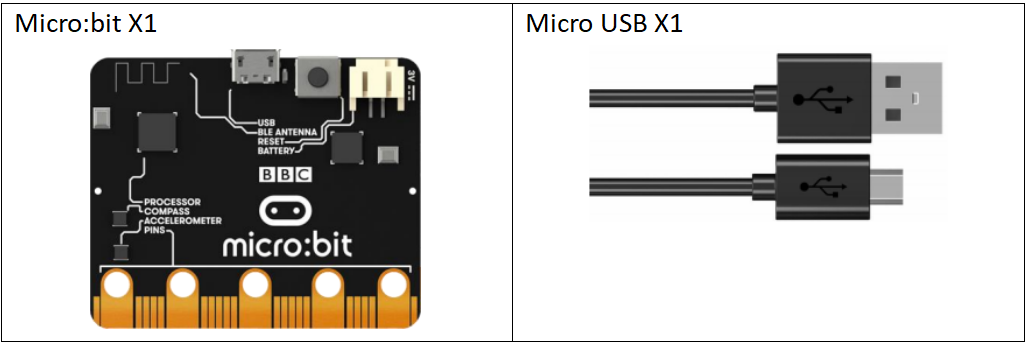
4.1 Components to be prepared
4.2 Micro:bit development environment
There are a huge number of possible coding environments that you can use to program the micro:bit.
Among the most popular are the official ones listed at http://microbit.org/code as well as the offline Mu editor.
For more information about Micro bit's development environment and IDE, you can open this website:
https://tech.microbit.org/software/
In our course, we use these two programming tools to conduct course project experiments: MakeCode Editor and Mu Editor.
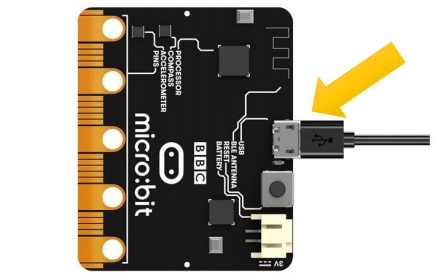
4.3 Circuit
Connect micro:bit and PC with a Micro USB cable.
4.4 MakeCode Editor
4.4.1 What is Microsoft MakeCode?
Microsoft MakeCode is a free, open source platform for creating engaging computer science learning experiences that support a progression path into real-world programming.
Microsoft’s MakeCode editor is the perfect way to start programming and get creating with the BBC micro:bit. The colour-coded blocks are familiar to anyone who’s previously used Scratch, and yet powerful enough to access all the features of this tiny computer. You can also switch to JavaScript to see the text-based code behind the blocks.
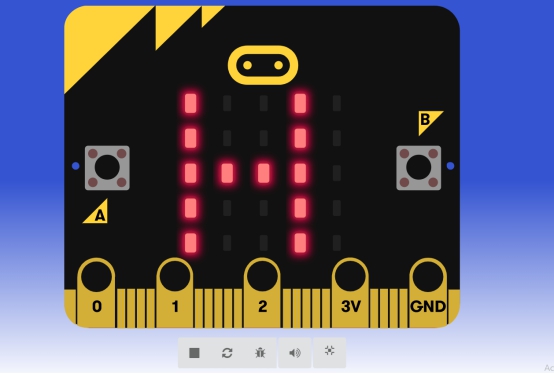
Simulator:
An interactive simulator provides students with immediate feedback on how their program is running and makes it easy to test and debug their code.
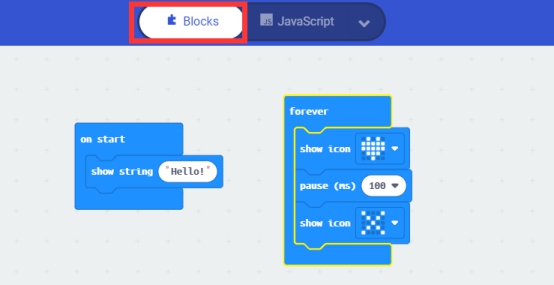
Block Editor:
Students new to coding can start with colored blocks that they can drag and drop onto their workspace to construct their programs.
JavaScript Editor:
When they are ready,students can move into a full-featured JavaScript editor with code snippets,tooltips,and error detection to help them.
4.4.2 How to open the MakeCode editor?
(1)Log in to the website
1.You need to enter the URL in the address bar of Google Chrome:
https://makecode.microbit.org/
2.After successfully opening the website, the following interface appears:

(2)How to create a project
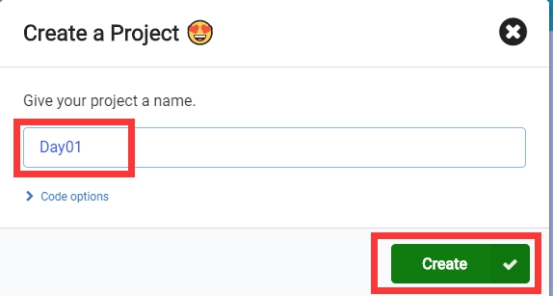
1.Click the  button in the lower left corner to create a new project. Enter the name of the new project in the pop-up input box, and then click the
  button to confirm:
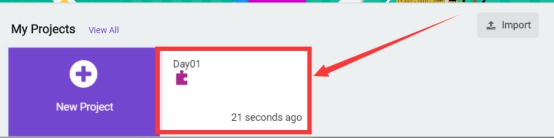
After clicking the  button, the item created this time will be automatically retained next to the
  button. When you use it next time, you can click it to open the item you edited last time (if you clear the cache of Google Chrome, then This newly created project will not be retained).
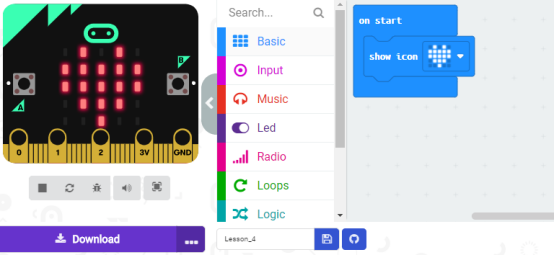
2.Then enter the programming interface of MakeCode Editor:
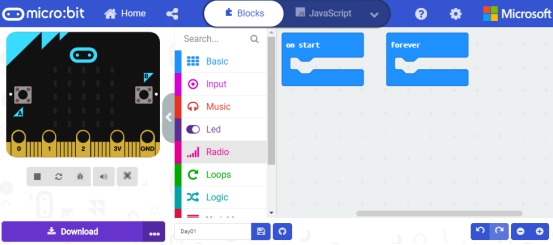
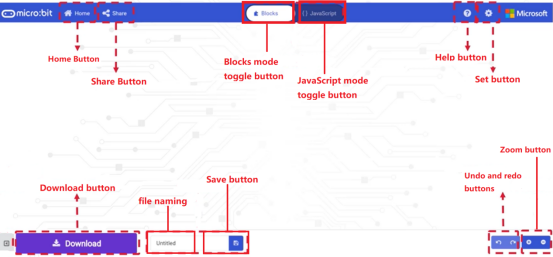
(3)Introduction to the functional interface of MakeCode Editor
Window area:
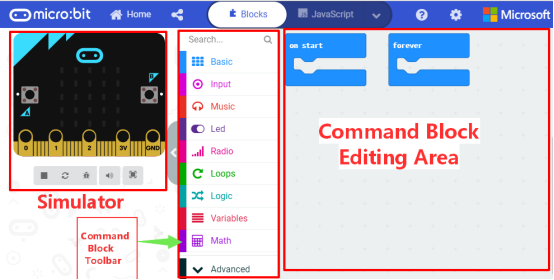
Menu button:
(4)Start programming
Now we start to write the first program. When the Micro:bit is turned on, it will display a "heart" pattern.
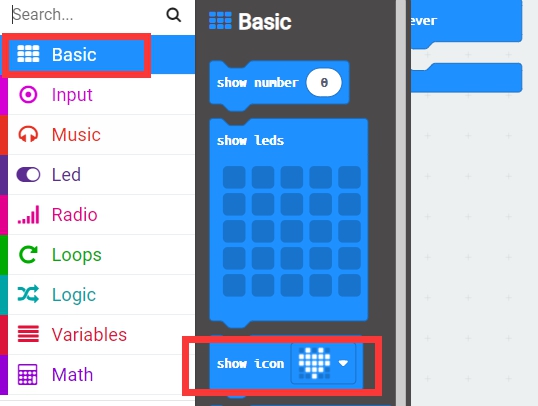
1.You need to find the  command block in
  in the "Command Block Toolbar", as shown below:
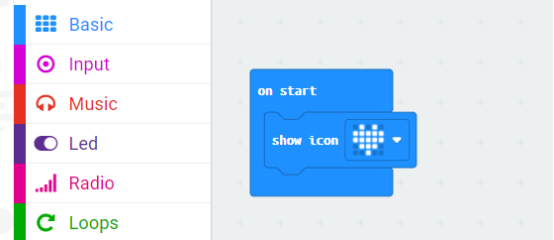
Drag  to the "Command Block Editing Area" on the right, the program is completed, as shown below:
(5)Download the program (code) to Micro:bit
There are two ways to download the completed program (code) to Micro:bit:
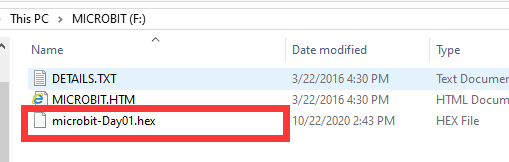
1.Connect micro:bit and PC with a Micro USB cable. Open  on the computer desktop, you can see a drive named "MICROBIT" in "devices and drives":
 ,This "MICROBIT" is the storage disk of Micro:bit (similar to U disk, boot disk), as shown below:

Type 1: Download the program directly to Micro:bit
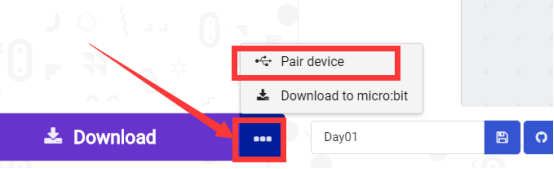
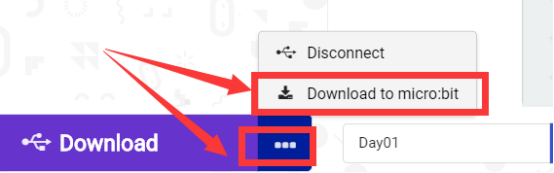
1.After writing the program in the MakeCode Editor, you need to "Pair device" first, click the  button to the right of
  in the lower left corner, and then click the
  option, as shown in the figure below:
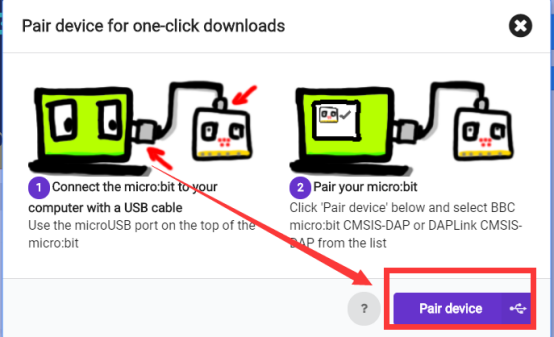
Then click  in the lower right corner
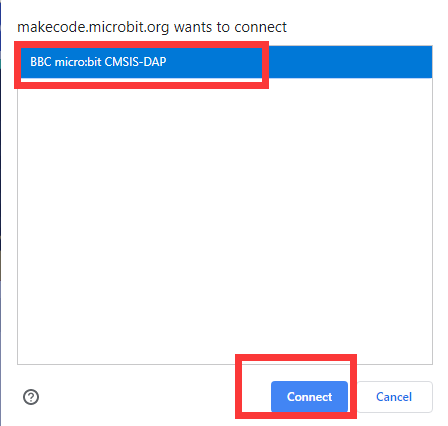
Then the following dialog box will pop up, select  , then click
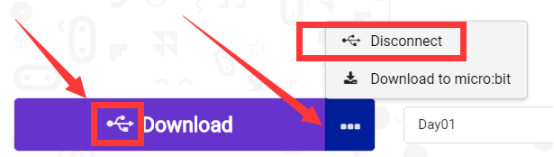
After successfully pairing the device, the  button will change to
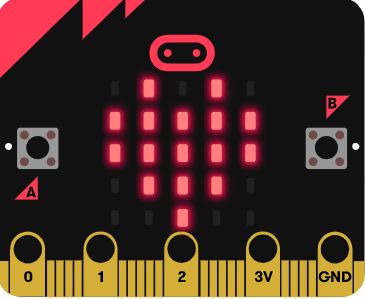
2.Start to download the program to the Micro:bit, click the  button, and usually download the program directly to the Micro:bit, and wait for the download to complete. After a successful download, your Micro:bit will restart and run the program you just downloaded. A
  graphic is displayed on the LED screen, as shown below:
【Note】
If after clicking the  button, Micro:bit does not respond or displays
  graphics, then you need to re-click the
  button on the right of
  , and then click
 to observe the Micro:bit situation again, as shown in the figure below:
If you encounter problems, please send us an email:support@adeept.com
Type 2: Copy the program to Micro:bit
1.This method is suitable for directly clicking  to download the program without clicking
  for device pairing. At this time, the downloaded program file is a file in the "HEX" format. The "HEX" file is a file that is directly executed by the single chip microcomputer. All are hexadecimal codes (displayed as ASCII codes), and the downloaded file will be saved on your computer:
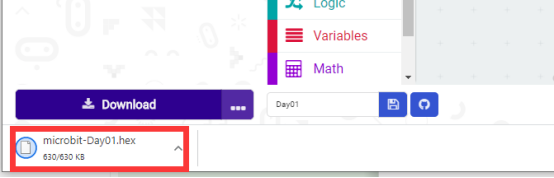
You can find it through the "download" path of your Google Chrome:

![]()
2.You need to copy the file "microbit-Day01.hex" to the storage disk "MICROBIT" of Micro:bit, then Micro:bit will execute this program, and it will restart during the execution. You should pay attention to Micro:bit .
4.4.3 How to import ".hex" project file in MakeCode editor
In each lesson, the ".hex" project file is provided, so how to use the MakeCode editor to import the ".hex" project file?
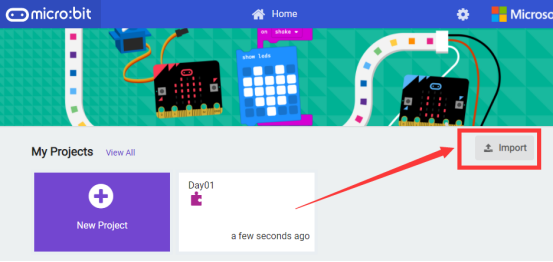
1. On the HOME interface, you can import external ".hex" files by clicking the "Import" button:
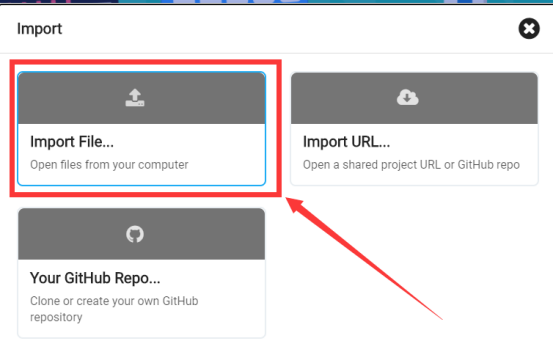
In the pop-up dialog box, select "Import File", as shown below:
Click“Choose File”:

![]()
Find out the code file of this lesson:
BBC_Microbit_Sensor\Code\Lesson_16\BlockCode
Select a “.py” file and click Open:
2.Note whether the file has been loaded in the window below, and then click the "Go ahead!" button, as shown below:
3.After successfully opening the file as shown below:
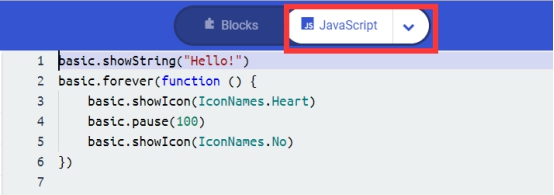
4.The second way is to click the  button in the upper right corner on the programming interface of the MakeCode editor, and select the second option
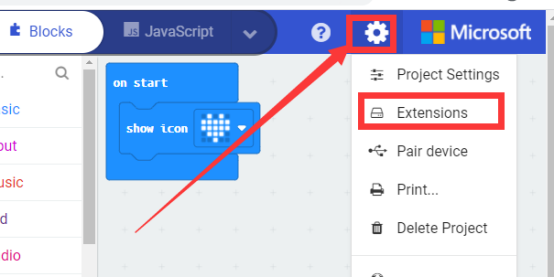
5.At the end of the interface, you will find the  button as shown below, click it:
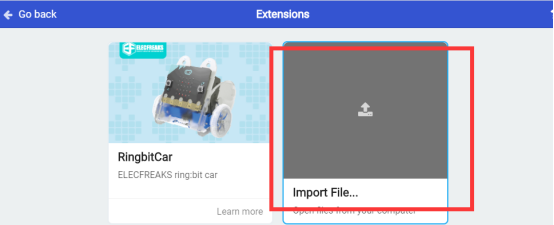
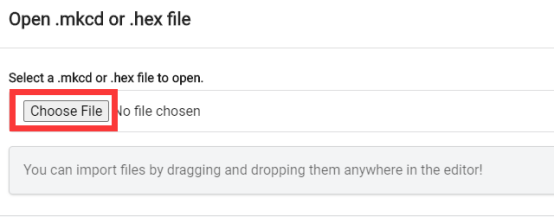
6.Click “Choose File”
Find the code file for this lesson:
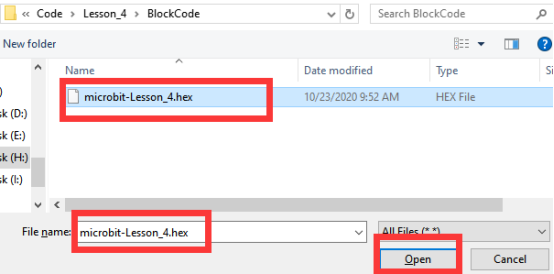
BBC_Microbit_Sensor\Code\Lesson_4\BlockCode
Select the ".hex" format file and click Open:

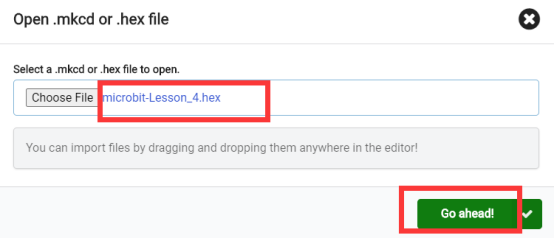
7.Note whether the file has been loaded in the window below, and then click the "Go ahead!" button, as shown below:

8.After successfully opening the file as shown below:

4.5 Mu Editor
4.5.1 What is Mu Editor?
Mu is a Python code editor for beginner programmers based on extensive feedback given by teachers and learners.
Micro:bit can be programmed in Python. Since micro:bit is a microcontroller, the hardware difference makes it not support pure Python. Here we use MicroPython, which is specially designed for micro:bit.
MicroPython is a version of the popular Python programming language for devices like the micro:bit.It’s free software: creating, maintaining and documenting MicroPython is the work of an international team of volunteers.
There are many ways to use MicroPython on the micro:bit,Here we use Mu Editor.
For more information about Mu Editor, please visit the following website:
4.5.2 How to install Mu on Windows with the Official Installer?
In our course project, all course code demonstrations are operated on the Windows system, so in the course manual, we only introduce how to install Mu Editor under the Windows system.
1.For how to install Mu Editor on Mac OS, please refer to this guide:
How to install Mu on macOS with the Official Installer
2.For how to install Mu Editor on Raspberry Pi, please refer to this guide:
How to install Mu on a Raspberry Pi
3.For more knowledge about Mu Editor, please refer to this website:
Let’s start learning "How to install Mu on Windows with the Official Installer?"
Installing Mu in Windows is super easy.Mu works on Window 7, 8 and 10 in 32 bit and 64 bit. It’s a good idea to make sure your system to up-to-date with all Windows updates.If you are in an educational setting you may need to get your system administrator to run the installer for you.
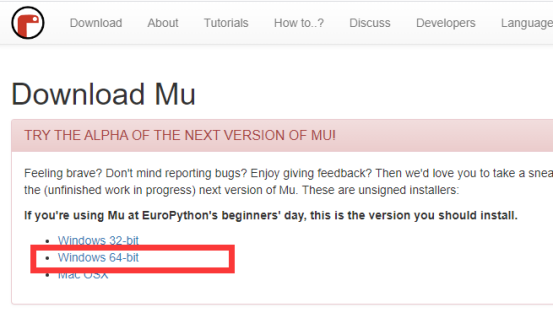
Step 1 - Download Mu Installer
1.Enter the following URL in Google Chrome:
https://codewith.mu/en/download
2.Choose your Windows system file download:
Step 2 - Run the installer
1.Find the installer you just downloaded (it’s probably in your Downloads folder):

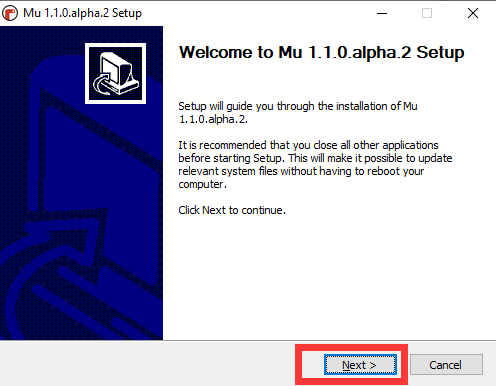
Step 3 - Start the install
1.Double-click the installer to run it.Confirm the version of Mu you’ll be installing and click “Next”.
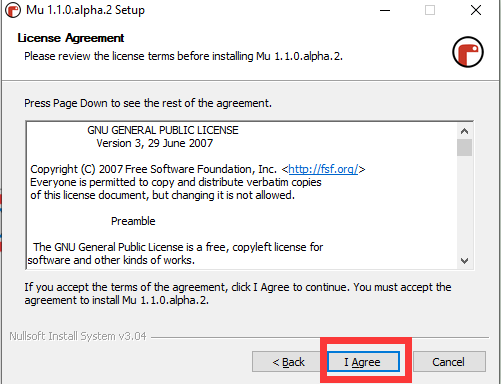
2.Review the license and click “I Agree”:
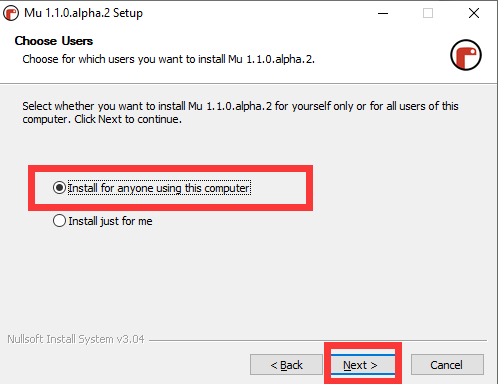
3.Select if you want to install Mu for all users,or just yourself and click“Next”.
【Note】:
if your user account does not have administrative rights this step might not appear on your installation process.If it does,the installer might only work if you select the“Install just for me”option.
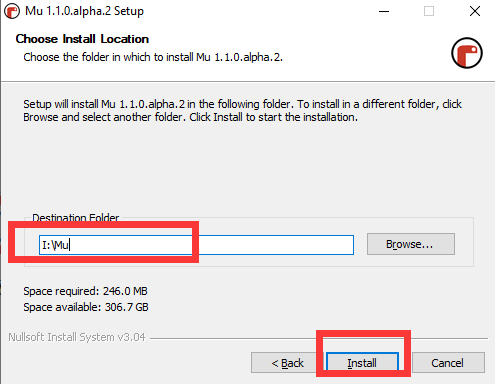
4.Select the installation destination (you can usually leave this as the default) and click“Install”.
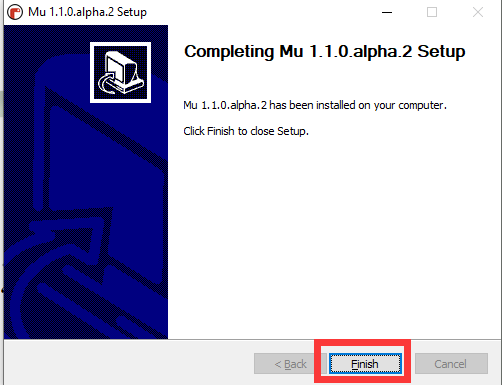
5.The installation has completed successfully,click“Finish”to close the installer.
Step 4 - Start Mu
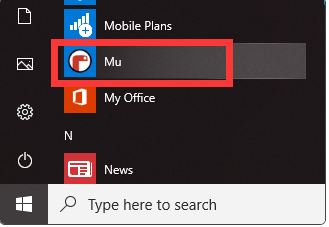
1.You can start Mu by clicking on the icon in the Start menu.
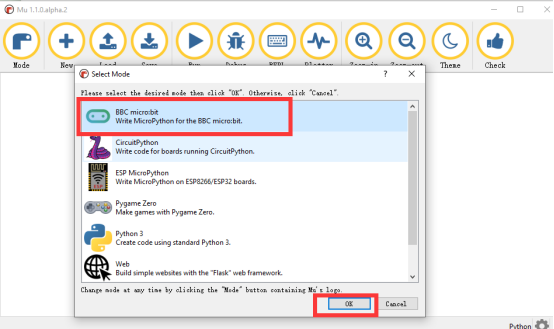
2.After opening, you will see the following interface, you need to select "BBC micro:bit", and then click "OK", as shown below:
【Note】
If the "Select Mode" window in the figure above does not appear after opening the Mu software, you can set it by clicking the "Mode" button in the upper left corner.

3.In the code editing area, you can write the code, the following code is to display the "heart" pattern on the Micro:bit:
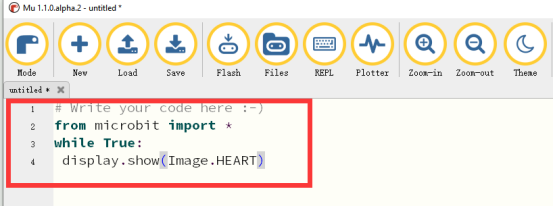
The source code is as follows:
1 2 3 | from microbit import * while True: display.show(Image.HEART) |
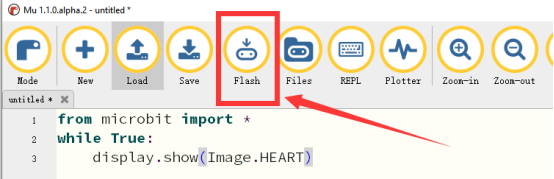
Step 5 - Download the program into micro:bit
1.Use the micro USB cable to connect micro:bit and PC
2.Click the "Flash" button to download the program to Micro:bit and observe the changes of Micro:bit.
【Note】:
If your code has errors, such as spelling errors, grammatical errors, etc., the program will not be successfully downloaded to Micro:bit! Even though it can be downloaded, it cannot run!
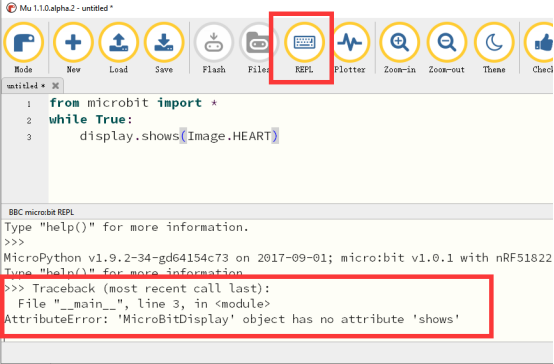
(1)How to check the code for errors?
You can click the "REPL" button, and a "BBC micro:bit REPL" window will appear below. At this time, you need to press the "Reset" button on the Micro:bit, and then the "BBC micro:bit REPL" The window will print out your code error message. This message tells us that there is an error in "shows" because an extra letter "s" is written. After deleting it, click the "Flash" button and click the "REPL" again. Button, press the "Reset" button on the Micro:bit, the "BBC micro:bit REPL" window will no longer print out information, indicating that the code is correct.
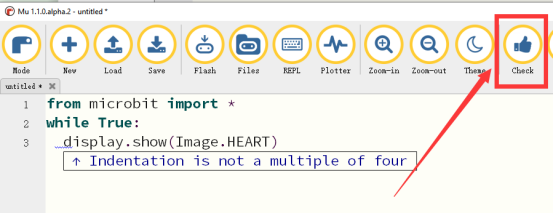
(2)How to check for grammatical errors?
You can click the "Check" button on the upper right, and the Mu editor will prompt you where the code syntax is wrong. For example, the syntax error below is due to the fact that the line of code display.show(Image.HEART) does not have 4 spaces indentation. The solution is to delete the space before this line of code, and then use the "Tab" key to indent this line of code.
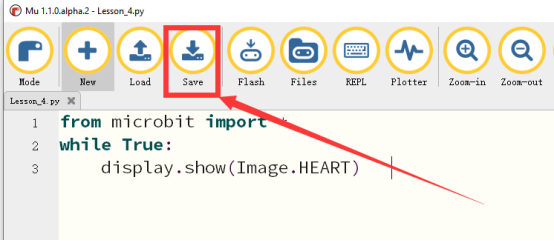
4.5.3 How to save a Python project
Click the "Save" button to save the written project locally.
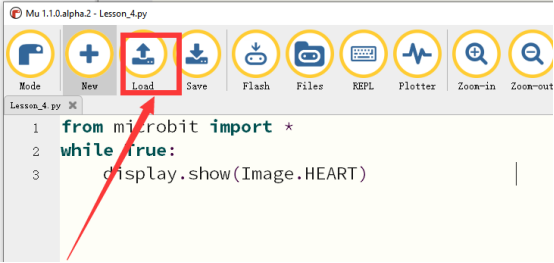
4.5.4 How to import a Python project
In our course project, every lesson provides Python source code files, so how does the Mu editor import Python projects?
1.Click the "Load" button to import external Python project files.
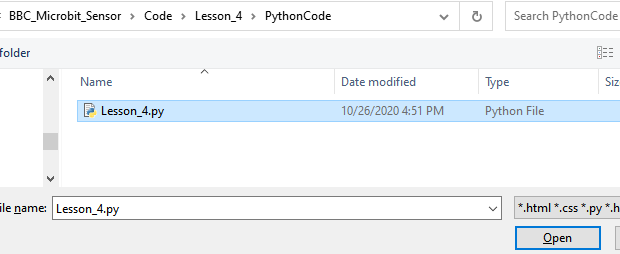
2.Find the code project for this lesson:
BBC_Microbit_Sensor\Code\Lesson_4\PythonCode
Select the ".py" format file and click Open:
If you encounter problems, please send us an email:support@adeept.com