In this lesson, we will carry out an interesting experiment on how to control LED with PIR sensor.
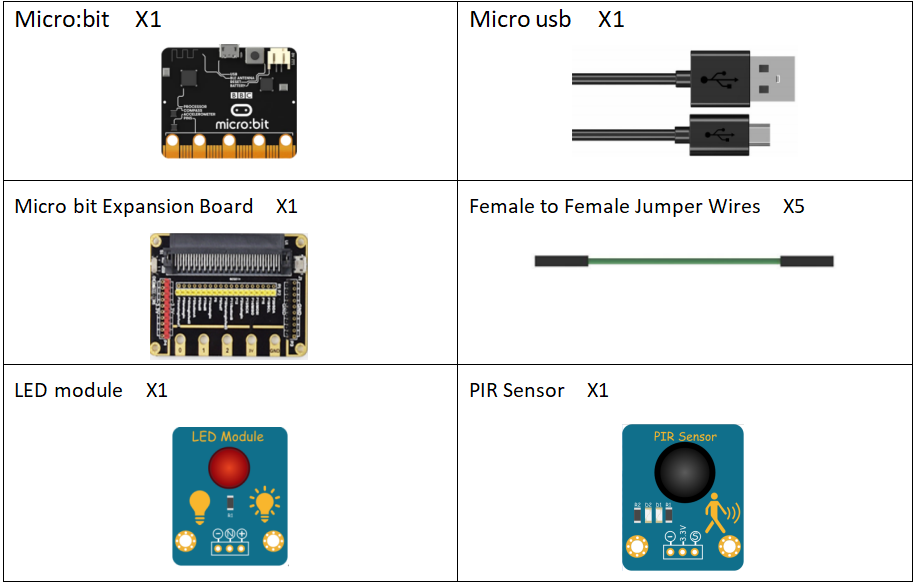
37.1 Components to be prepared
37.2 The PIR Sensor
37.2.1 PIR Sensor
The PIR sensor is a kind of sensor that can sense the infrared radiation of the target and make measurements based on the physical properties of infrared. The figure below is the passive infrared sensor we use in this class, also known as human infrared sensor. It has three pins, namely VCC(3.3V), OUT(S) and GND. It can detect every living and non-living thing whose temperature is above absolute zero.PIR sensors will respond to animals such as cats and dogs, as well as humans and other heat sources.When a motion is detected by PIR sensor, the value of the output end will rise.


37.2.2 The working principle of the PIR Movement Sensor
PIR movement sensor, also known as human infrared sensor, it can detect the human body in the form of heat emission of infrared radiation, so can be used to detect the presence of people or animals. The human body has a constant body temperature, generally at 37 degrees, so it will emit a specific wavelength of about 10UM of infrared. The passive infrared probe is used to detect about 10UM of infrared emitted by the human body. The infrared ray about 10UM emitted by the human body is enhanced through the Fresnel filter and then gathered to the infrared sensor. Infrared induction source usually adopts pyroelectric element, which will lose the charge balance when it receives the human body's infrared radiation temperature changes, and release the charge outward. After the subsequent circuit is detected and processed, the alarm signal can be generated.
Within the range of the setting, the high level will be output when someone is detected to be active, otherwise the low level will be output. It can repeatedly trigger the output high level. After sensing the human body, keep the output high level for a delay period and no longer sense, and re-detect after the delay is over. If someone is active within its sensing range, its output will be It keeps high level until the person leaves, and then changes the high level to low level (the sensor module will automatically extend the delay time for each activity detected again after the end of a delay period, and take the time of the last activity as the starting point of the delay time).
(1) Pyroelectric effect
When some crystals are heated, an equal but opposite amount of charge will be generated at both ends of the crystal. This phenomenon of electrical polarization due to thermal change is called pyroelectric effect.
(2) Fresnel lens
The Fresnel lens is made according to the Fresnel principle. The Fresnel lens is divided into two forms: refraction and reflection. Second, the detection area is divided into several bright areas and dark areas, so that moving objects entering the detection area can generate infrared signals on PIR in the form of temperature changes, so that PIR can generate electrical signals of changes. The sensitivity of pyroelectric human body infrared sensor (PIR) is greatly increased.
37.3 Low level and high level
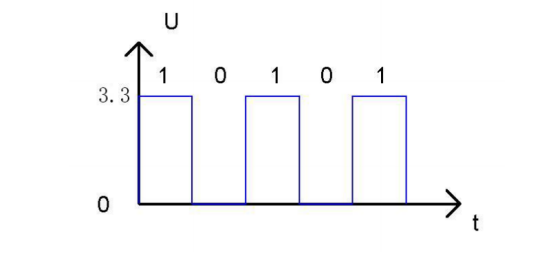
In circuit, the form of binary (0 and 1) is presented as low level and high level.
Low level is generally equal to ground voltage (0V). High level is generally equal to the operating voltage of components.
The low level of Micro:bit is 0V and high level is 3.3V, as shown below. When IO port on Micro:bit outputs high level, low-power components can be directly driven,like LED.
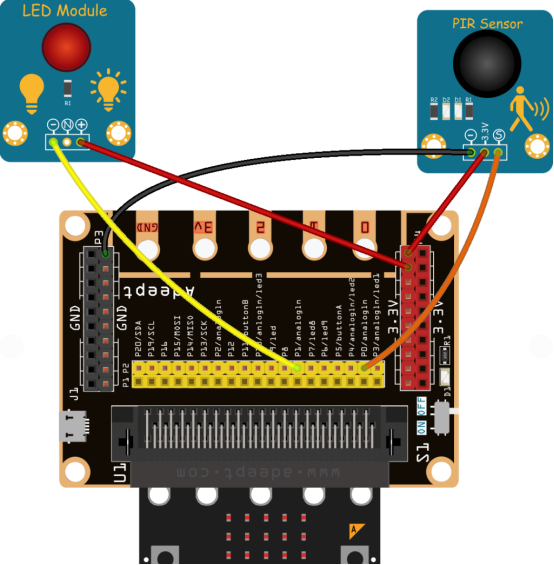
37.4 Circuit
You need to connect the components according to the circuit diagram below.
37.5 MakeCode programming
Next, we will use the online MakeCode Editor to complete the experiment in this lesson.
37.5.1 Start programming
(1) Log in to the website
1. You need to enter the URL in the address bar of Google Browser:
https://makecode.microbit.org/
2. After the website is successfully opened, the interface as shown below will appear:

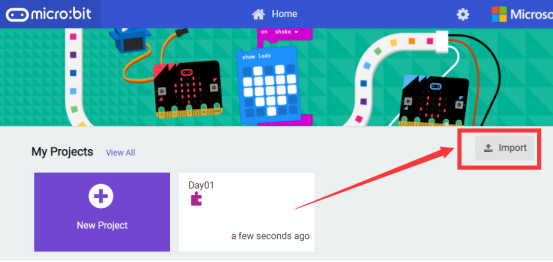
(2) Import a project
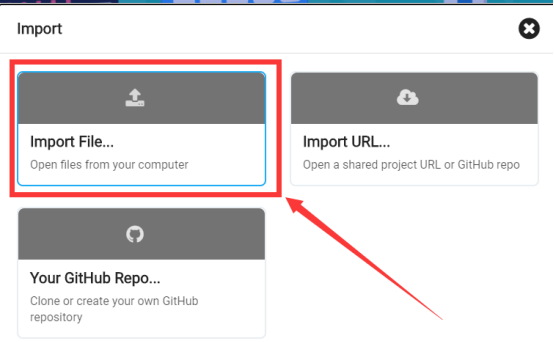
1. In the HOME interface, click the "Import" button to import the external ".hex" file:
In the pop-up dialog box, select the "Import File", as shown in the following figure:
Click the "Choose File"

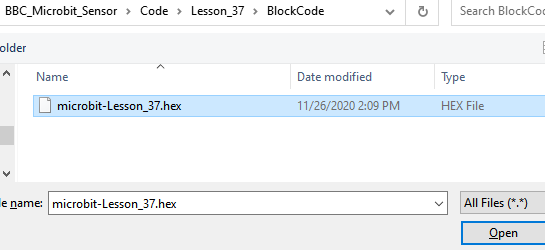
Find the code file for this lesson:
BBC_Microbit_Sensor\Code\Lesson_37\BlockCode
Select the file in ".hex" format and click the Open:
2. Notice whether the file has been loaded into the following window, and then click the "Go ahead!" button, as shown in the following figure:

3.You can see the following interface when successfully opening the file:

37.5.2 Run the program
1. After the program is written, connect micro:bit and PC with a Micro USB cable.
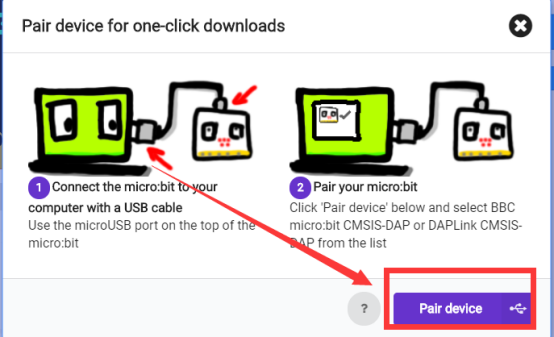
2. After micro:bit is connected to the computer, you need to first "Pair device". Click the  button on the right of
  in the lower left corner, and then click the
  option, as shown in the following figure:

Then click  in the lower right corner
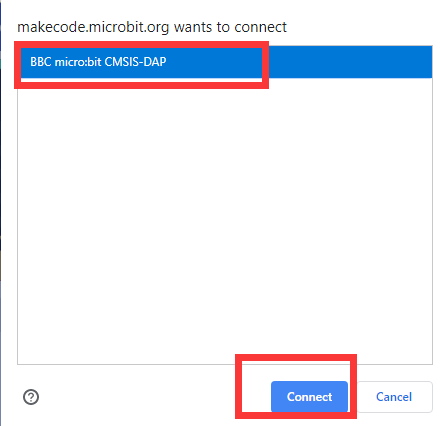
Then the following dialog box will pop up, select  , and then click
After the device is successfully paired, the  button changes to
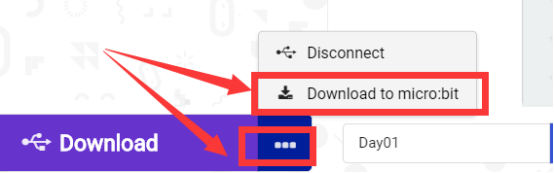
3. Start to download the program to Micro:bit, and click the  button. Generally, the program will be downloaded directly to the Micro:bit. After the download is completed, your Micro:bit will restart and run the program just downloaded. If any moving creature is approaching PIR Sensor, LED will light up, as shown below:

[Note]
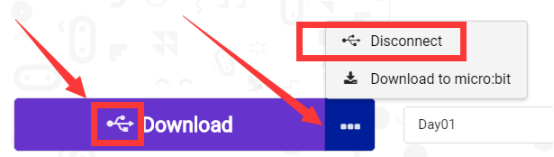
If Micro:bit doesn't respond after clicking the  , you need to click the
  button on the right of the
  , and then click the
  , and observe the situation of the LED again, as shown in the following figure:
If you have problems, please send us an email: support@adeept.com
37.5.3 Learn the code program
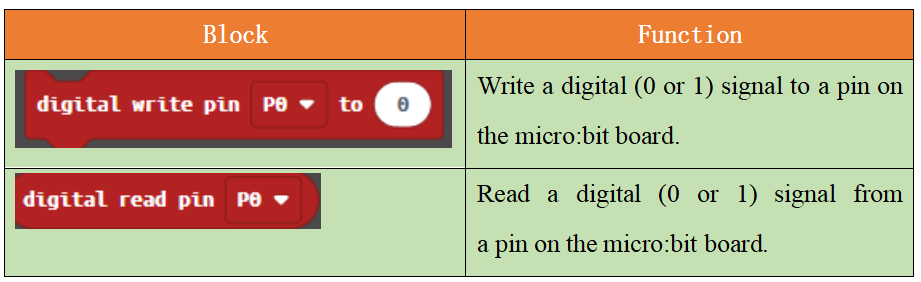
The following instruction blocks will be applied in the program. Please see the description of the function as follows:
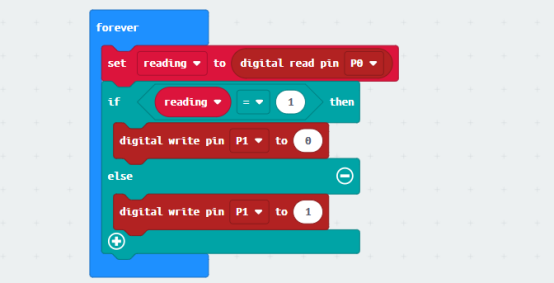
(1)If reading == 1, it means that the PIR Sensor detects that a moving creature is approaching, and then controls the LED to light up; if it does not detect the biological movement, then turn off the LED.
37.6 Python programming
37.6.1 Run the program
1.Connect micro:bit and PC with a Micro USB cable.
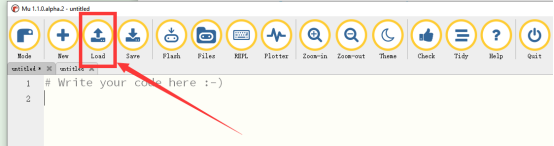
2. Open the Mu Editor installed on the computer, and click the button [Load] in the upper left corner to open the source code program of this lesson:
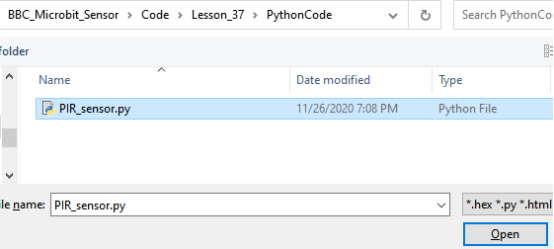
Find the code file for this lesson:
BBC_Microbit_Sensor\Code\Lesson_37\PythonCode
Select the file in ".py" format and click the Open:
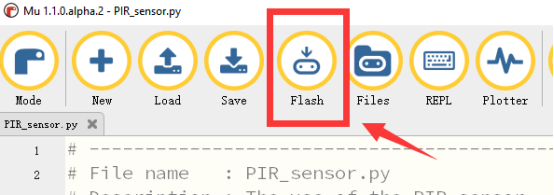
3. Click the [Flash] button to download the program to Micro:bit, as shown in the following figure:
4.When the download is successful, if any moving creature is approaching PIR Sensor, LED will light up, as shown below:

If you have problems, please send us an email: support@adeept.com
37.6.2 Learn the code program
If reading == 1, it means that the PIR Sensor detects that a moving creature is approaching, and then controls the LED to light up; if it does not detect the biological movement, then turn off the LED.
11 12 13 14 15 16 | while True: reading = pin0.read_digital() if reading == 1: pin1.write_digital(0) else: pin1.write_digital(1) |
【Note】
Since there will be some delay when PIR Sensor detects, so when you are testing, it is recommended to keep moving slowly close to or away from PIR Sensor. The PIR Sensor is more accurate in detecting the living creatures in motion. If the creature is stationary after approaching the PIR Sensor, the PIR Sensor will not be able to detect it, so it is best to keep some movement.