Overview
In this lesson, we will learn how to use DHT-11 to collect temperature and humidity by programming Arduino.
Components
- 1 * Arduino UNO
- 1 * USB Cable
- 1 * LCD1602
- 1 * 10kΩ Potentiometer
- 1 * DHT-11 Temperature and Humidity Sensor
- 1 * Breadboard
- Several jumper wires
Principle
This DHT-11 temperature & humidity sensor features a temperature & humidity sensor complex with a calibrated digital signal output. By using the exclusive digital signal acquisition technique and temperature & humidity sensing technology, it ensures high reliability and excellent long-term stability. This sensor includes a resistive-type humidity measurement component and an NTC temperature measurement component, and connects to a high-performance 8-bit microcontroller, offering excellent quality, fast response, anti-interference ability and cost-effectiveness.
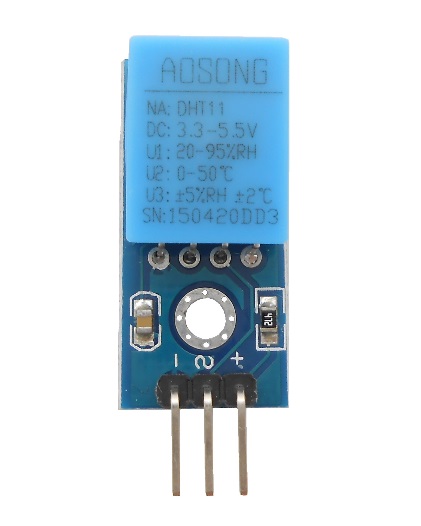
Item: DHT11
Measurement Range: 20-95%RH, 0-50℃
Humidity Accuracy: ±5%RH
Temperature Accuracy: ±2℃
‘+’: VCC (3.3~5.5V)
‘-’: GND (0V)
‘S’: data pin
Procedures
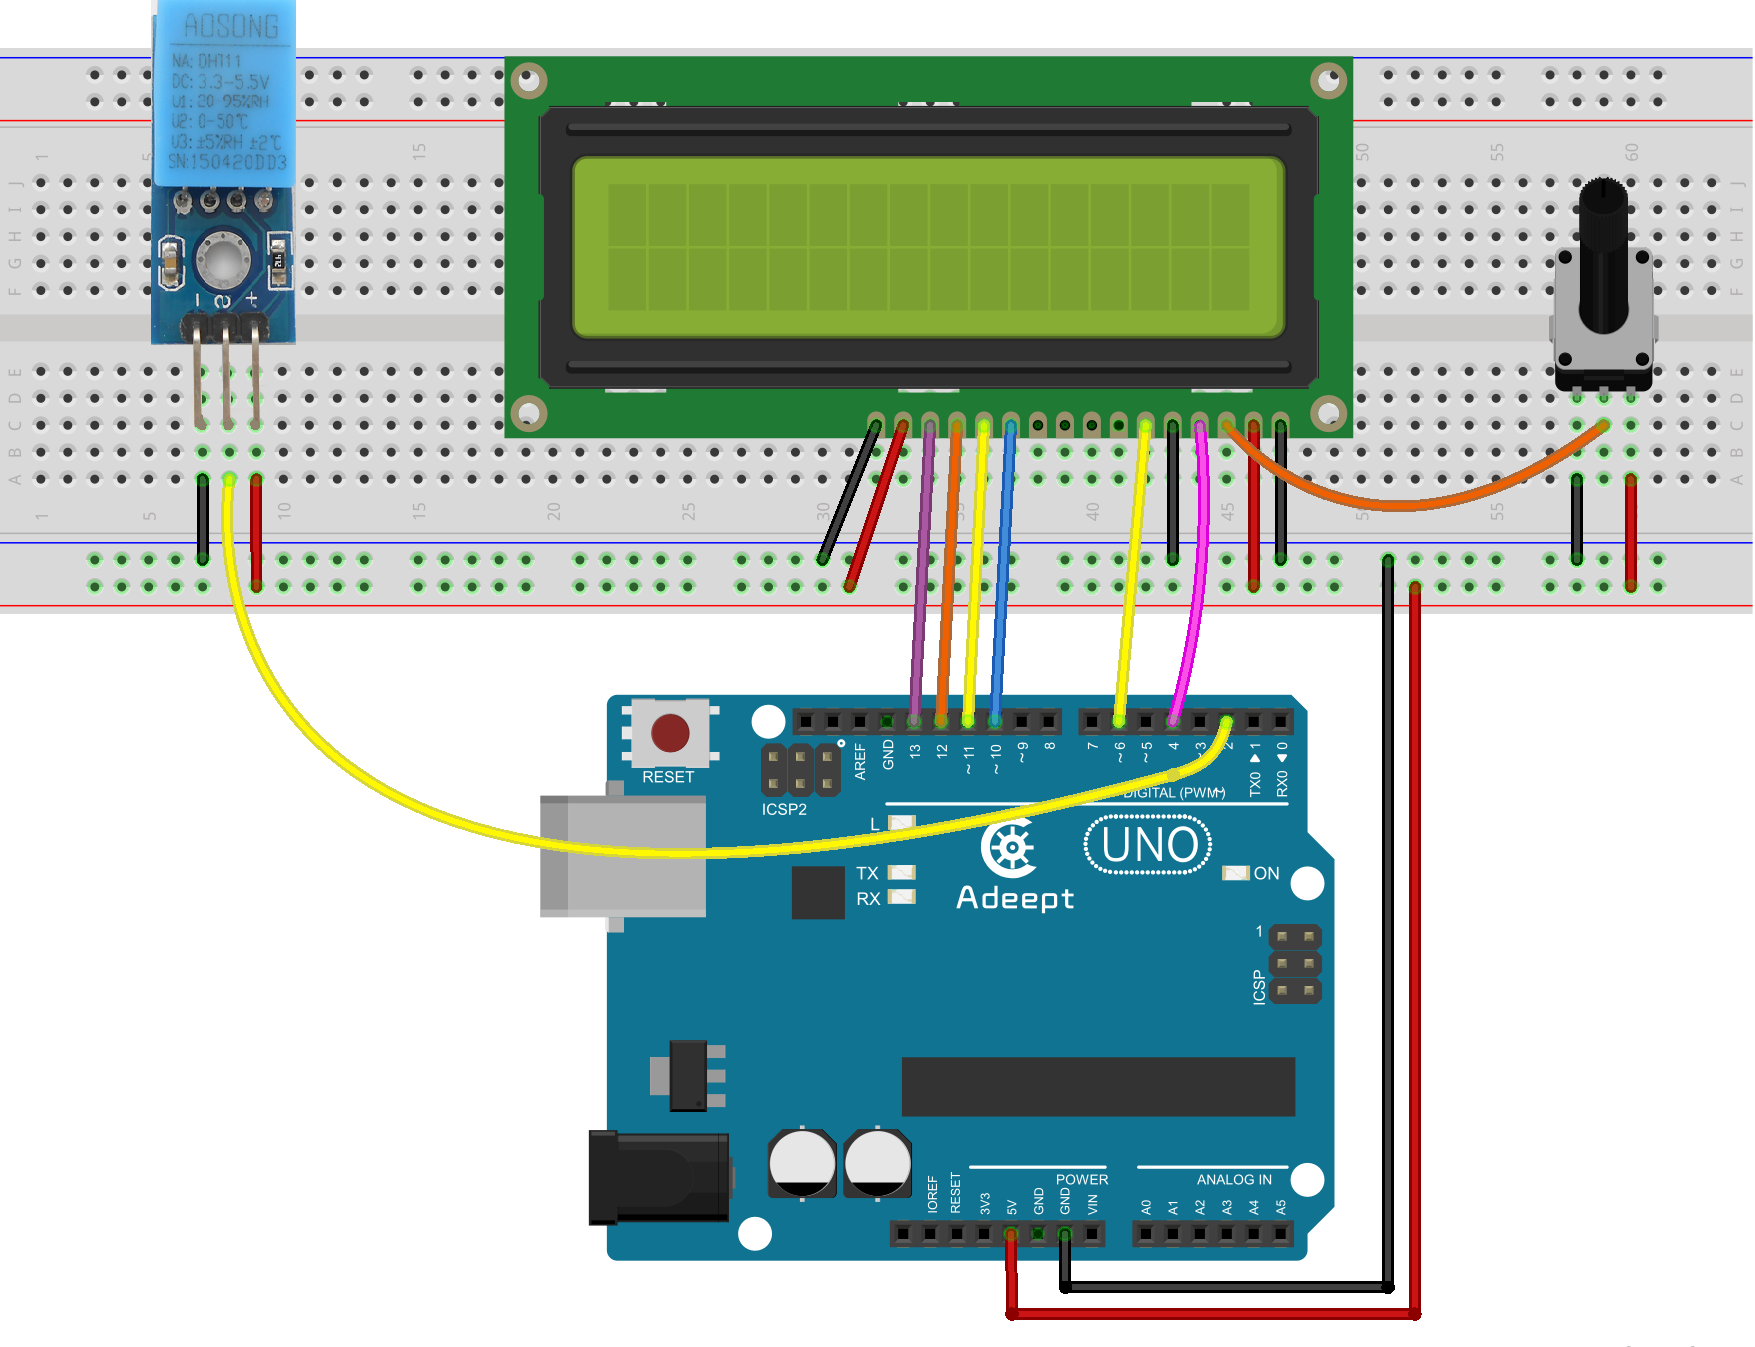
Step 1: Build the circuit
Step 2: Program
/***********************************************************
File name: 18_DHT11.ino
Description: you can see the temperature and humidity data
displayed on the LCD1602.
Website: www.adeept.com
E-mail: support@adeept.com
Author: Tom
Date: 2015/05/02
***********************************************************/
#include <dht11.h>
#include <LiquidCrystal.h>
dht11 DHT11;
#define DHT11PIN 2
LiquidCrystal lcd(4, 6, 10, 11, 12, 13); //Define the connection LCD pin
void setup()
{
lcd.begin(16, 2); // set up the LCD's number of columns and rows:
lcd.clear(); //Clears the LCD screen and positions the cursor in the upper-left corner
delay(1000); //延时1000ms
}
void loop()
{
int chk = DHT11.read(DHT11PIN);
lcd.setCursor(0, 0); // set the cursor to column 0, line 0
lcd.print("Humidity:");// Print a message of "Humidity: "to the LCD.
lcd.print((float)DHT11.humidity, 2);// Print a message of "Humidity: "to the LCD.
lcd.print(" % "); // Print the unit of the centigrade temperature to the LCD.
lcd.setCursor(0, 1); // set the cursor to column 0, line 0
lcd.print("Temp: ");// Print a message of "Temp: "to the LCD.
lcd.print((float)DHT11.temperature, 2);// Print a centigrade temperature to the LCD.
lcd.print(" C "); // Print the unit of the centigrade temperature to the LCD.
delay(1000);
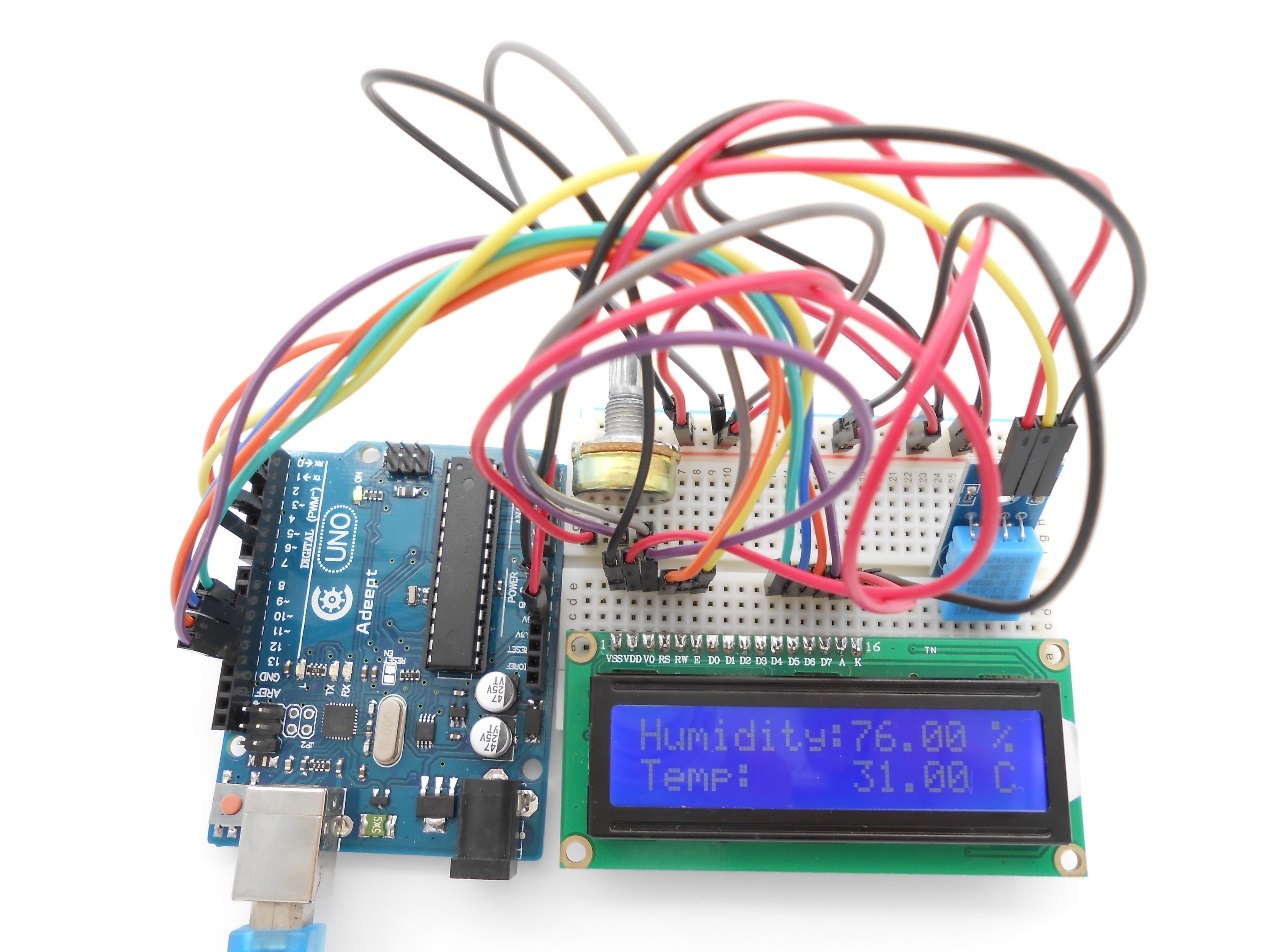
}Step 3: Compile the program and upload to Arduino UNO board
Now, you can see the temperature and humidity data displayed on the LCD1602.
Summary
Through this lesson, you should be able to measure the room’s temperature and humidity. Now try to make a simple smart home system based on this and the previous lessons.