Overview
In this lesson, we will collect the state of a joystick by programming the Arduino UNO Board, and then send the data to the Processing through the serial communication.
Components
- 1 * Arduino UNO
- 1 * USB Cable
- 1 * PS2 Joystick
- 1 * Breadboard
- Several jumper wires
Principle
The experiment consists of two parts: first, acquire the data from Arduino; second, process the data.
Here use the Arduino UNO board to collect data of the joystick state, and upload the data to the computer through the serial port. The data will be processed by Processing and shown with 3D image.
Note:
1. In this experiment, my Arduino UNO board is connected to my computer port COM26. But it may differ in your case. So please adjust it according to your actual situation.
2. If the Processing does not run normally, you may need to install the related function libraries.
Procedures
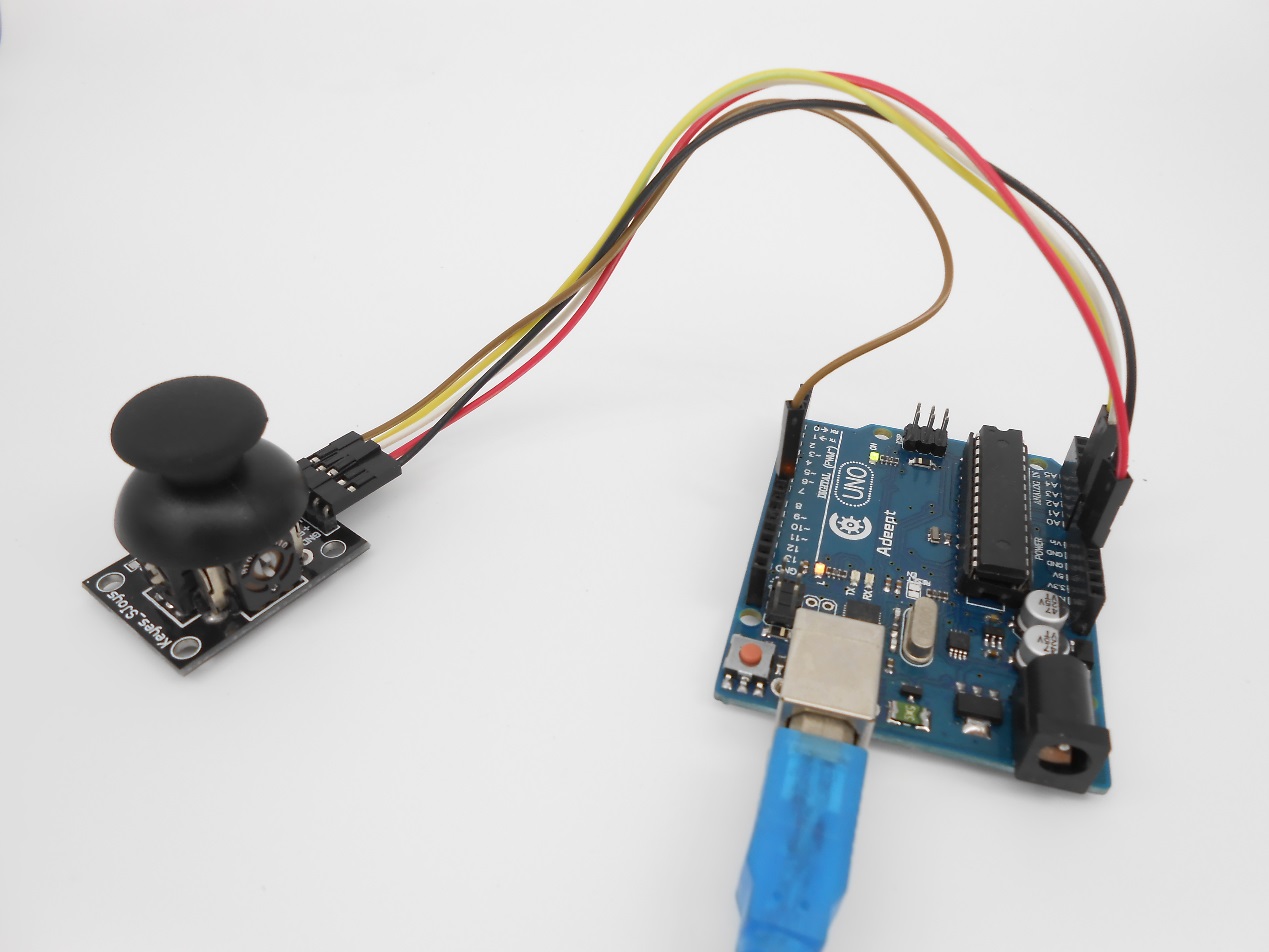
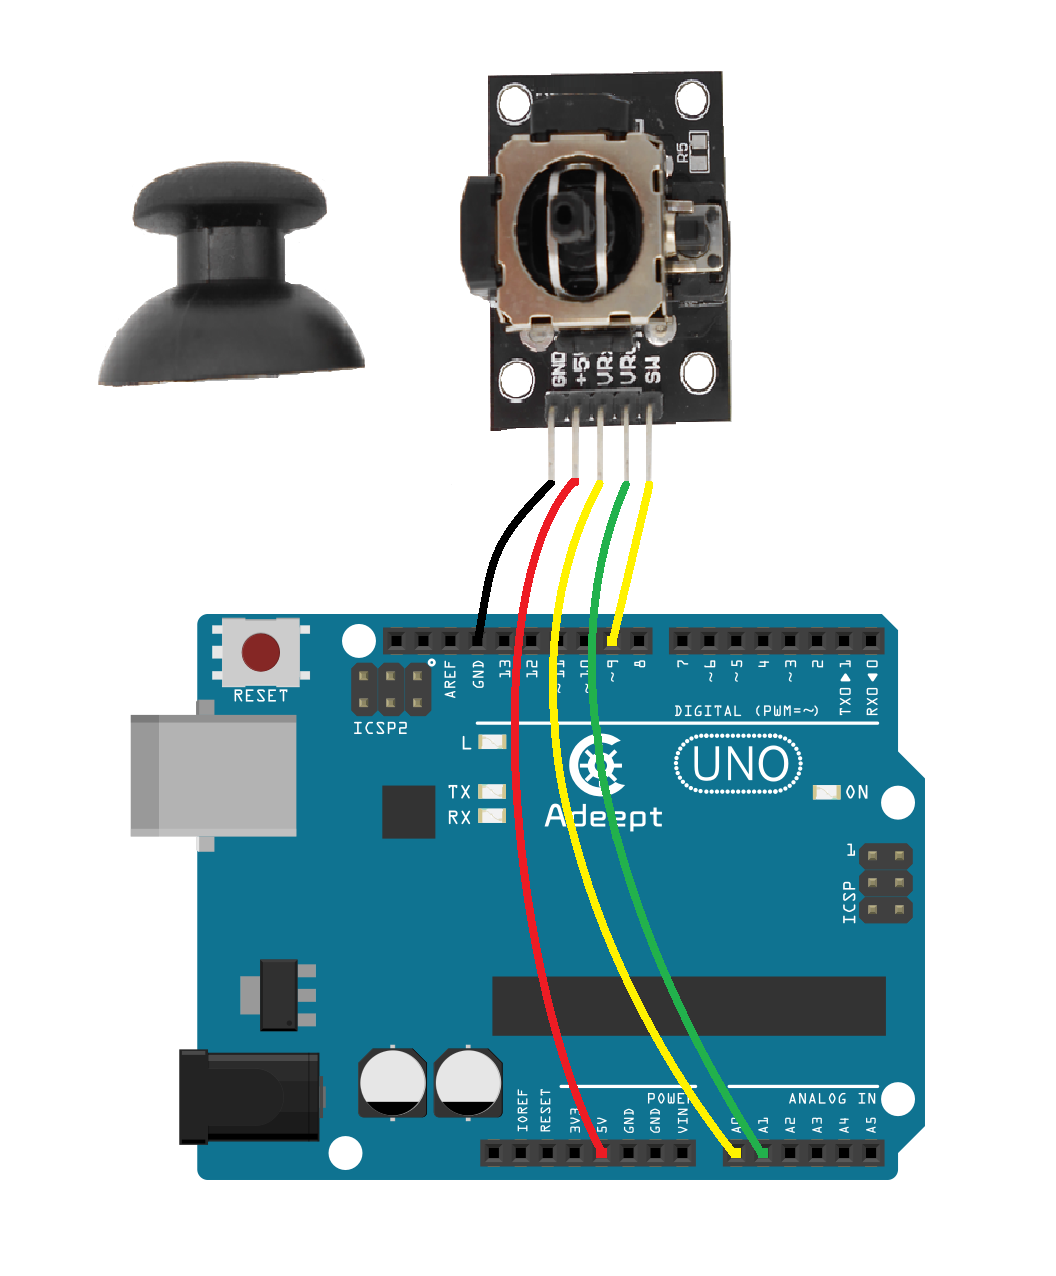
Step 1: Build the circuit
Step 2: Program
![]() _35_PS2Joystick_Processing.ino
_35_PS2Joystick_Processing.ino
/***********************************************************
File name:   35_PS2Joystick_Processing.ino
Description: Arduino and processing interactive
             The Joystiak data which Arduino collected send
             the processing software to display.
Website: www.adeept.com
E-mail: support@adeept.com
Author: Tom
Date: 2015/05/02
***********************************************************/
int xpotPin = 0; // Define UNO board A0 pin connect the Ioystick x
int ypotPin = 1; // Define UNO board A1 pin connect the Ioystick y
int swPin = 9;   // Define UNO board digital 9 pin connect the Ioystick sw

int xval = 0;
int yval = 0;
int swval= 0;

void setup() {
  // Start the serial port, baud rate to 9600
  Serial.begin(9600);
  pinMode(swPin,INPUT_PULLUP);//Set swPin inputand pull up
}

void loop() {
  // Read the Joystick x y sw information
  int xval = analogRead(xpotPin);
  int yval = analogRead(ypotPin);
  int swval = digitalRead(swPin);

  Serial.print(xval);//Dend xval value
  Serial.print(',');
  Serial.print(yval);//Dend yval value
  Serial.print(',');
  Serial.print(swval);//Dend swval value
  Serial.println(',');
  delay(100);
}
Step 3: Compile the program and upload to Arduino UNO board
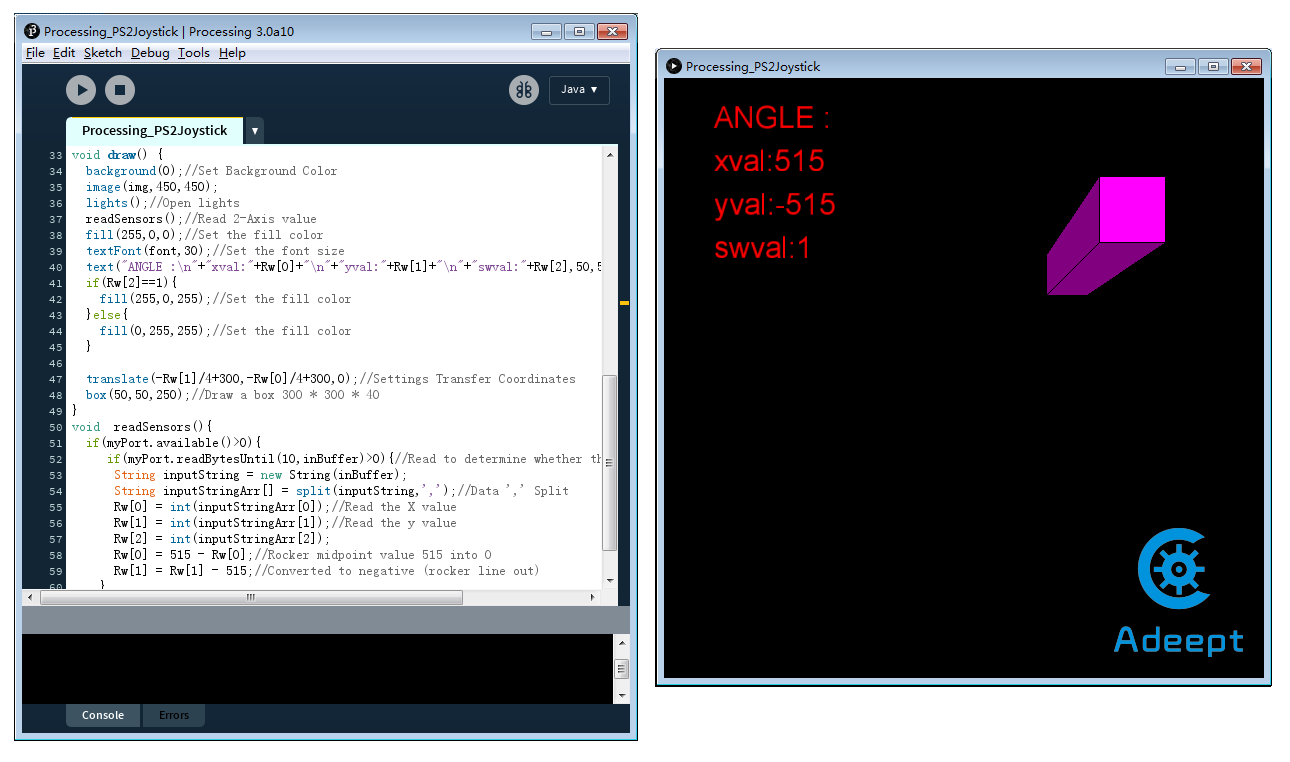
Step 4: Run the Processing software (Processing_PS2Joystick.pde)
Move the joystick, and the 3D model will follow movement changes accordingly on your computer.