Overview
In this lesson, we will learn how to measure the light intensity by photoresistor and make the measurement result displayed on the LCD1602.
Components
- 1 * Arduino UNO
- 1 * USB Cable
- 1 * LCD1602
- 1 * Photoresistor
- 1 * 10kΩ Resistor
- 1 * 10kΩ Potentiometer
- 1 * Breadboard
- Several jumper wires
Principle
A photoresistor is a light-controlled variable resistor. The resistance of a photoresistor decreases with the increasing incident light intensity; in other words, it exhibits photoconductivity. A photoresistor can be applied in light-sensitive detector circuits.
A photoresistor is made of a high resistance semiconductor. In the dark, a photoresistor can have a resistance as high as a few megohms (MΩ), while in the light, a photoresistor can have a resistance as low as a few hundred ohms. If incident light on a photoresistor exceeds a certain frequency, photons absorbed by the semiconductor give bound electrons enough energy to jump into the conduction band. The resulting free electrons (and their hole partners) conduct electricity, thereby lowering resistance. The resistance range and sensitivity of a photoresistor can substantially differ among dissimilar devices. Moreover, unique photoresistors may react substantially differently to photons within certain wavelength bands.
The schematic diagram of this experiment is shown below:
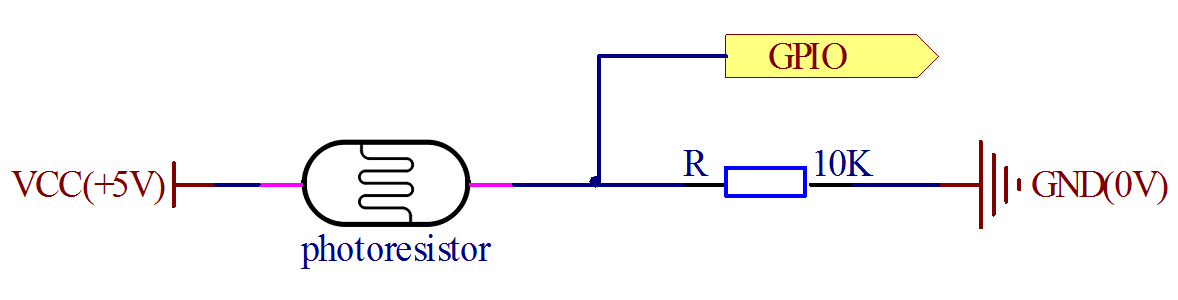
With the increase of the light intensity, the resistance of photoresistor will be decreased. The voltage of GPIO port in the above figure will become high.
Procedures
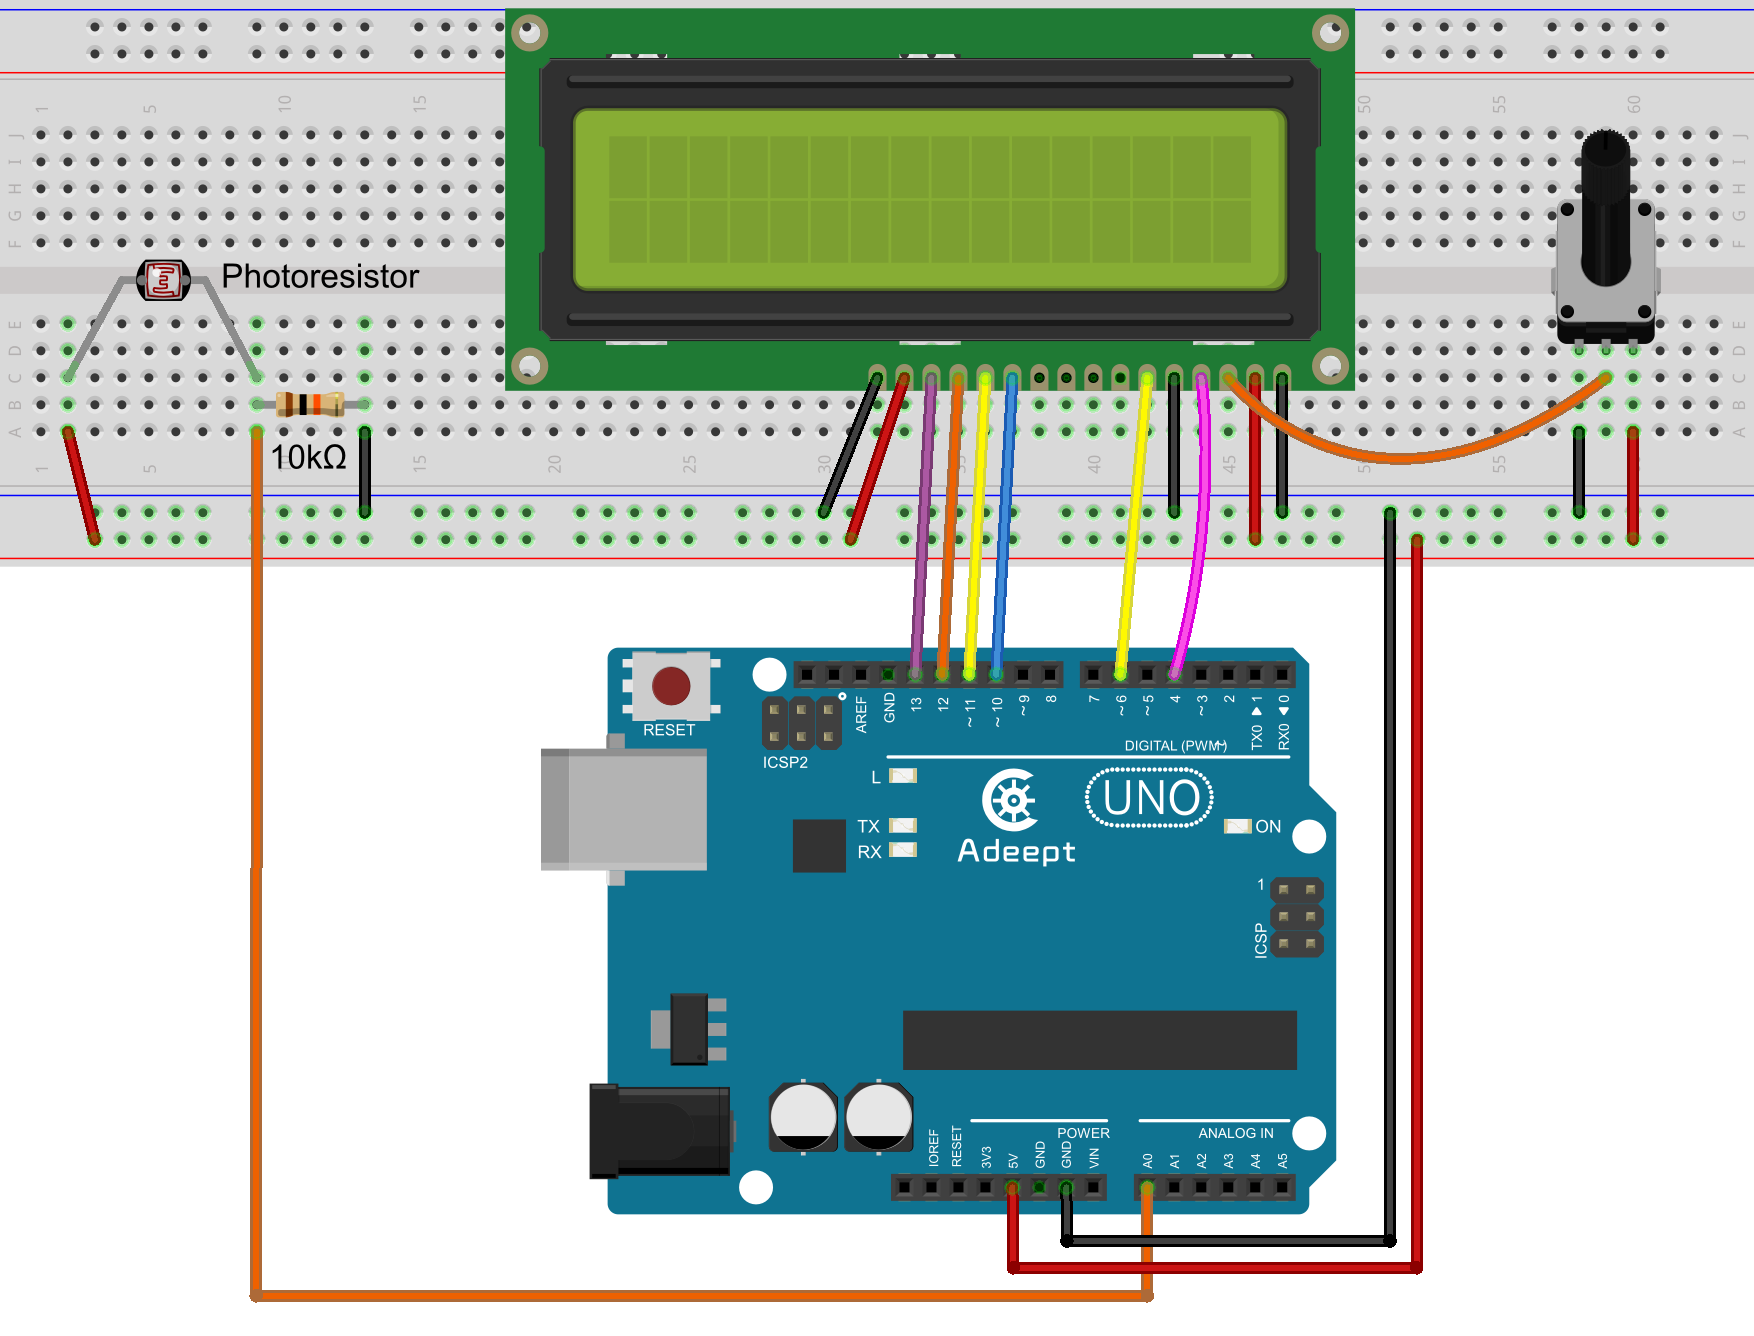
Step 1: Build the circuit
Step 2: Program
/***********************************************************
File name: 27_photoresistance.ino
Description: We measure the light intensity of information with
photosensitive resistance, and displayed on the
LCD1602.
Website: www.adeept.com
E-mail: support@adeept.com
Author: Tom
Date: 2015/05/02
***********************************************************/
#include <LiquidCrystal.h>
char array1[]=" Adeept test "; //the string to print on the LCD
char array2[]=" DATA: 0000 "; //the string to print on the LCD
int tim = 50; //the value of delay time
// initialize the library with the numbers of the interface pins
LiquidCrystal lcd(4, 6, 10, 11, 12, 13);
int photoresistorPin = 0; // potentiometer wiper (middle terminal) connected to analog pin 3
void setup()
{
lcd.begin(16, 2); // set up the LCD's number of columns and rows:
lcd.clear(); //Clears the LCD screen and positions the cursor in the upper-left corner
lcd.setCursor(0,0); // set the cursor to column 15, line 0
for (int positionCounter1 = 0; positionCounter1 < 16; positionCounter1++)
{
lcd.print(array1[positionCounter1]); // Print a message to the LCD.
delay(tim); //wait for 250 microseconds
}
}
void loop()
{
array2[9]=analogRead(photoresistorPin)/1000+0x30; //Take one thousand - bit data
array2[10]=analogRead(photoresistorPin)/100%10+0x30;//Take one hundred - bit data
array2[11]=analogRead(photoresistorPin)/10%10+0x30; //Take ten-bit data
array2[12]=analogRead(photoresistorPin)%10+0x30; //Take a bit of data
lcd.setCursor(0,1); // set the cursor to column 15, line 1
for (int positionCounter3 = 0; positionCounter3 < 16; positionCounter3++)
{
lcd.print(array2[positionCounter3]); // Print a message to the LCD.
delay(tim); //wait for 250 microseconds
}
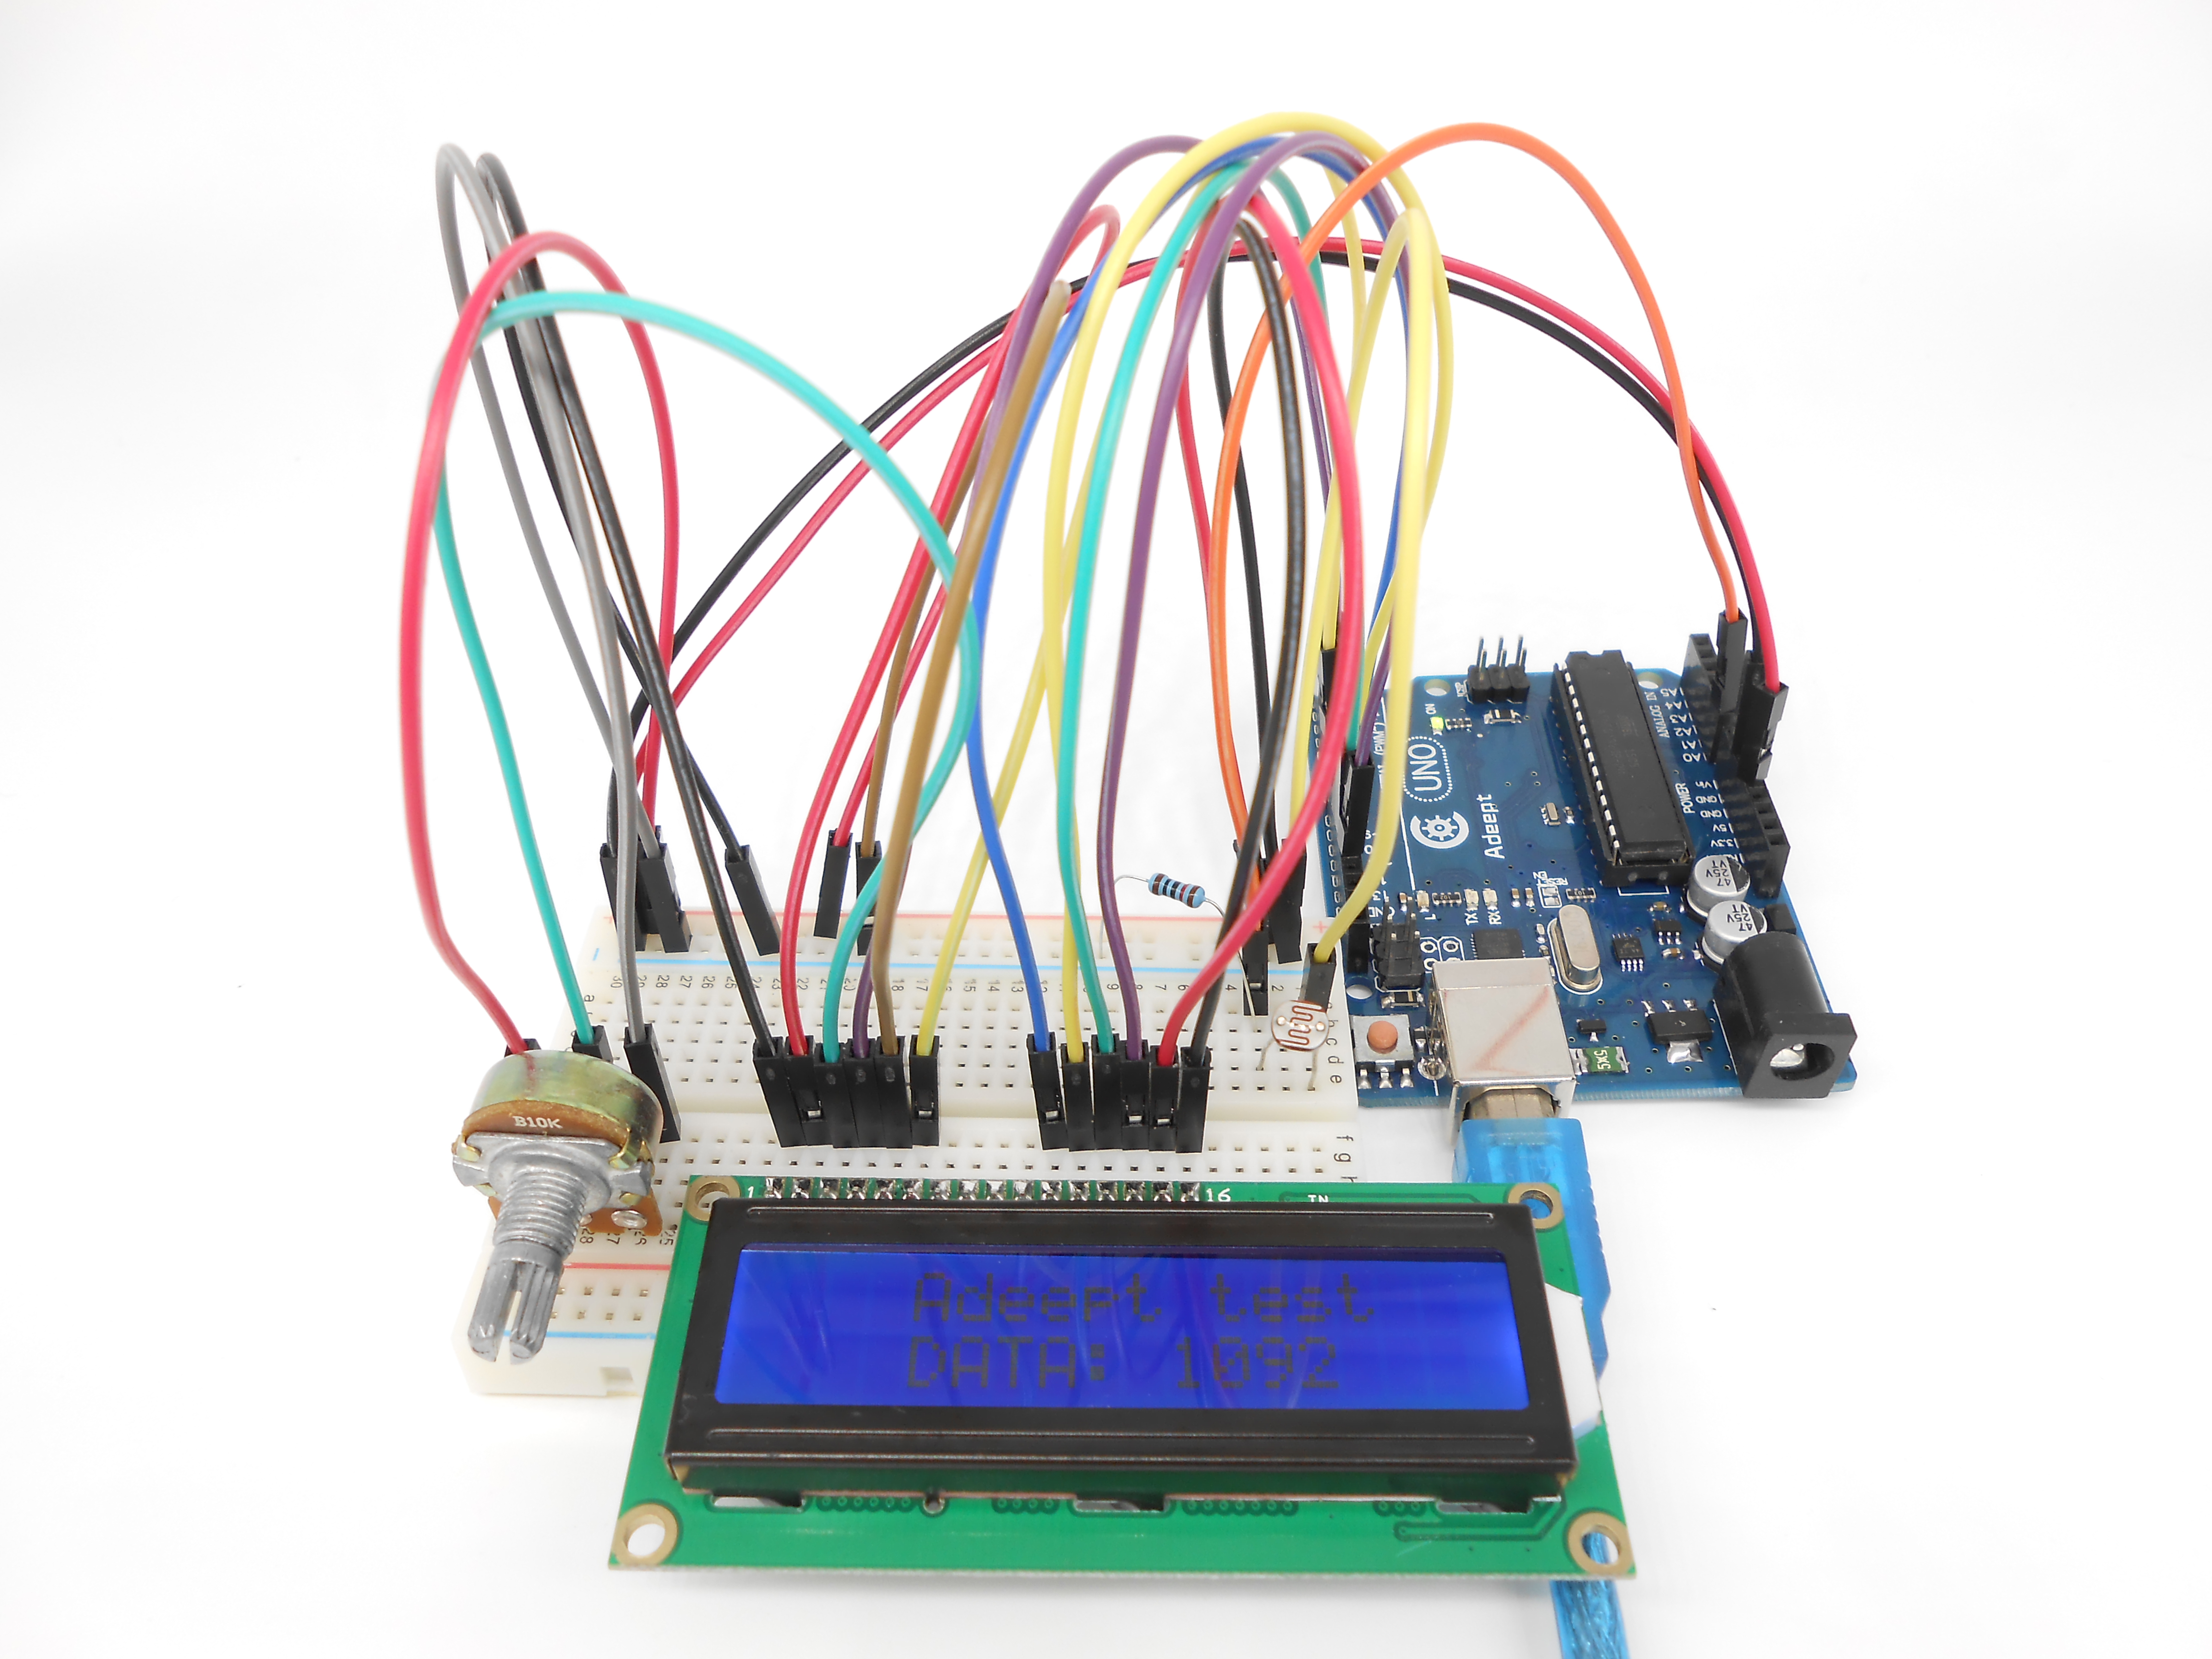
}Step 3: Compile the program and upload to Arduino UNO board
Now, when you try to block the light towards the photoresistor, you will find that the value displayed on the LCD1602 will be reduced. Otherwise, when you use a powerful light to irradiate the photoresistor, the value displayed on the LCD1602 will be increased.
Summary
By learning this lesson, we have learned how to detect surrounding light intensity with the photoresistor. You can play your own wisdom, and make more originality based on this experiment and the former experiment.