Overview
In this lesson, we will make a light tracking system based on a servo and a photoresistor.
Components
- 1 * Arduino UNO
- 1 * USB Cable
- 1 * Servo
- 1 * Photoresistor
- 1 * 10kΩ Resistor
- 1 * Breadboard
- Several jumper wires
Principle
In this experiment, we need to fasten the photoresistor with the horn of servo. First, we control the servo with a photoresistor to rotate from 0° to 180° to record the intensity of illumination, and then the photoresistor will stop at the brightest position.
Procedures
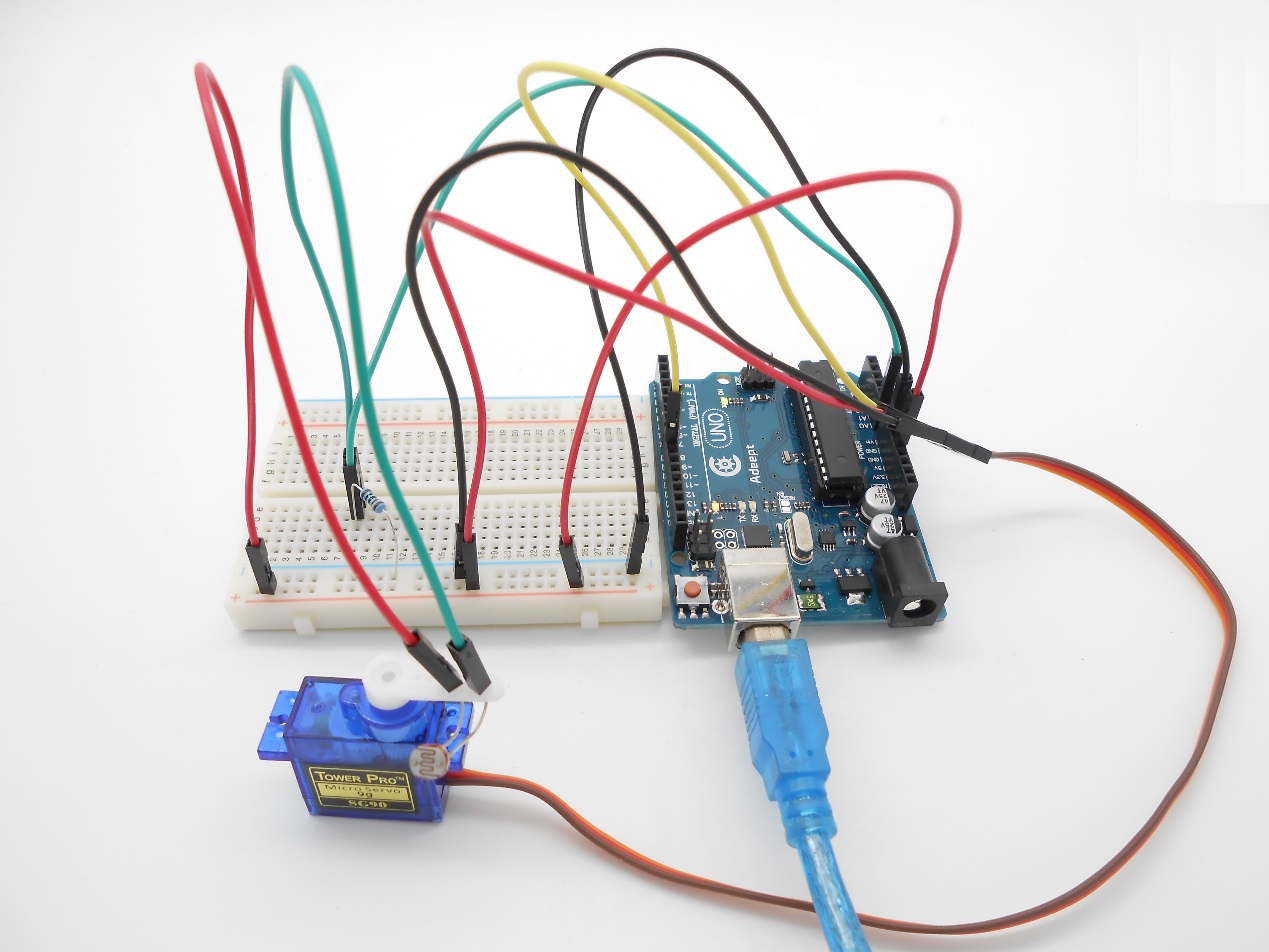
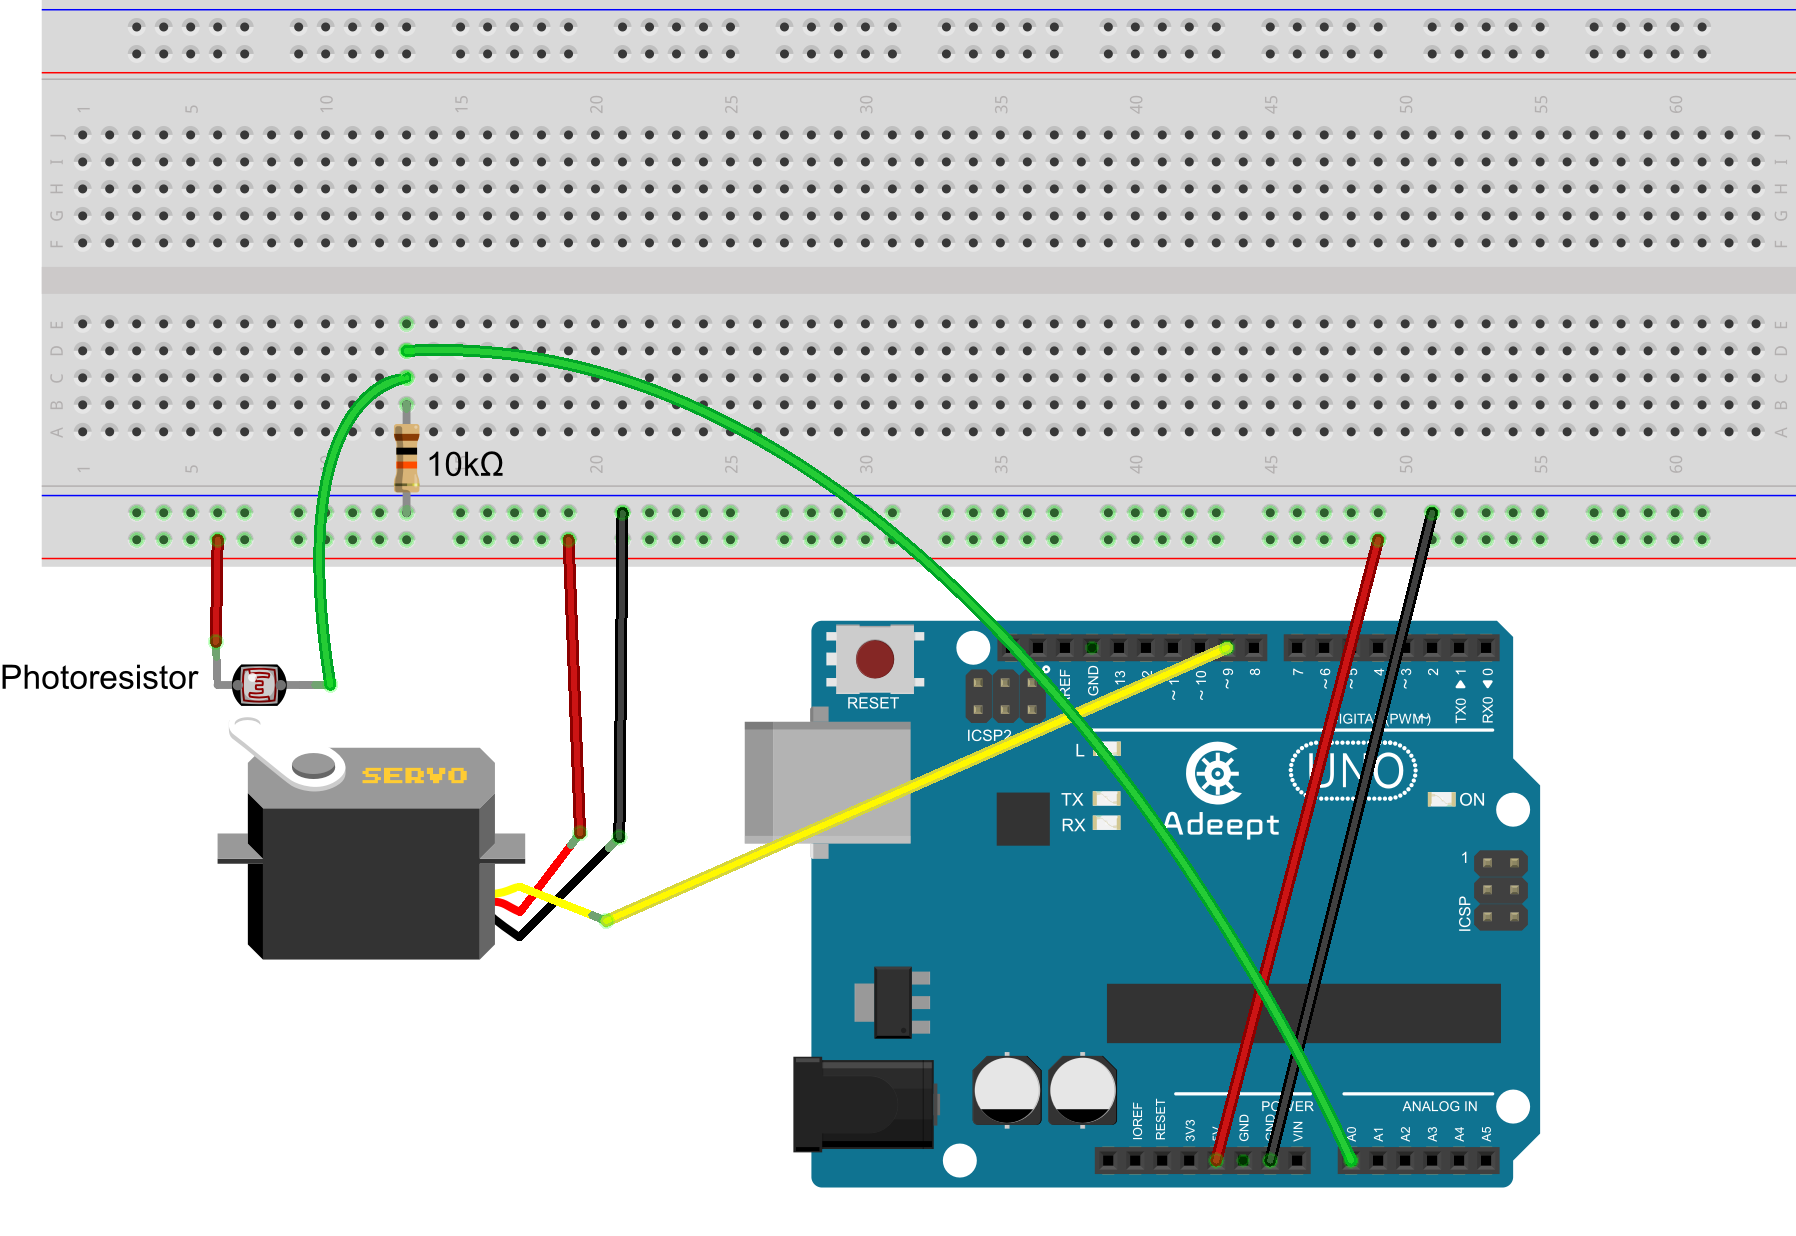
Step 1: Build the circuit
Step 2: Program
![]() _28_automatically_tracking_light_source.ino
_28_automatically_tracking_light_source.ino
/***********************************************************
File name: 28_automatically_tracking_light_source.ino
Description: if you use a flashlight to shine the photoresistor
             and servo, you will see the servo motor and the
             photoresistor rotate, finally stop at the direction
             of light source.
Website: www.adeept.com
E-mail: support@adeept.com
Author: Tom
Date: 2015/05/02
***********************************************************/
#include <Servo.h>

const int photocellPin = A0;
Servo myservo;//create servo object to control a servo

int outputValue = 0;
int angle[] = {0,10, 20, 30, 40, 50, 60,70, 80, 90, 100,110,120,130,140,150,160,170,180};
int maxVal = 0;
int maxPos = 0;

void setup()
{
  myservo.attach(9);//attachs the servo on pin 9 to servo object
}

void loop()
{
  for(int i = 0; i < 19; i ++)
  {
    myservo.write(angle[i]);
    outputValue = analogRead(photocellPin);
    if(outputValue > maxVal)
    {
      maxVal = outputValue;
     maxPos =i;
    }
    delay(200);
  }
  myservo.write(angle[ maxPos]);
  while(1);
}
Step 3: Compile the program and upload to Arduino UNO board