Overview
In this lesson, we will use the remote IR receiver and the RGB to do an experiment - control the RGB LED by the infrared remote controller.
Components
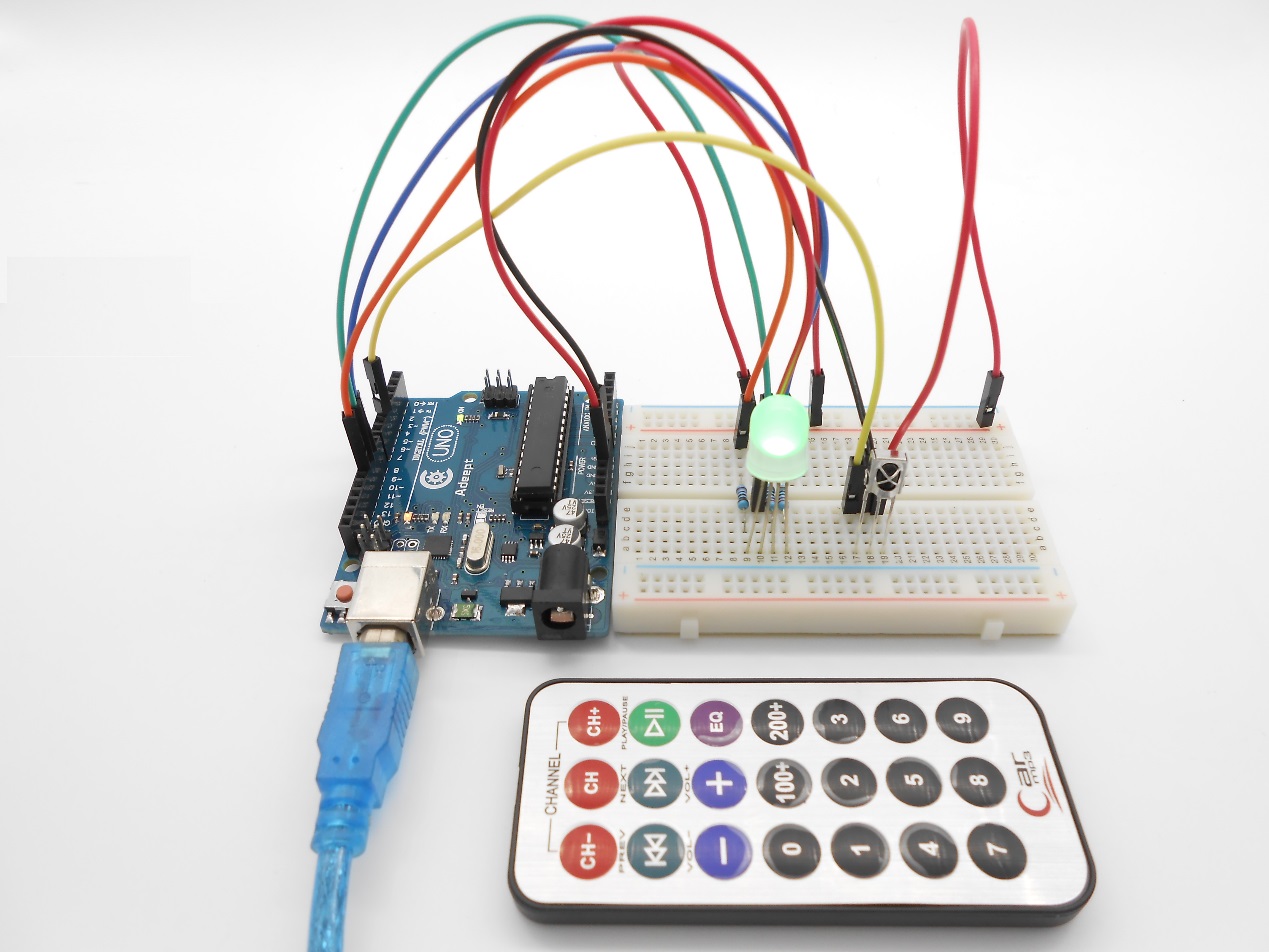
- 1 * Arduino UNO
- 1 * USB Cable
- 1 * IR Receiver HX1838
- 1 * Remote Controller
- 1 * RGB LED
- 3* 220Ω Resistor
- 1 * Breadboard
- Several jumper wires
Principle
This experiment is to connect an RGB LED with a remote controller, and by programming the Arduino board, realize controlling the LED by the remote controller.
If you press a certain key except 0 on the remote controller, you will find the color of an RGB LED changed. When you press the key marked with 0, the RGB LED will be off.
Procedures
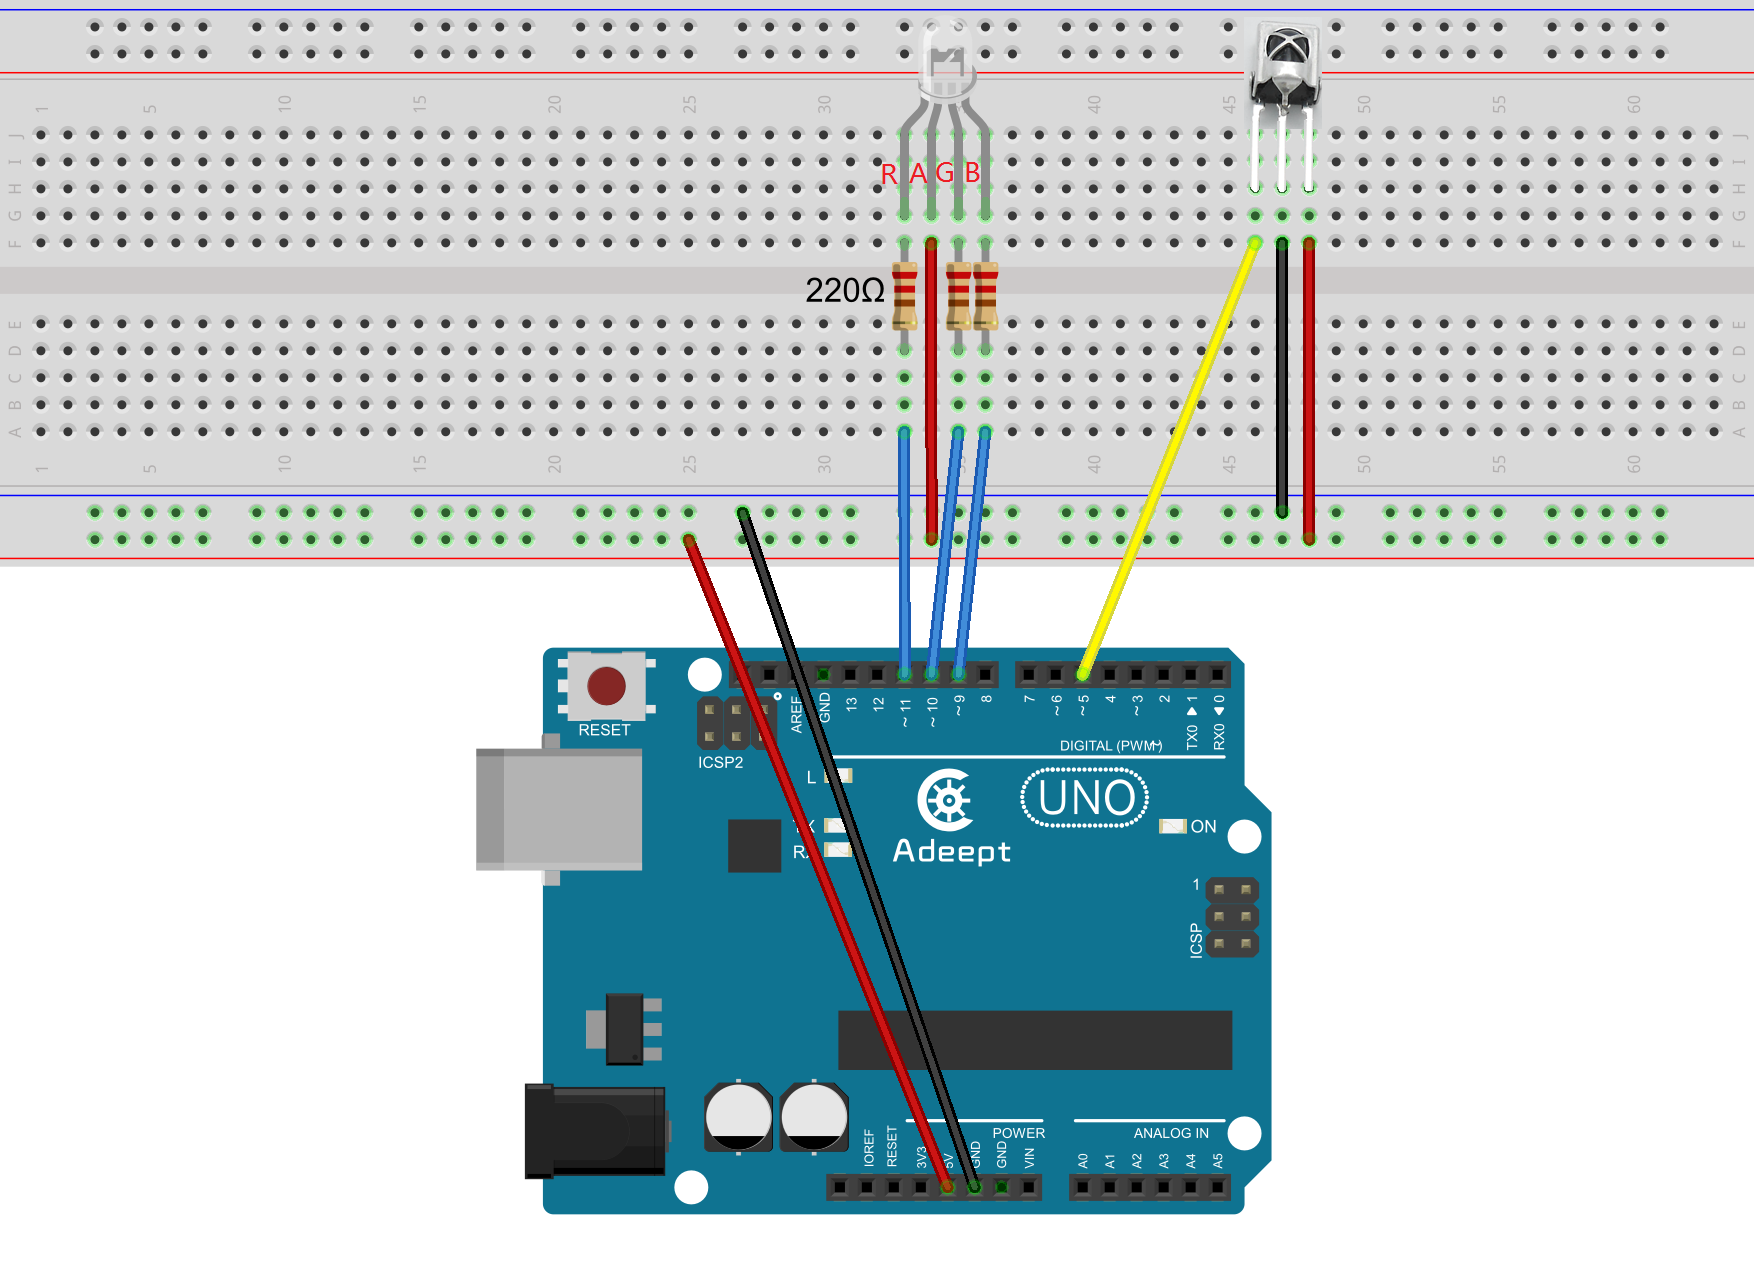
Step 1: Build the circuit
Step 2: Program
![]() _32_control_a_RGB_LED_with_IR_remoter_controller.ino
_32_control_a_RGB_LED_with_IR_remoter_controller.ino
/***********************************************************
File name: 32_control_a_RGB_LED_with_IR_remoter_controller.ino
Description: When you press the number buttons 0-9 on the
             remote control, you will see the RGB LED emit
             different colors of light.
Website: www.adeept.com
E-mail: support@adeept.com
Author: Tom
Date: 2015/05/02
***********************************************************/
#include <IRremote.h>

int RECV_PIN = 5;//The definition of the infrared receiver pin 5
int redPin = 11;   // R petal on RGB LED module connected to digital pin 11
int greenPin = 10; // G petal on RGB LED module connected to digital pin 9
int bluePin = 9;   // B petal on RGB LED module connected to digital pin 10
IRrecv irrecv(RECV_PIN);
decode_results results;
void setup()
{
   pinMode(redPin, OUTPUT);   // sets the redPin to be an output
   pinMode(greenPin, OUTPUT); // sets the greenPin to be an output
   pinMode(bluePin, OUTPUT);  // sets the bluePin to be an output
   irrecv.enableIRIn(); //Initialization infrared receiver
}

void loop()
{
  if (irrecv.decode(&results)) {
    if(results.value==0xC101E57B)//0
    {
       color(0,0,0);  // turn the RGB LED off
    }
    if(results.value==0x9716BE3F)//1
    {
      color(255,0,0); // turn the RGB LED red
    }
    if(results.value==0x3D9AE3F7)//2
    {
      color(0,255,0); // turn the RGB LED green
    }
     if(results.value==0x6182021B)//3
    {
      color(0,0,255); // turn the RGB LED blue
    }
    if(results.value==0x8C22657B)//4
    {
      color(255,255,0); // turn the RGB LED yellow
    }
    if(results.value==0x488F3CBB)//5
    {
      color(255,255,255); // turn the RGB LED white
    }
    if(results.value==0x449E79F)//6
    {
      color(128,0,255); // turn the RGB LED purple
    }
   if(results.value==0x32C6FDF7)//7
    {
      color(30,128,255); // turn the RGB LED hermosa pink
    }
    if(results.value==0x1BC0157B)//8
    {
      color(0,128,128); // turn the RGB LED pale blue
    }
    if(results.value==0x3EC3FC1B)//9
    {
      color(128,0,128); // turn the RGB LED pink
    }
    irrecv.resume(); // Receiving the next value
  }
}
void color (unsigned char red, unsigned char green, unsigned char blue)// the color generating function
{
     analogWrite(redPin, 255-red);     // PWM signal output
     analogWrite(greenPin, 255-green); // PWM signal output
     analogWrite(bluePin, 255-blue);   // PWM signal output
}
Step 3: Compile the program and upload to Arduino UNO board
Now press any key except 0 on the remote control and the color of the RGB LED will change; press key 0, then the LED will be turned off.