Overview
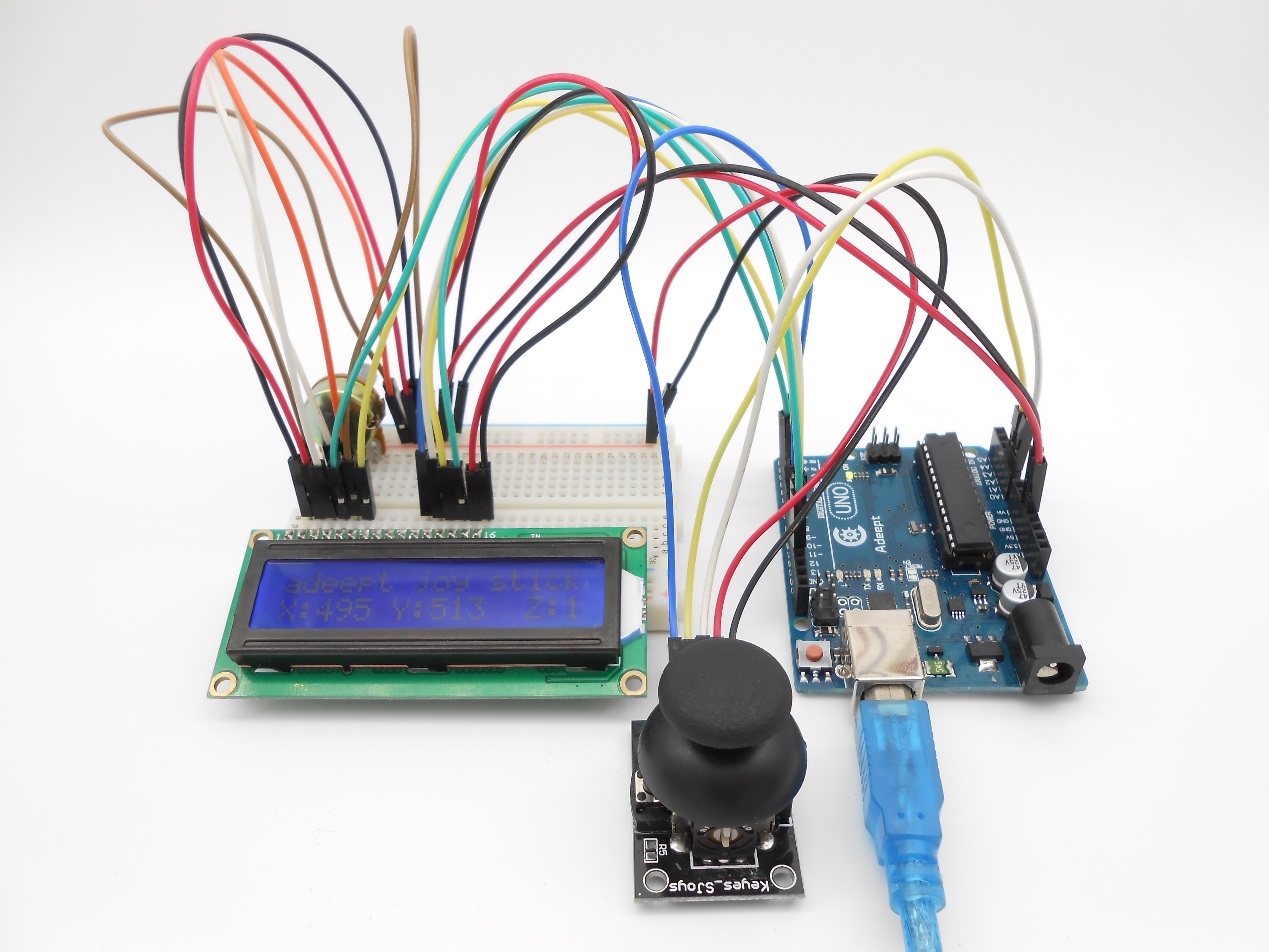
In this lesson, we will learn the usage of joy stick. We program the Arduino to detect the state of PS2 joystick, and display the data on an LCD1602.
Components
- 1 * Arduino UNO
- 1 * USB Cable
- 1 * LCD1602
- 1 * 10kΩ Potentiometer
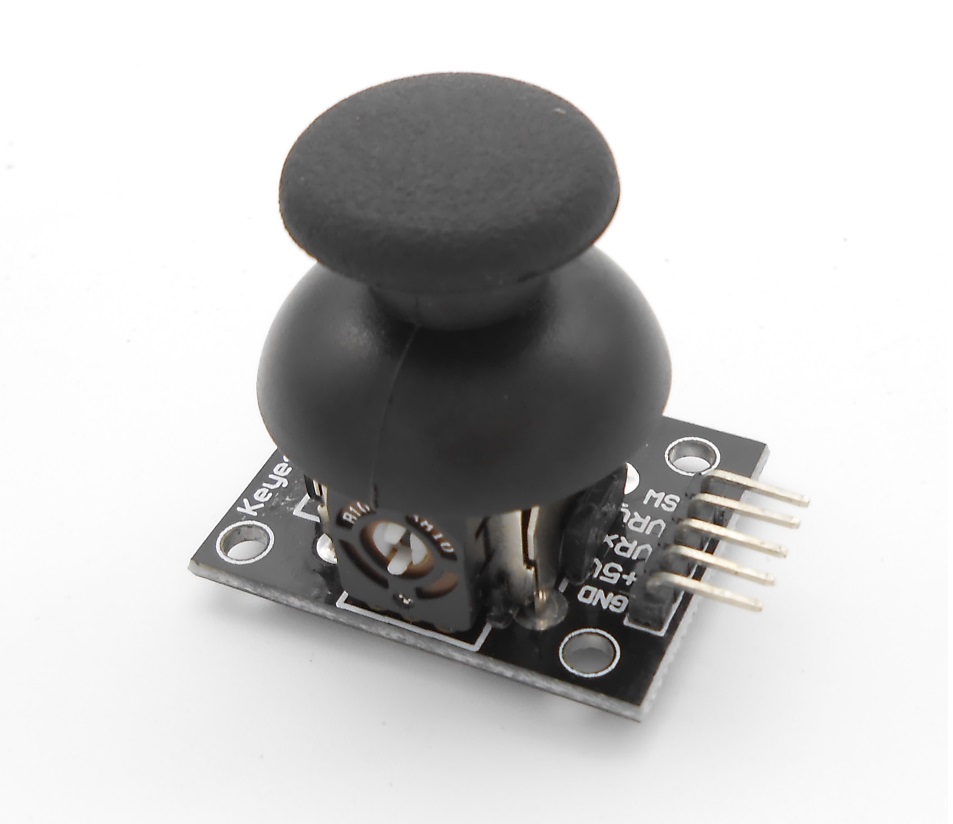
- 1 * PS2 JoyStick
- 1 * Breadboard
- Several jumper wires
Principle
A joystick is an input device consisting of a stick that pivots on a base and reports its angle or direction to the device it is controlling. A joystick, also known as the control column, is the principal control device in the cockpit of many civilian and military aircraft, either as a center stick or side-stick. It often has supplementary switches to control various aspects of the aircraft's flight.
Joysticks are often used to control video games, and usually have one or more push-buttons whose state can also be read by the computer. A popular variation of the joystick used on modern video game consoles is the analog stick. Joysticks are also used for controlling machines such as cranes, trucks, underwater unmanned vehicles, wheelchairs, surveillance cameras, and zero turning radius lawn mowers. Miniature finger-operated joysticks have been adopted as input devices for smaller electronic equipment such as mobile phones.
Procedures
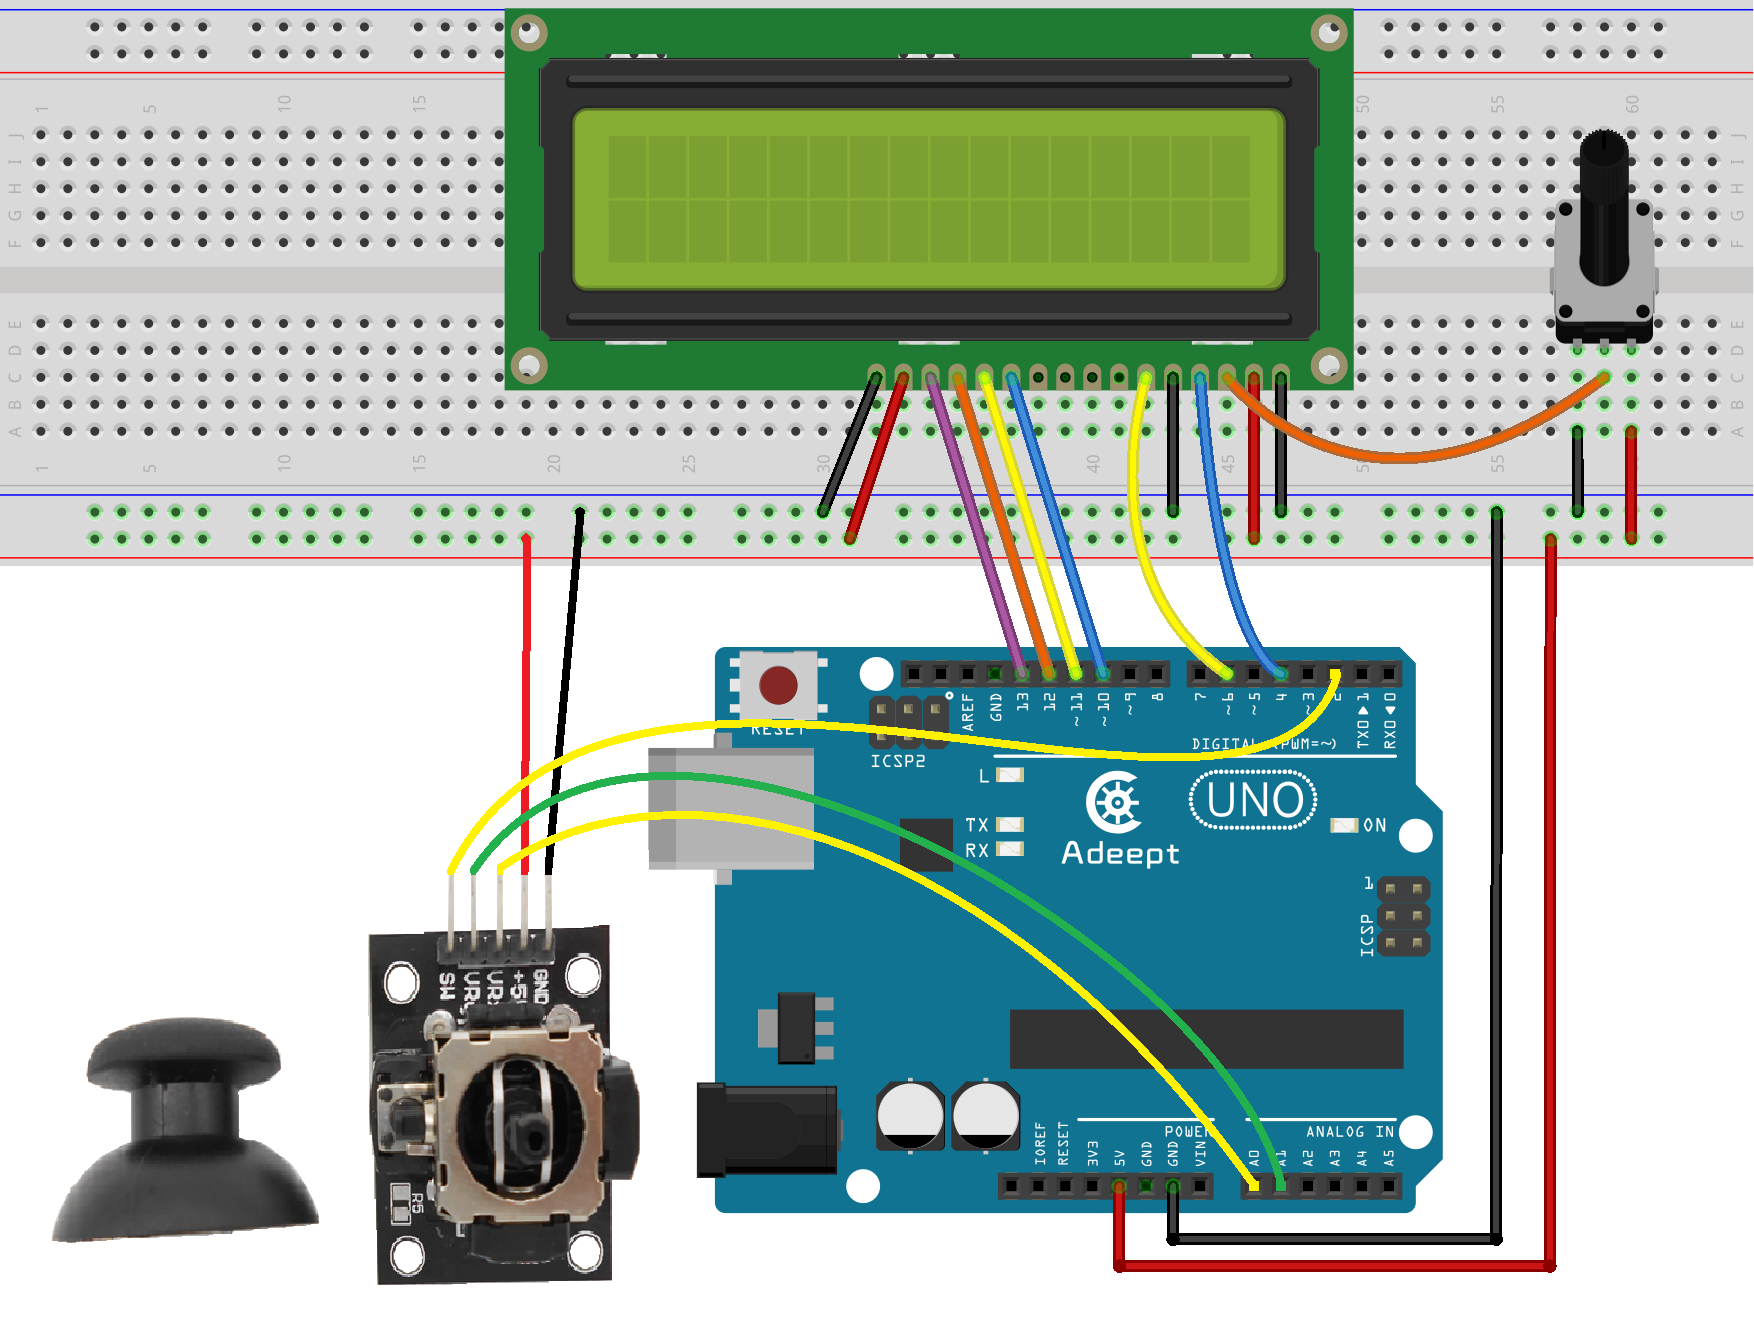
Step 1: Build the circuit
Step 2: Program
/***********************************************************
 File name: 23_joyStick.ino
 Description: you can see the joy stick information on the 1602.
 Website: www.adeept.com
 E-mail: support@adeept.com
 Author: Tom
 Date: 2015/05/02
 ***********************************************************/
 #include <LiquidCrystal.h>
 LiquidCrystal lcd(4, 6, 10, 11, 12, 13);
 int JoyStick_X = 0; //PS2 joystick X-axis is defined, ANALOG IN of Pin0
 int JoyStick_Y = 1; //PS2 joystick Y axis is defined, ANALOG IN of Pin1
 int JoyStick_Z = 2; //Defined PS2 joystick Z axis,


   void setup(void)
   {
      lcd.begin(16, 2);    // set up the LCD's number of columns and rows:
      lcd.clear();         //Clears the LCD screen and positions the cursor in the upper-left corner
      pinMode(JoyStick_Z, INPUT_PULLUP); //Z axis is defined as an input PS2
   }

   void loop(void)
   {
     int x,y,z;
     x=analogRead(JoyStick_X);
     y=analogRead(JoyStick_Y);
     z=digitalRead(JoyStick_Z);


     lcd.setCursor(0, 0); // set the cursor to column 0, line 0
     lcd.print("adeept joy stick");// Print a message of "Temp: "to the LCD.

     lcd.setCursor(0, 1); // set the cursor to column 0, line 0
     lcd.print("X:");// Print a message of "Temp: "to the LCD.
     lcd.print(x);// Print a centigrade temperature to the LCD.
     lcd.print("   ");// Print a message of "Temp: "to the LCD
     lcd.setCursor(6, 1); // set the cursor to column 0, line 0
     lcd.print("Y:"); // Print the unit of the centigrade temperature to the LCD.
     lcd.print(y);// Print a centigrade temperature to the LCD
     lcd.print("   ");// Print a message of "Temp: "to the LCD
     lcd.setCursor(13, 1); // set the cursor to column 0, line 0
     lcd.print("Z:"); // Print the unit of the centigrade temperature to the LCD.
     lcd.print(z);// Print a centigrade temperature to the LCD
     delay(500);
   }
Step 3: Compile the program and upload to Arduino UNO board
Now, you can see the PS2 joystick state information displayed on the LCD1602.