Overview
In this comprehensive experiment, we will learn how to control the state of a DC motor with Arduino, and display the state by an LED at the same time. The state includes its running forward, reversing, acceleration, deceleration and stop.
Components
- 1 * Arduino UNO
- 1 * USB Cable
- 1 * L9110 DC Motor Driver
- 1 * DC Motor
- 4 * Button
- 4 * LED
- 4 * 220Ω Resistor
- 1 * Battery Holder
- 1 * Breadboard
- Several jumper wires
Principle
1. L9110
L9110 is a driver chip which is used to control and drive motor. The chip has two TTL/CMOS compatible input terminals, and possesses the property of anti-interference: it has high current driving capability, two output terminals that can directly drive DC motor, each output port can provide 750~800mA dynamic current, and its peak current can reach 1.5~2.0A; L9110 is widely applied to various motor drives, such as toy cars, stepper motors, and power switches and so on.
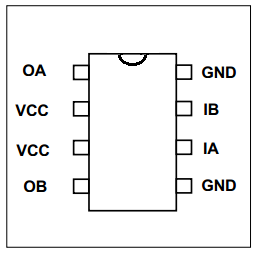
OA, OB: These are used to connect the DC motor.
VCC: Power supply (+5V)
GND: The cathode of the power supply (Ground).
IA, IB: The input terminal of drive signal.
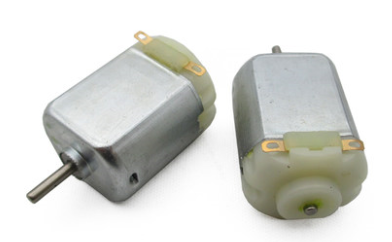
2. DC motor
A DC motor is any of a class of electrical machines that converts direct current electrical power into mechanical power. The most common types rely on the forces produced by magnetic fields. Nearly all types of DC motors have some internal mechanism, either electromechanical or electronic, to periodically change the direction of current flow in part of the motor. Most types produce rotary motion; a linear motor directly produces force and motion in a straight line.
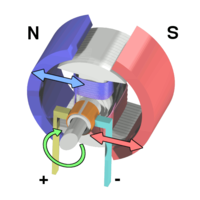
DC motors were the first type widely used, since they could be powered from existing direct-current lighting power distribution systems. A DC motor's speed can be controlled over a wide range, using either a variable supply voltage or by changing the strength of current in its field windings. Small DC motors are used in tools, toys, and appliances. The universal motor can operate on direct current but is a lightweight motor used for portable power tools and appliances.
3. Key functions
●switch / case statements
Like if statements, switch…case controls the flow of programs by allowing programmers to specify different code that should be executed in various conditions. In particular, a switch statement compares the value of a variable to the values specified in case statements. When a case statement is found whose value matches that of the variable, the code in that case statement is run.
The break keyword exits the switch statement, and is typically used at the end of each case. Without a break statement, the switch statement will continue executing the following expressions (“falling-through”) until a break, or the end of the switch statement is reached.
Example:
switch (var) {
case 1:
//do something when var equals 1
break;
case 2:
//do something when var equals 2
break;
default:
// if nothing else matches, do the default
// default is optional
}
Syntax:
switch (var) {
case label:
// statements
break;
case label:
// statements
break;
default:
// statements
}
Parameters:
var: the variable whose value to compare to the various cases
label: a value to compare the variable to
Procedures
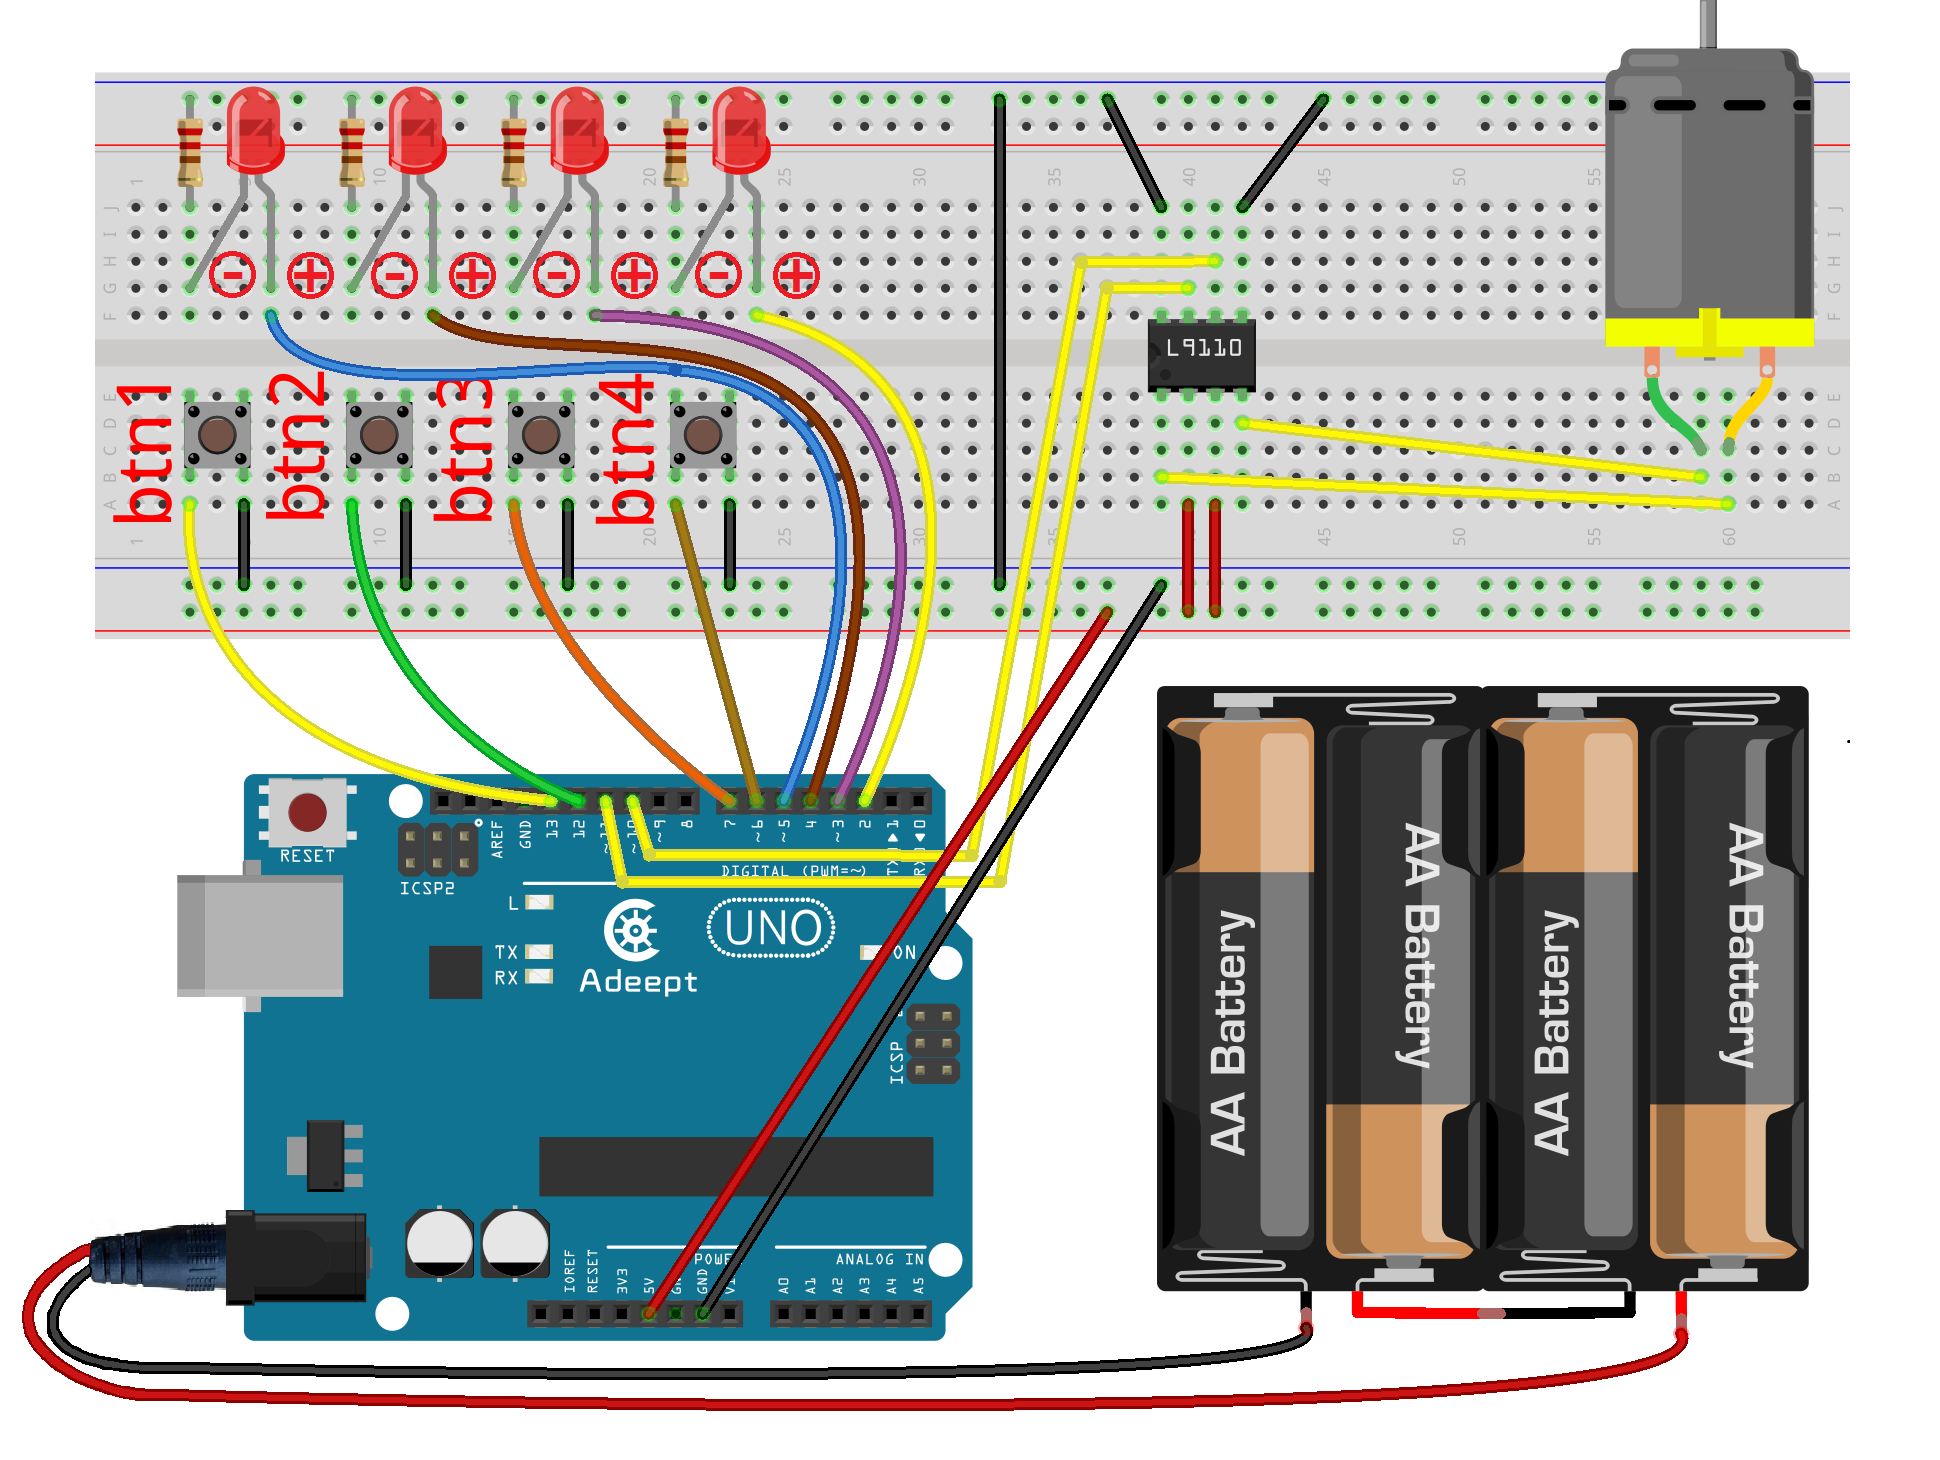
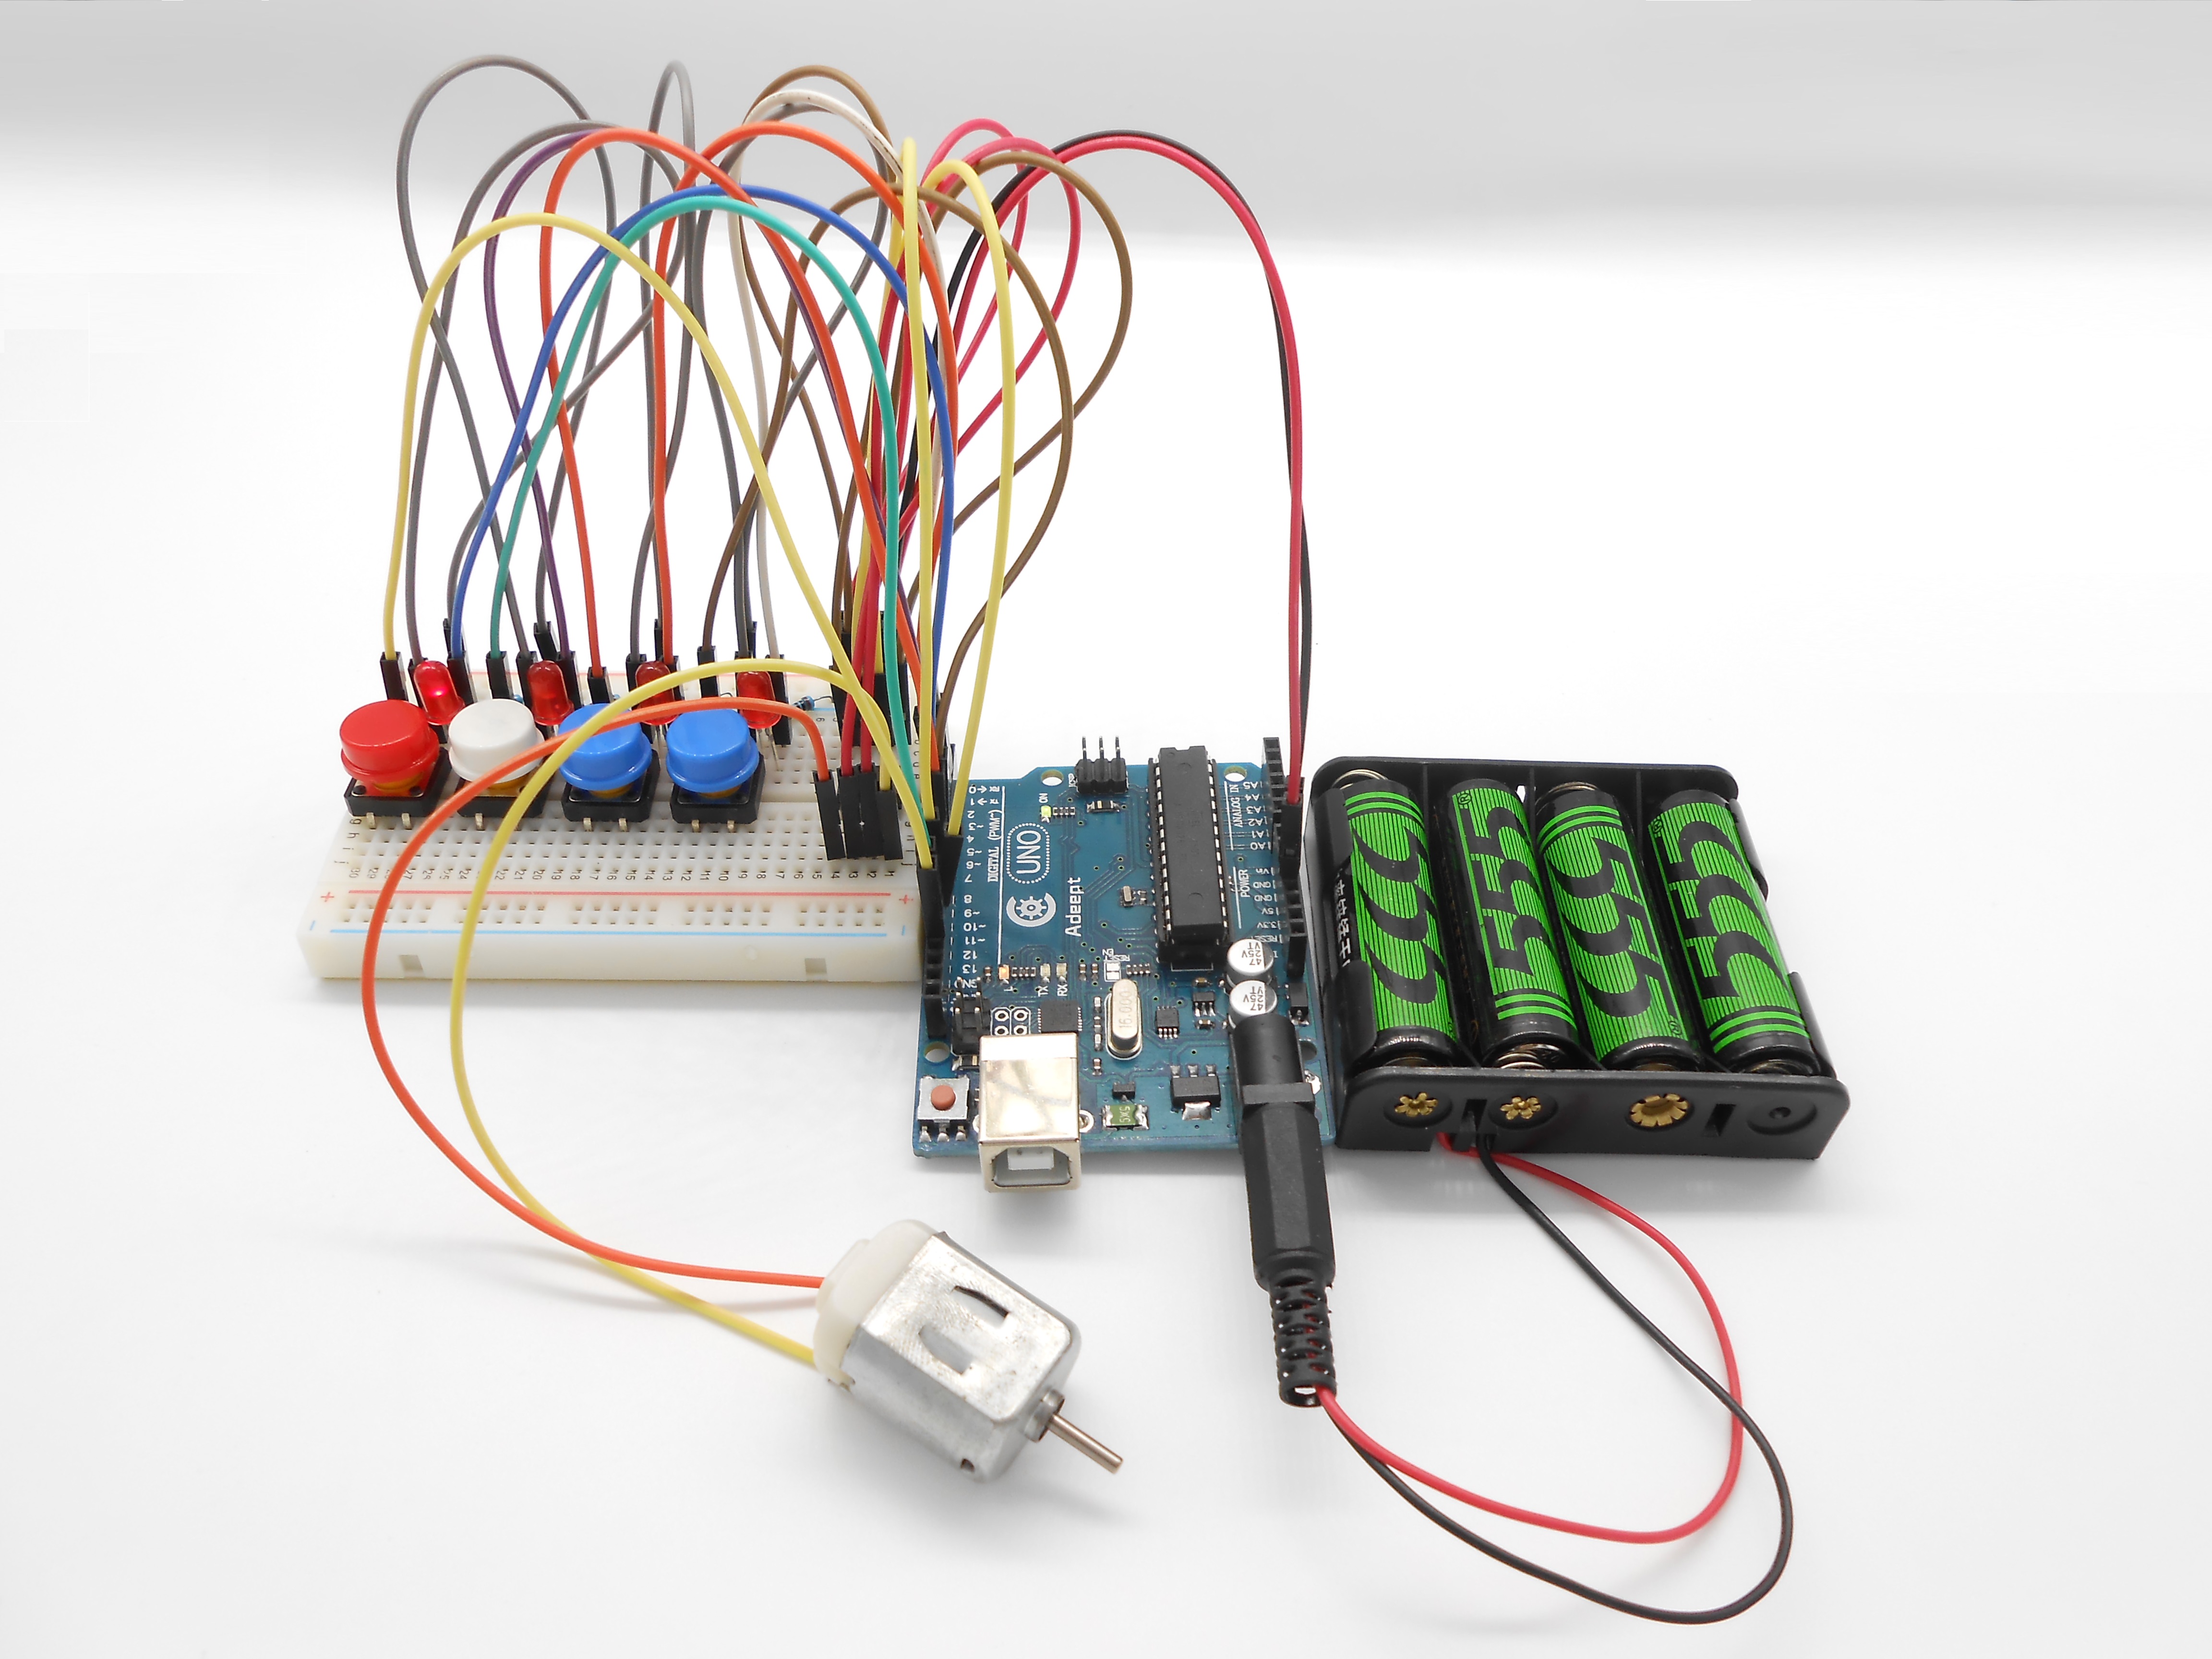
Step 1: Build the circuit (Make sure that the circuit connection is correct before powering on; otherwise it may cause the chips to burn.)
Step 2: Program
/***********************************************************
File name: 22_motor.ino
Description: The state of DC motor includes its forward, reverse,
             acceleration, deceleration and stop.
Website: www.adeept.com
E-mail: support@adeept.com
Author: Tom
Date: 2015/05/02
***********************************************************/

const int motorIn1 = 11;  //attach to one of the pin of the motor
const int motorIn2 = 10;  //attach to another pin of the motor

int btn1pin=13;           //Set the digital 13 to button interface
int led1pin=5;            //definition digital 5 pins as pin to control the LED
int btn2pin=12;           //Set the digital 12 to button interface
int led2pin=4;            //definition digital 4 pins as pin to control the LED
int btn3pin=7;            //Set the digital 7 to button interface
int led3pin=3;            //definition digital 3 pins as pin to control the LED
int btn4pin=6;            //Set the digital 6 to button interface
int led4pin=2;            //definition digital 2 pins as pin to control the LED

int state = 0;            //Record the motor state. 0:STOP  1:forward  2:reverse
int DCmotorspeed = 128;   //Motor speed  0~255

void setup()
{
  pinMode(motorIn1,OUTPUT);     //initialize the motorIn1 pin as output
  pinMode(motorIn2,OUTPUT);     //initialize the motorIn2 pin as output
  pinMode(btn1pin,INPUT_PULLUP);//Set digital 13 port mode, the INPUT for the input
  pinMode(led1pin,OUTPUT);      //Set digital 5 port mode, the OUTPUT for the output
  pinMode(btn2pin,INPUT_PULLUP);//Set digital 12 port mode, the INPUT for the input
  pinMode(led2pin,OUTPUT);      //Set digital 4 port mode, the OUTPUT for the output
  pinMode(btn3pin,INPUT_PULLUP);//Set digital 7 port mode, the INPUT for the input
  pinMode(led3pin,OUTPUT);      //Set digital 3 port mode, the OUTPUT for the output
  pinMode(btn4pin,INPUT_PULLUP);//Set digital 6 port mode, the INPUT for the input
  pinMode(led4pin,OUTPUT);      //Set digital 2 port mode, the OUTPUT for the output
}

void loop()
{
  if(digitalRead(btn1pin)==LOW)          //Detection button interface to low
  {
      delay(10);                         //Delay 10ms for the elimination of key leading-edge jitter
      if(digitalRead(btn1pin)==LOW)      //Confirm button is pressed
      {
        while(digitalRead(btn1pin)==LOW);//Wait for key interfaces to high
        delay(10);                       //delay 10ms for the elimination of key trailing-edge jitter
        while(digitalRead(btn1pin)==LOW);//Confirm button release
        for(int i=0;i<4;i++)
        {
          digitalWrite(led1pin,HIGH); //Output control status LED, ON
          delay(100);                 //delay 100ms
          digitalWrite(led1pin,LOW);  //Output control status LED, OFF
          delay(100);                 //delay 100ms
        }
        if(state!=0)                  //Detecting the motor is running
        {
           state = 0;                 // Motor stop
           digitalWrite(led1pin,LOW); //Output control status LED, OFF
        }
        else
        {
           state = 1;                 //Motor Run
           digitalWrite(led1pin,HIGH);//Output control status LED, ON
        }
      }
   }

  if(digitalRead(btn2pin)==LOW)          //Detection button interface to low
  {
      delay(10);                         //Delay 10ms for the elimination of key leading-edge jitter
      if(digitalRead(btn2pin)==LOW)      //Confirm button is pressed
      {
        while(digitalRead(btn2pin)==LOW);//Wait for key interfaces to high
        delay(10);                       //delay 10ms for the elimination of key trailing-edge jitter
        while(digitalRead(btn2pin)==LOW);//Confirm button release
        if(state!=0)                     //Detecting the motor is running
        {
           for(int i=0;i<4;i++)
           {
              digitalWrite(led2pin,HIGH);//Output control status LED, ON
              delay(100);                //delay 100ms
              digitalWrite(led2pin,LOW); //Output control status LED, OFF
              delay(100);                //delay 100ms
            }
            if(state==1)                 //Motor forward
            {state = 2;}                 //Motor reverse
            else if(state==2)            //Motor reverse
            {state = 1;}                 //Motor forward
         }
      }
   }

  if(digitalRead(btn3pin)==LOW)          //Detection button interface to low
  {
      delay(10);                         //Delay 10ms for the elimination of key leading-edge jitter
      if(digitalRead(btn3pin)==LOW)      //Confirm button is pressed
      {
        while(digitalRead(btn3pin)==LOW);//Wait for key interfaces to high
        delay(10);                       //delay 10ms for the elimination of key trailing-edge jitter
        while(digitalRead(btn3pin)==LOW);//Confirm button release
        if(state!=0)
        {
            for(int i=0;i<4;i++)
            {
               digitalWrite(led3pin,HIGH);//Output control status LED, ON
               delay(100);                //delay 100ms
               digitalWrite(led3pin,LOW); //Output control status LED, OFF
               delay(100);                //delay 100ms
             }
             if(DCmotorspeed<230)
             {DCmotorspeed += 20;}       //Motor speed increases 20
             else
             {DCmotorspeed = 230;}       //Motor speed  230
         }
      }
   }

   if(digitalRead(btn4pin)==LOW)         //Detection button interface to low
   {
      delay(10);                         //Delay 10ms for the elimination of key leading-edge jitter
      if(digitalRead(btn4pin)==LOW)      //Confirm button is pressed
      {
        while(digitalRead(btn4pin)==LOW);//Wait for key interfaces to high
        delay(10);                       //delay 10ms for the elimination of key trailing-edge jitter
        while(digitalRead(btn4pin)==LOW);//Confirm button release
        if(state!=0)
        {
           for(int i=0;i<4;i++)
           {
              digitalWrite(led4pin,HIGH);//Output control status LED, ON
              delay(100);                //Delay 100ms
              digitalWrite(led4pin,LOW); //Output control status LED, OFF
              delay(100);                //Delay 100ms
            }
            if(DCmotorspeed>30)
            {DCmotorspeed -= 20;}        //Motor speed reduction 20
            else
            {DCmotorspeed = 20;}         //Motor speed 20
        }
      }
   }

  switch(state)
  {
    case 0:  clockwise(0);                  //motor stop
             break;
    case 1:  clockwise(DCmotorspeed);       //rotate clockwise
             break;
    case 2:  counterclockwise(DCmotorspeed);//rotate counterclockwise
             break;
    default: clockwise(0);                  //motor stop
             break;
  }
}

//The function to drive motor rotate clockwise
void clockwise(int Speed)
{
  analogWrite(motorIn1,Speed); //set the speed of motor
  analogWrite(motorIn2,0);     //stop the motorIn2 pin of motor
}

//The function to drive motor rotate counterclockwise
void counterclockwise(int Speed)
{
  analogWrite(motorIn1,0);     //stop the motorIn1 pin of motor
  analogWrite(motorIn2,Speed); //set the speed of motor
}
Step 3: Compile the program and upload to Arduino UNO board
Press the btn1 button to stop or run the DC motor; press btn2 to make it go forward or reverse; press btn3 to accelerate the motor; press btn4 to decelerate it. When any of the four buttons is pressed, the corresponding LED will flash, prompting that the current button is pressed down.
Summary
Now you must have grasped the basic theory and programming of the DC motor after all the study. You not only can make it go forward and reverse, but also regulate its speed. Besides, you can do more awesome applications with what you've learnt.